Patterned Plywood Hexagons
January 24, 2026
Once again I find myself reaching for the baltic birch plywood, and making some patterned plywood. Previous projects were largely done by watching Michael Alm’s videos on YouTube, or just kind of piecing it out. Since the last time, I purchased plans from Almfab (link to plans), and was eager to try some that were new to me. I settled on hexagon patterns.
I started with some 3/4” baltic birch plywood (technically 18mm) that came from my stash of 12” x 12” squares I got for cheap from Woodcraft a while back. They are perfect for this kind of project. I used three squares and it yielded enough to make 9 boxes. A little bit can go a long way. Combined with some scrap walnut and a cherry board from my Dad’s stash, and I was in for about $10 in supplies to make these boxes. Not exactly a high bar.
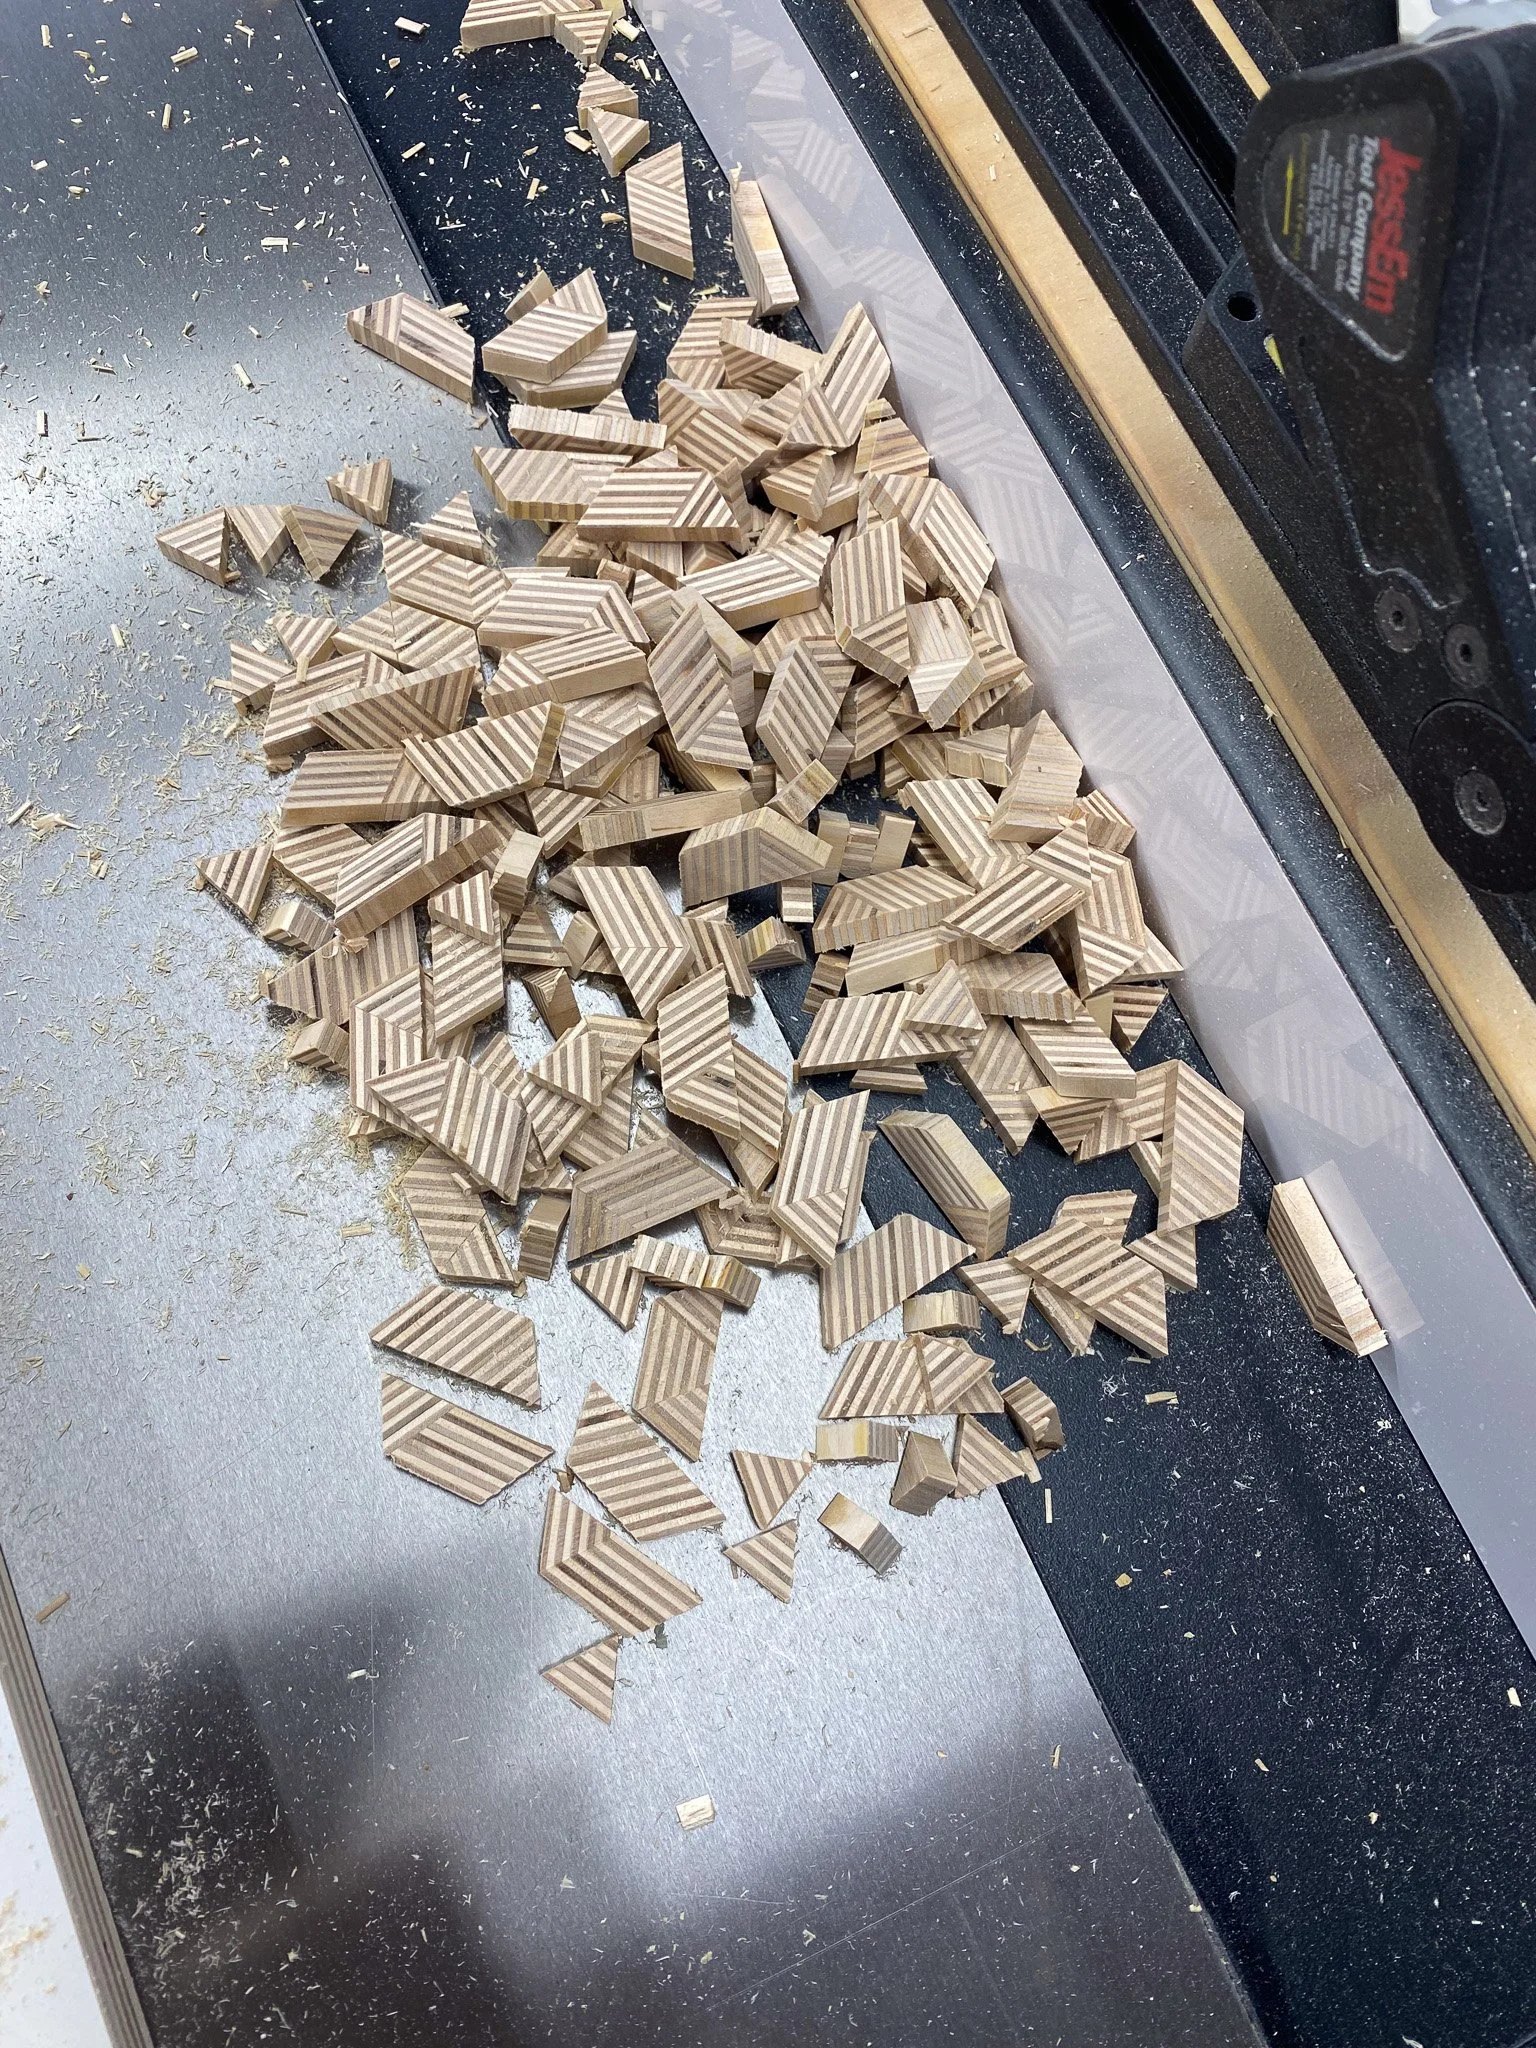
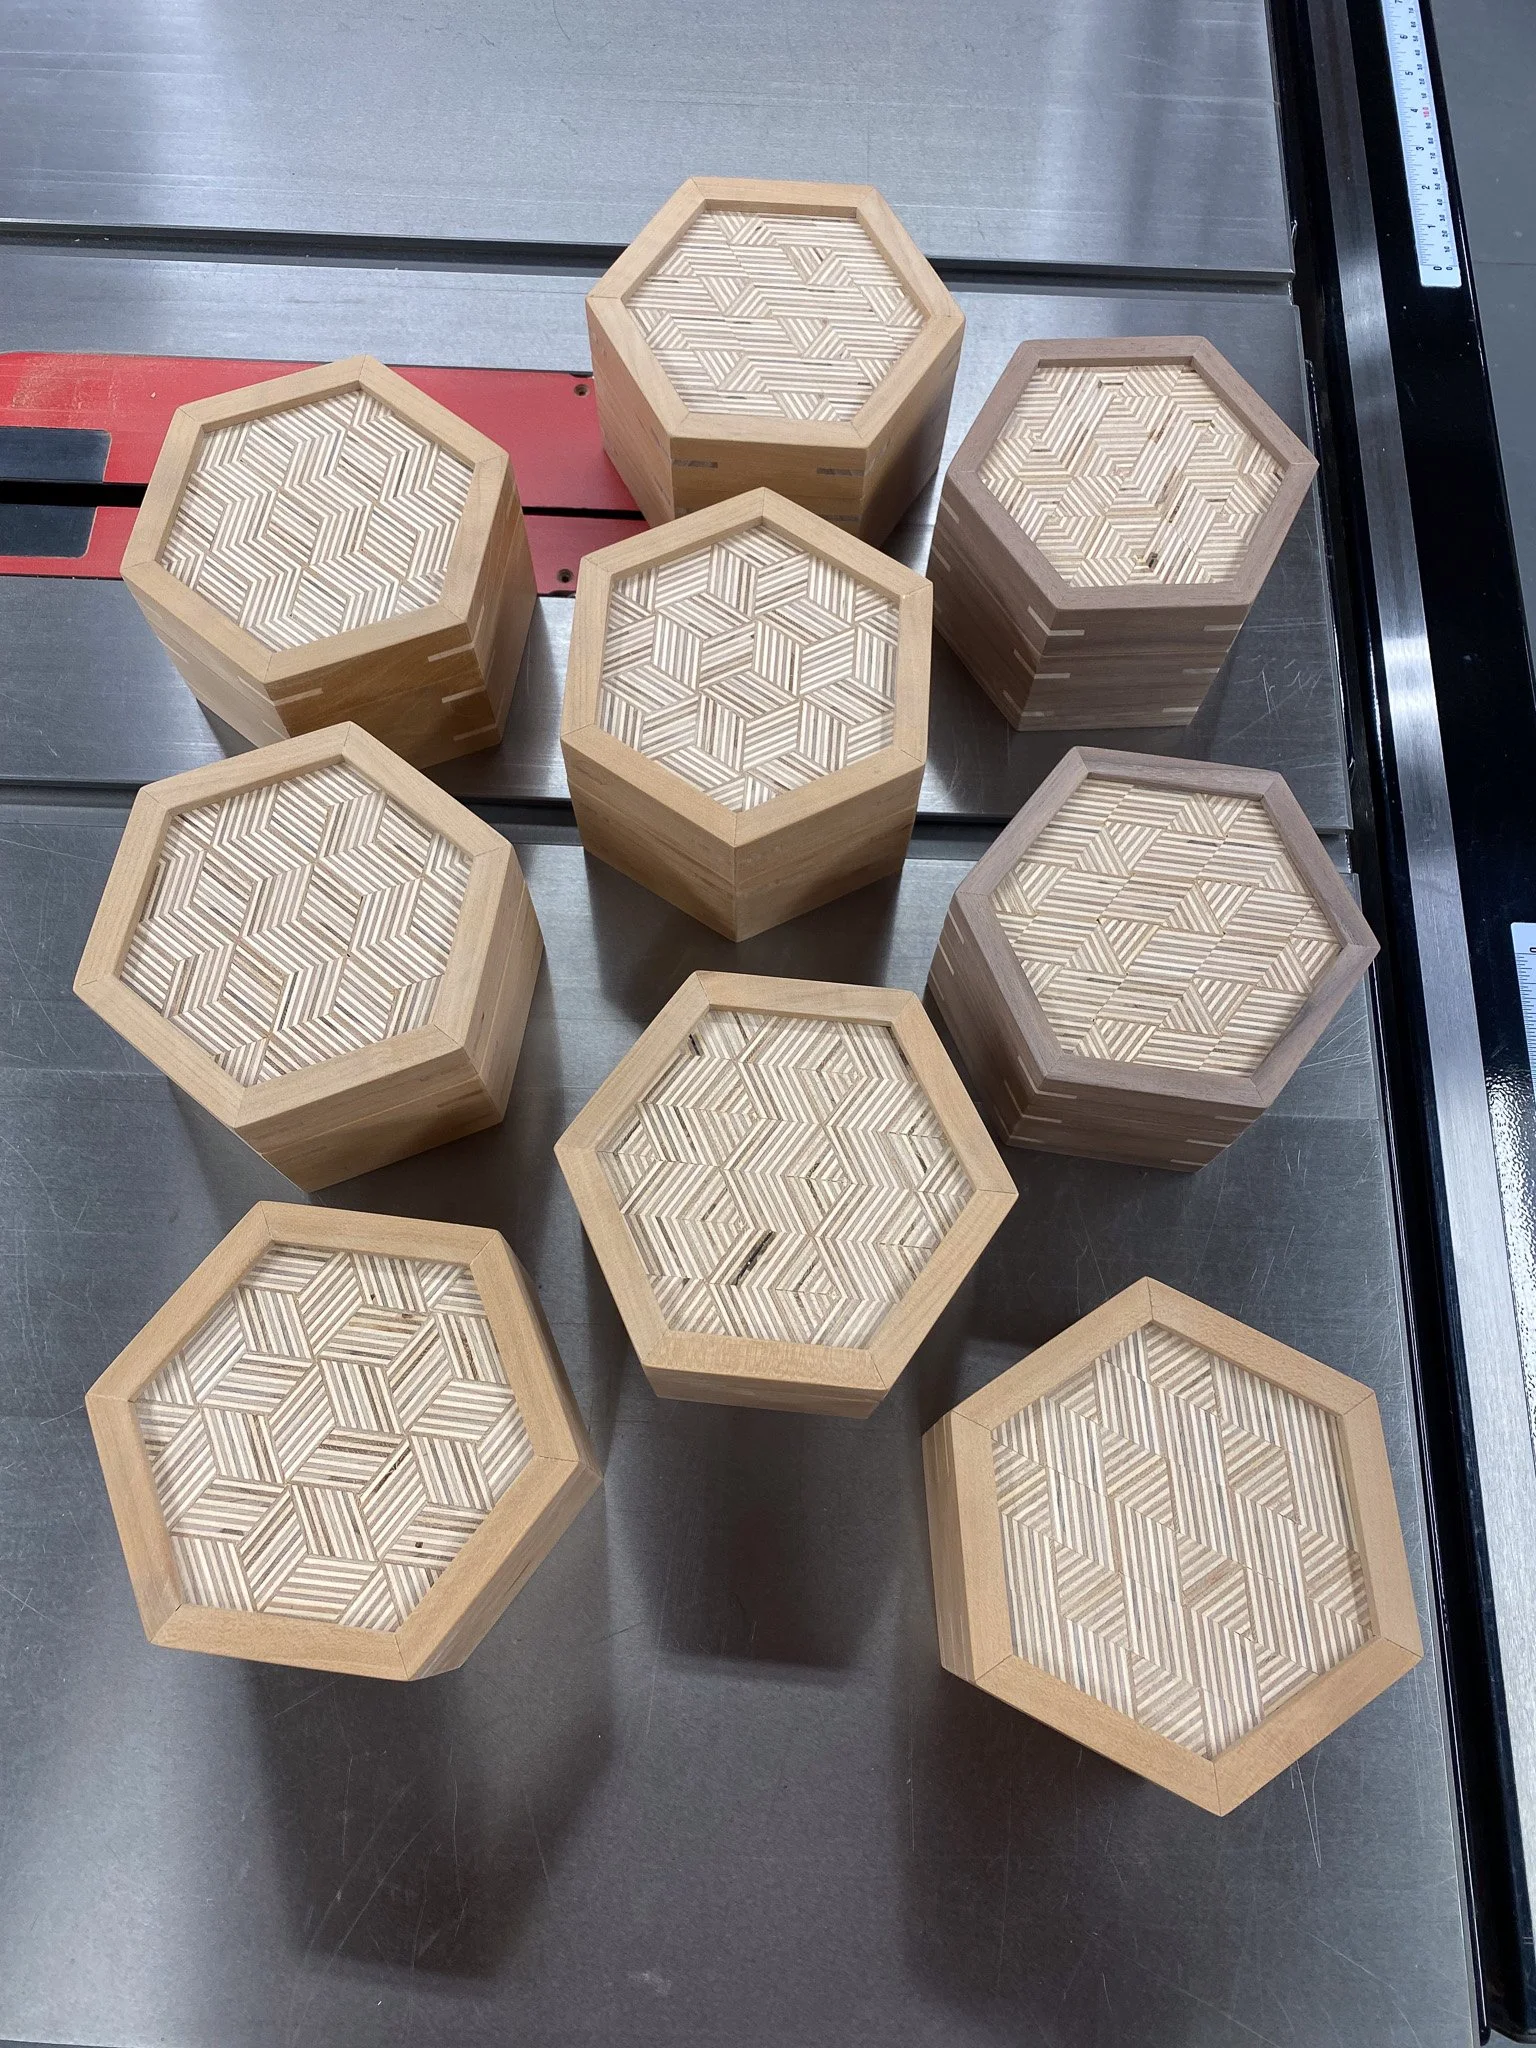
First up was making strips in the shape of trapezoids and triangles. Some patterns were just three trapezoids, others mixed triangles and trapezoids. Once the strips were cut (I had no rhyme or reason, just tried to cut a bunch of each), it was time to settle on the patterns and glue them in to “logs”. I tried to find a mix of patterns (I made 6 different patterns) and to use the wood in a way that left the least over. Each log was glued together and wrapped with rubber bands to serve as clamps until the glue set up.
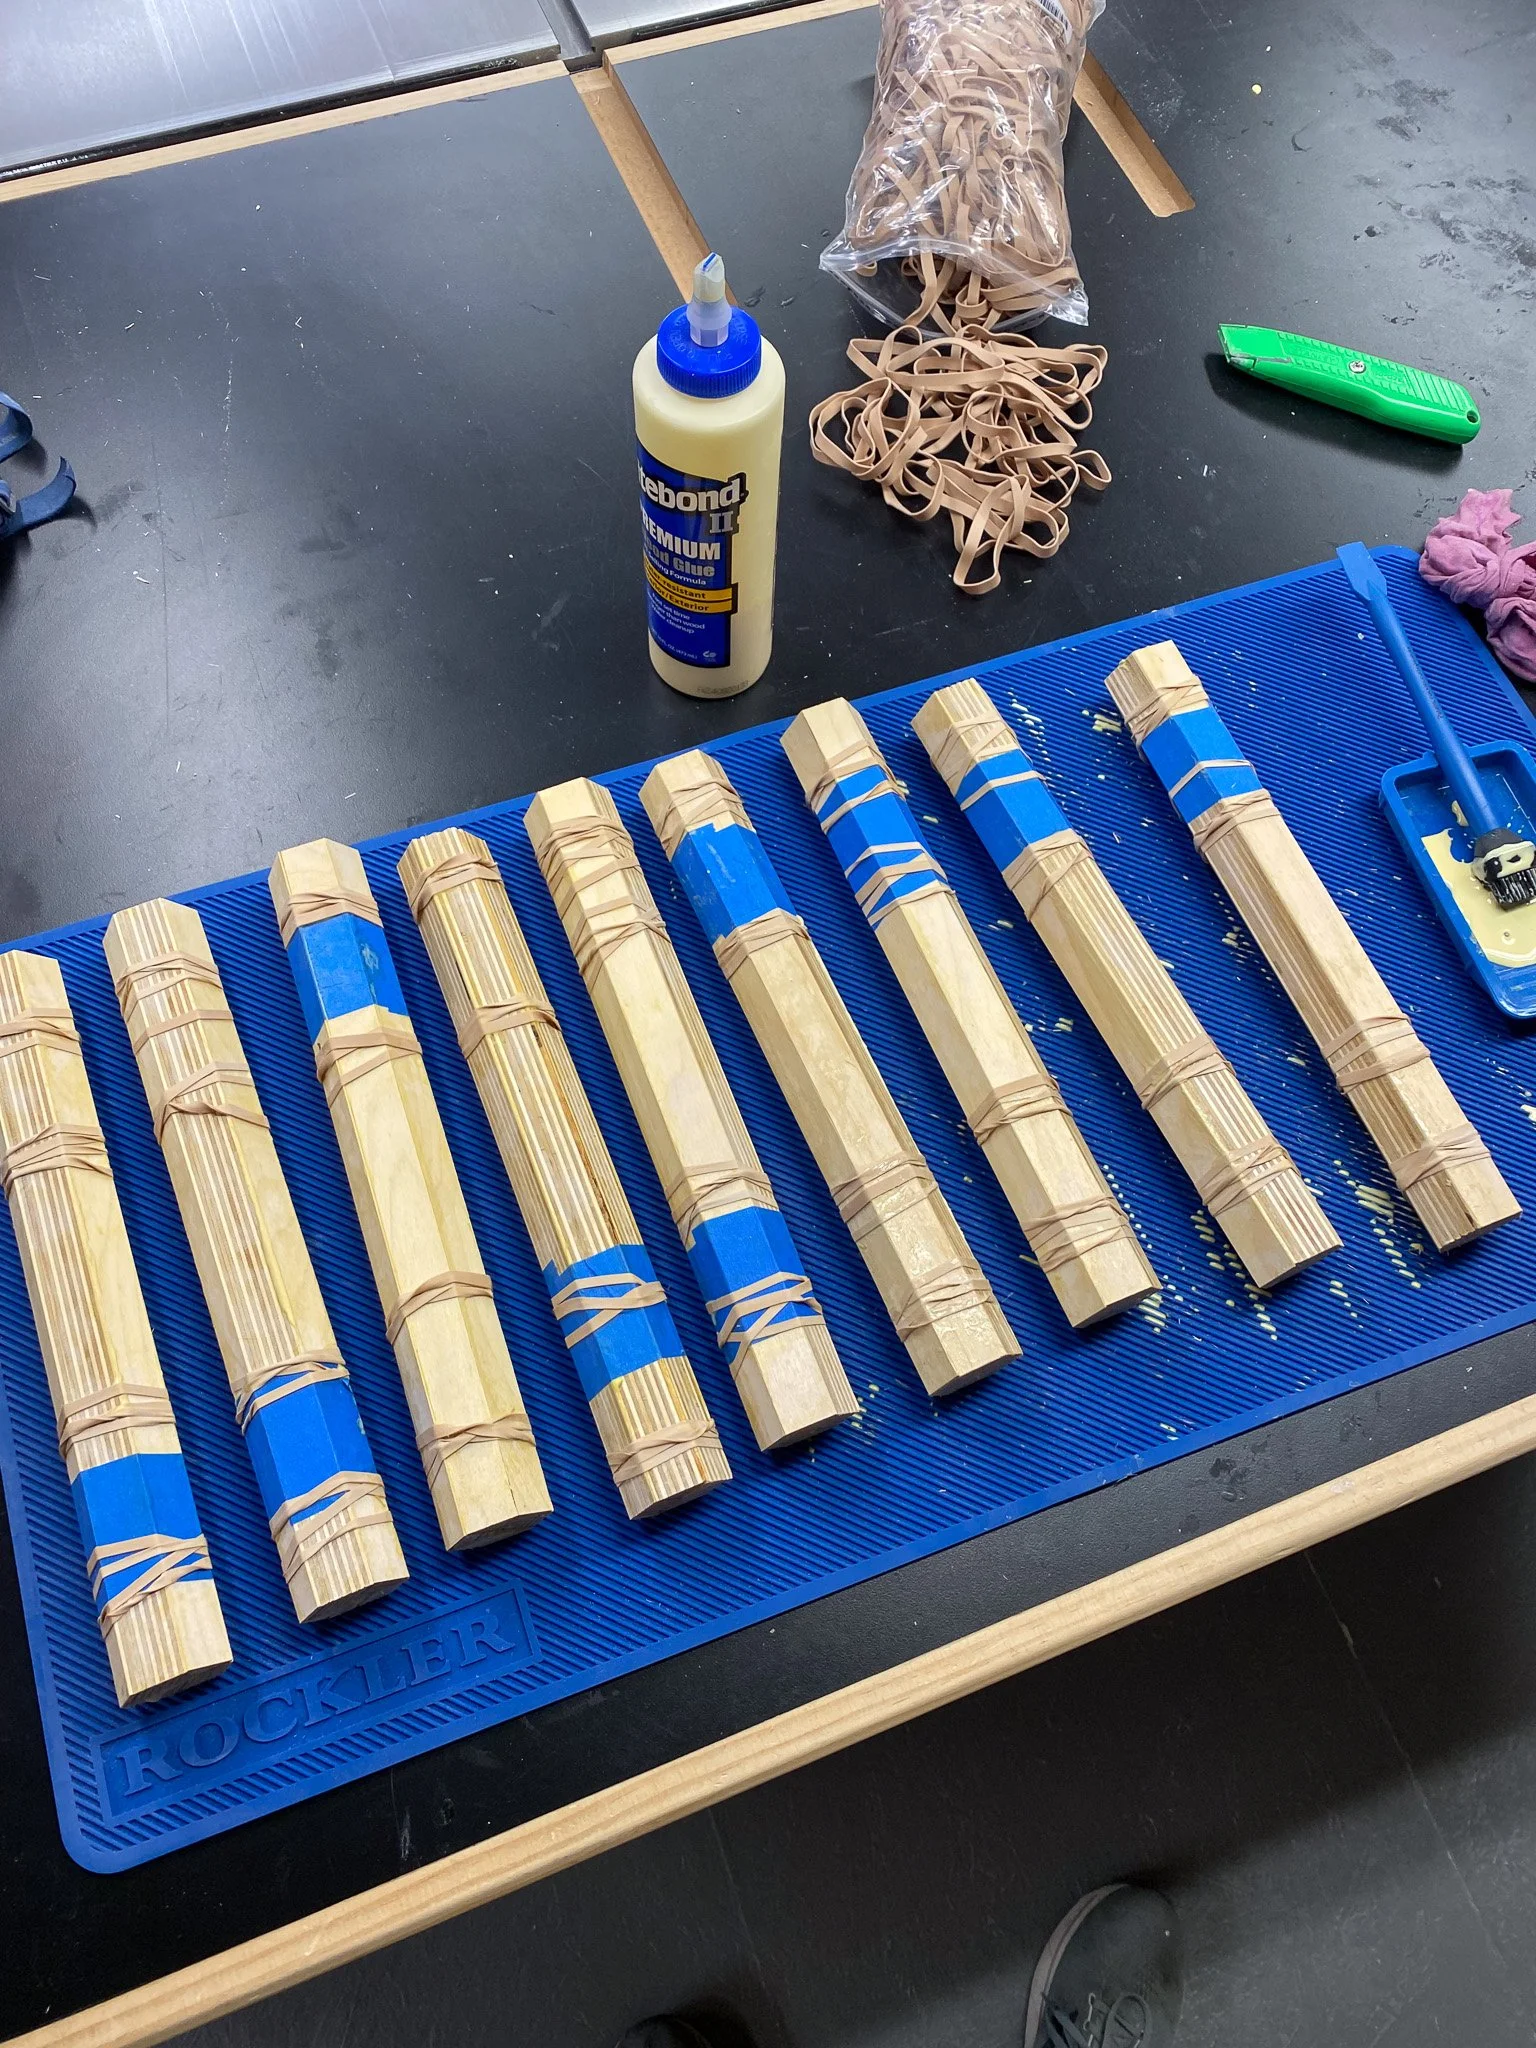
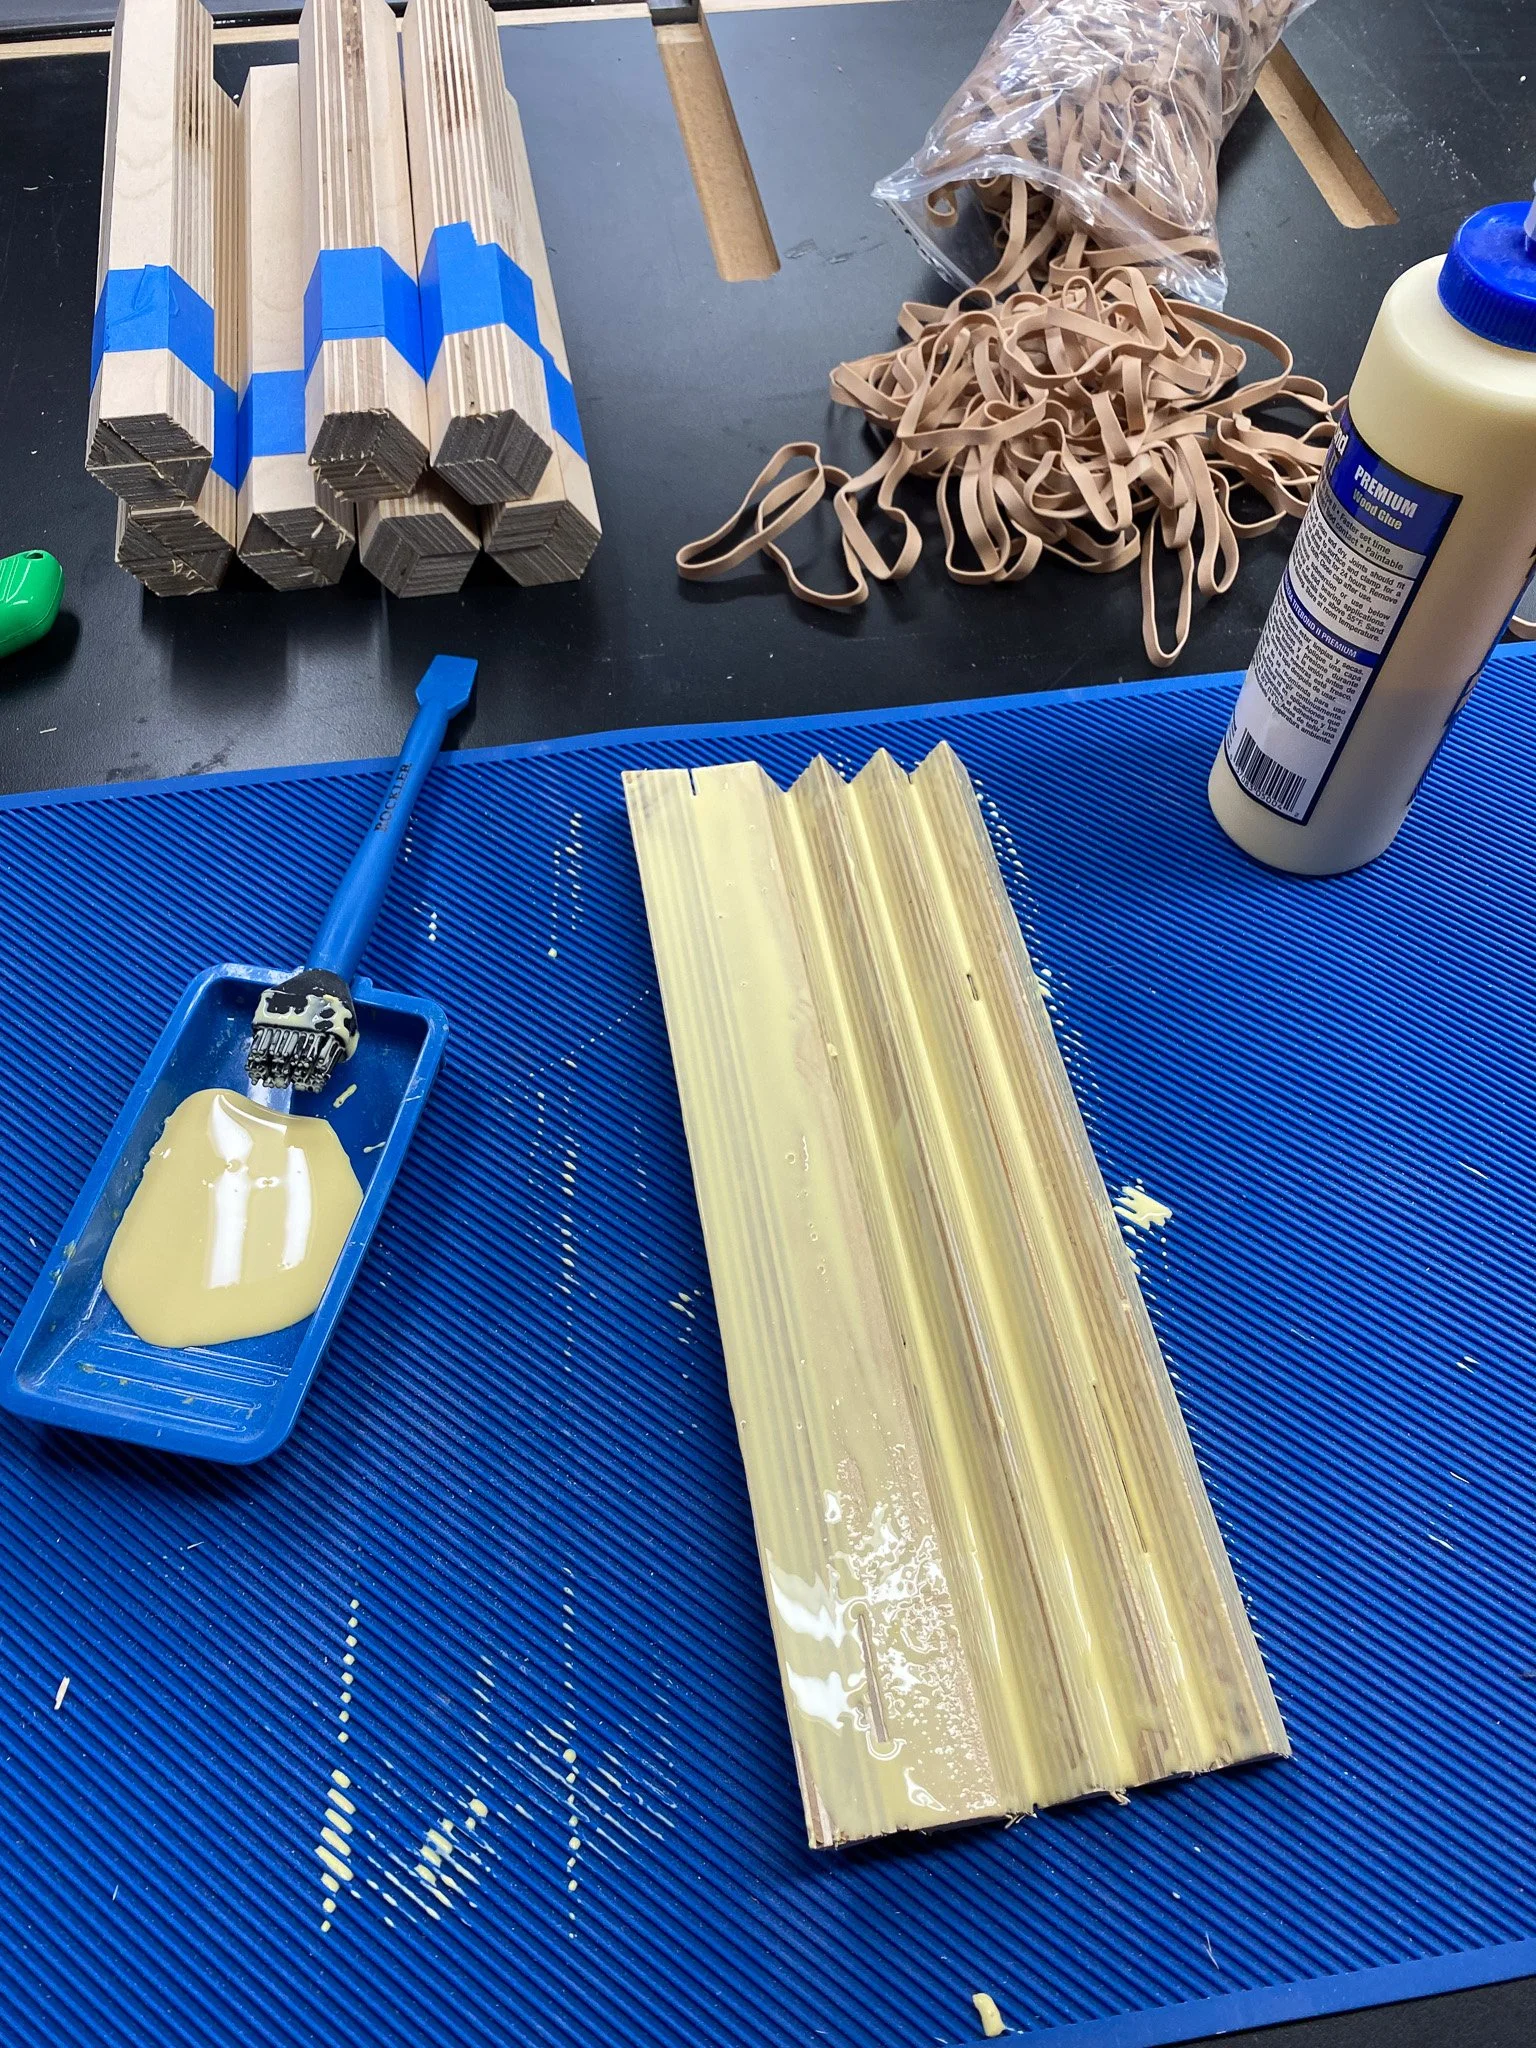
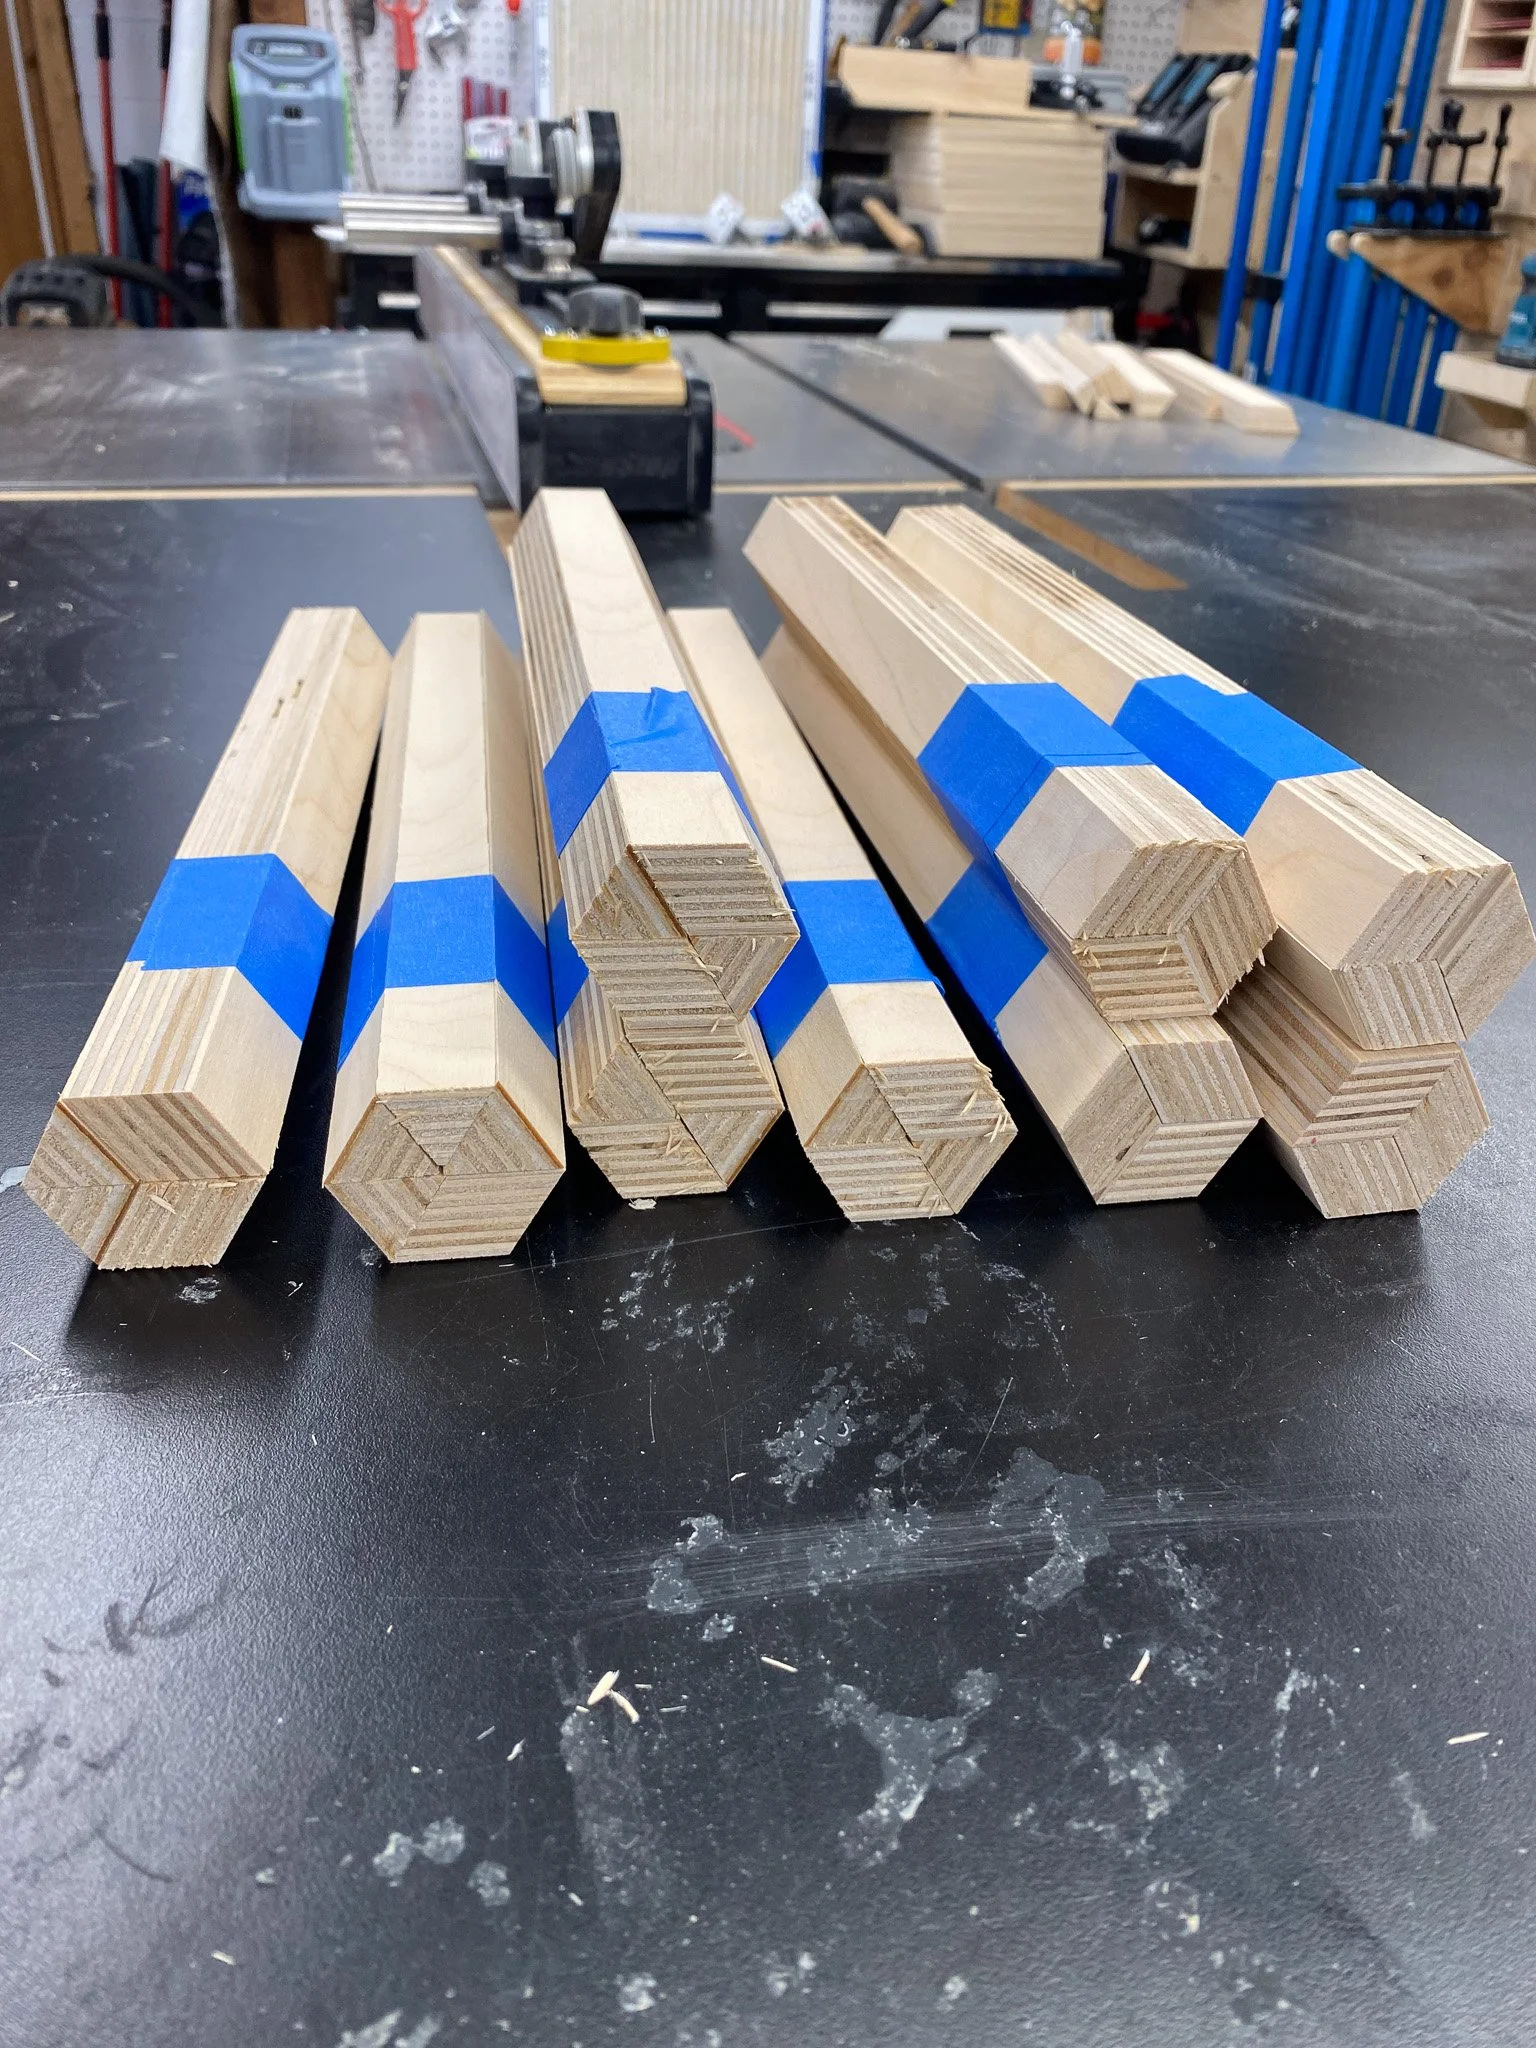
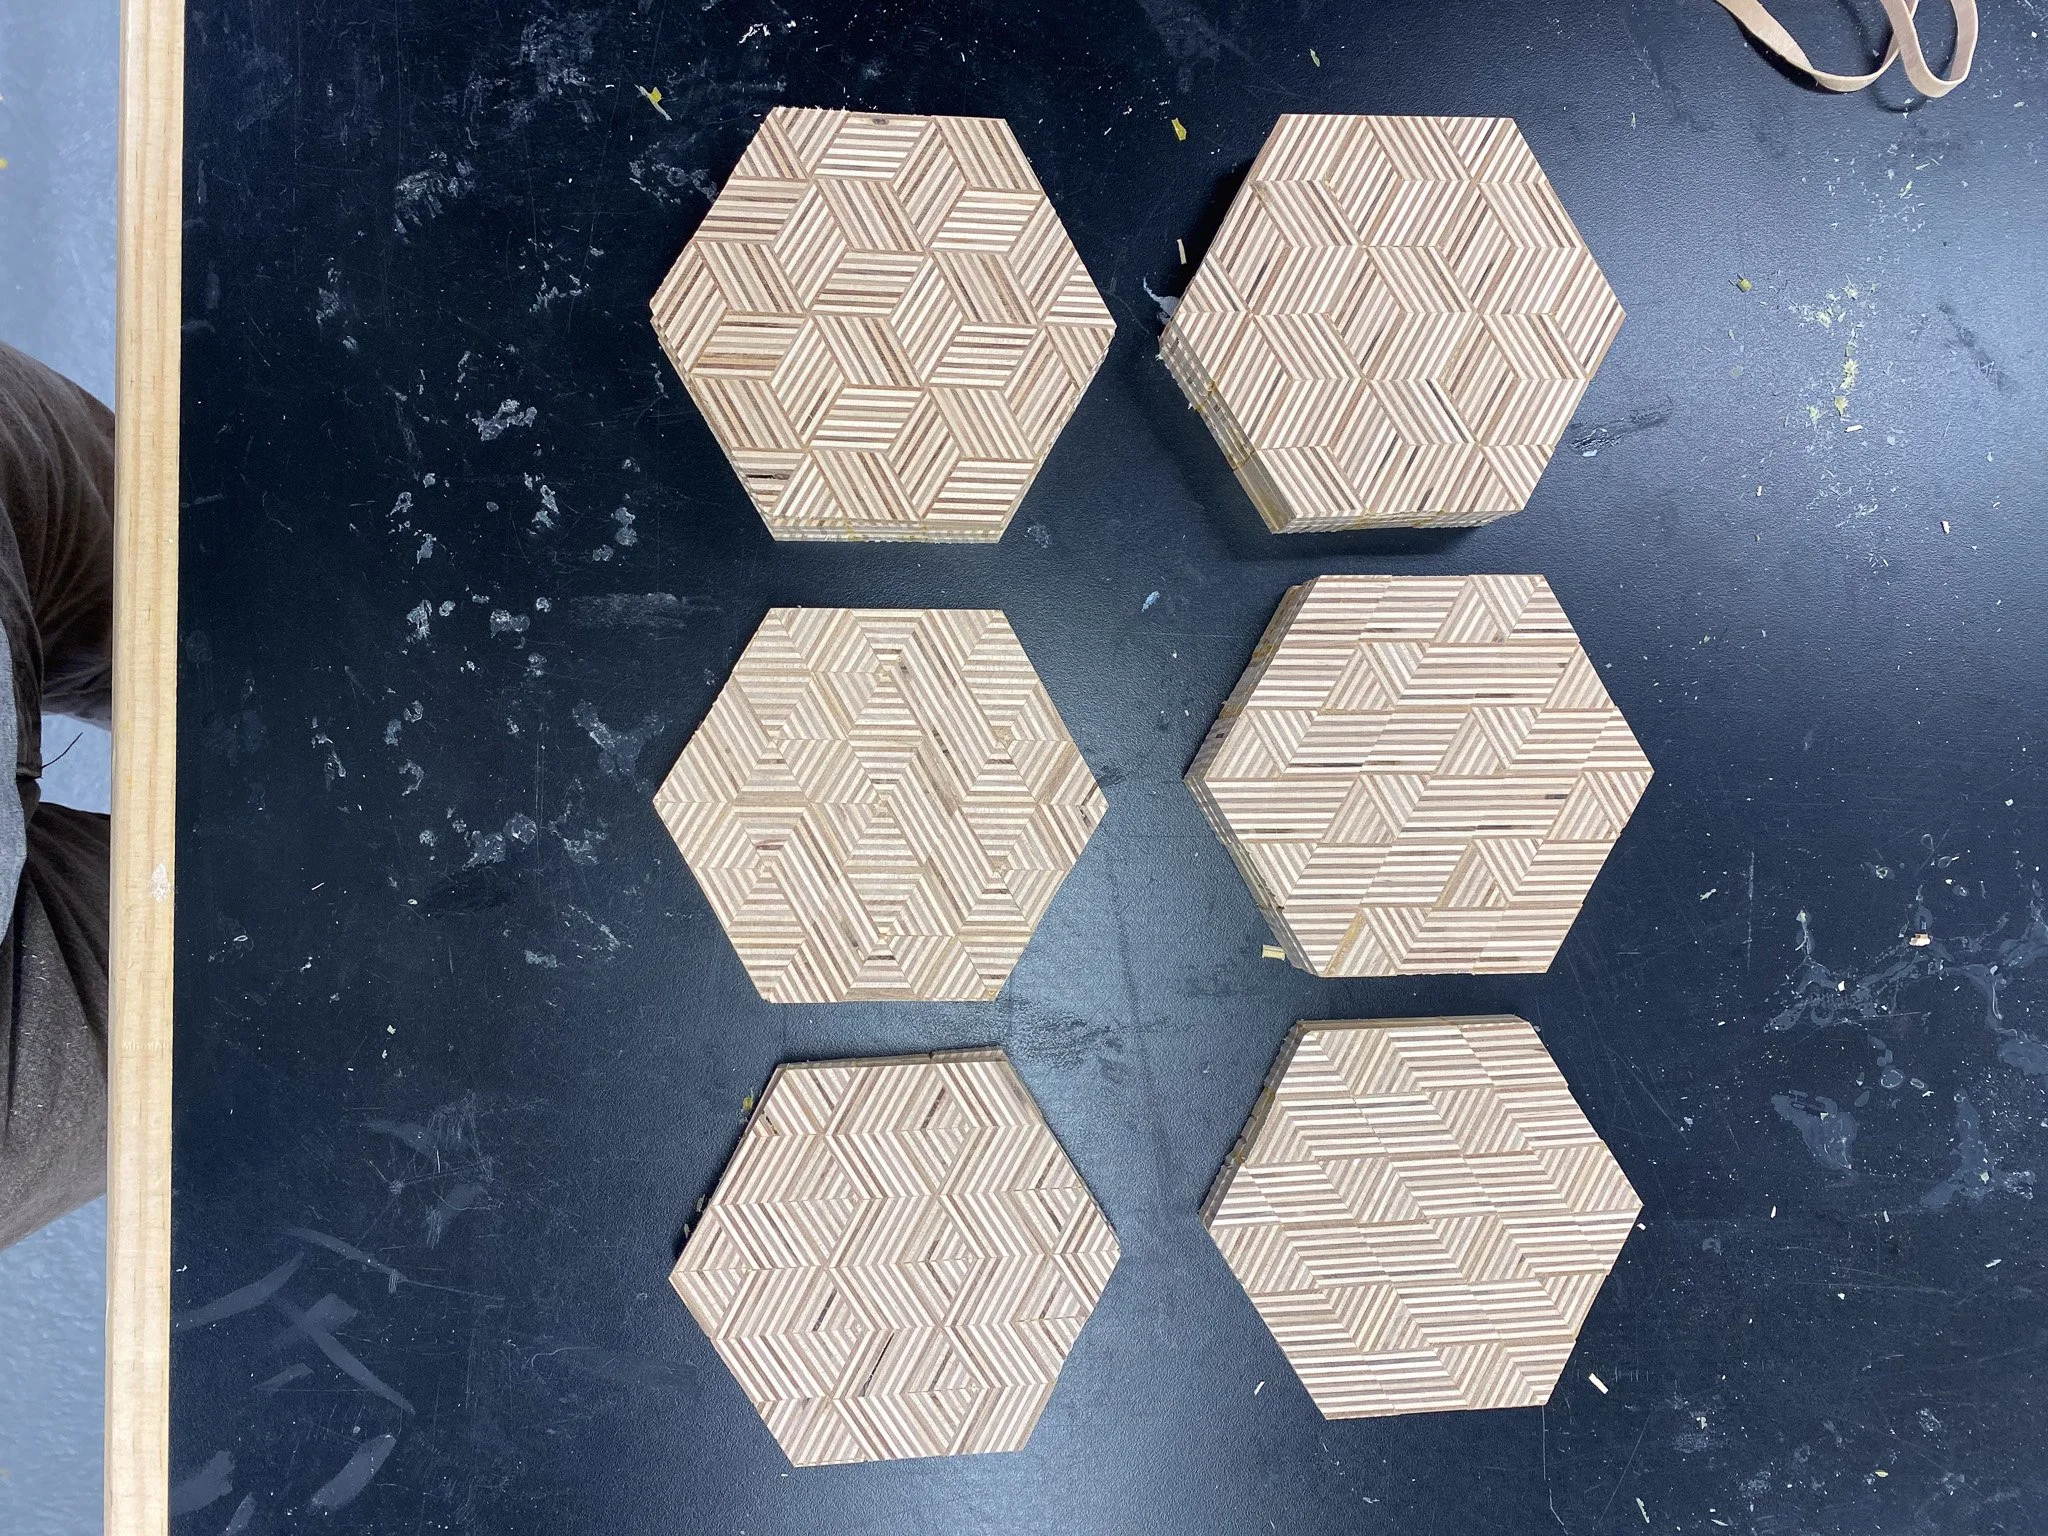
Once the glue was dry, I could remove the rubber bands, and cut each log in to slices. It is a bit like making sugar cookies where you roll the dough in to a log and then slice them to make nice round cookies. This works the same way - but when finished, you assemble the cookies in pattern with other cookies and make up a larger cookie. I tried cutting the slices on my table saw, but was getting a lot of tearout on the backside. I knew I could make a special jig to hold the hexagonal shaped logs and create a sacrificial fence, but I thought maybe the band saw would be quicker. I made a little bitty sled with some scraps and CA glue (krazy glue for non woodworkers) for my bandsaw and tried that. It worked better and wasted less material since the blade is so much thinner. The downside was that the cuts were not as straight. The blade was getting dull (since replaced) and that was causing it to drift a bit. I proceeded anyway.
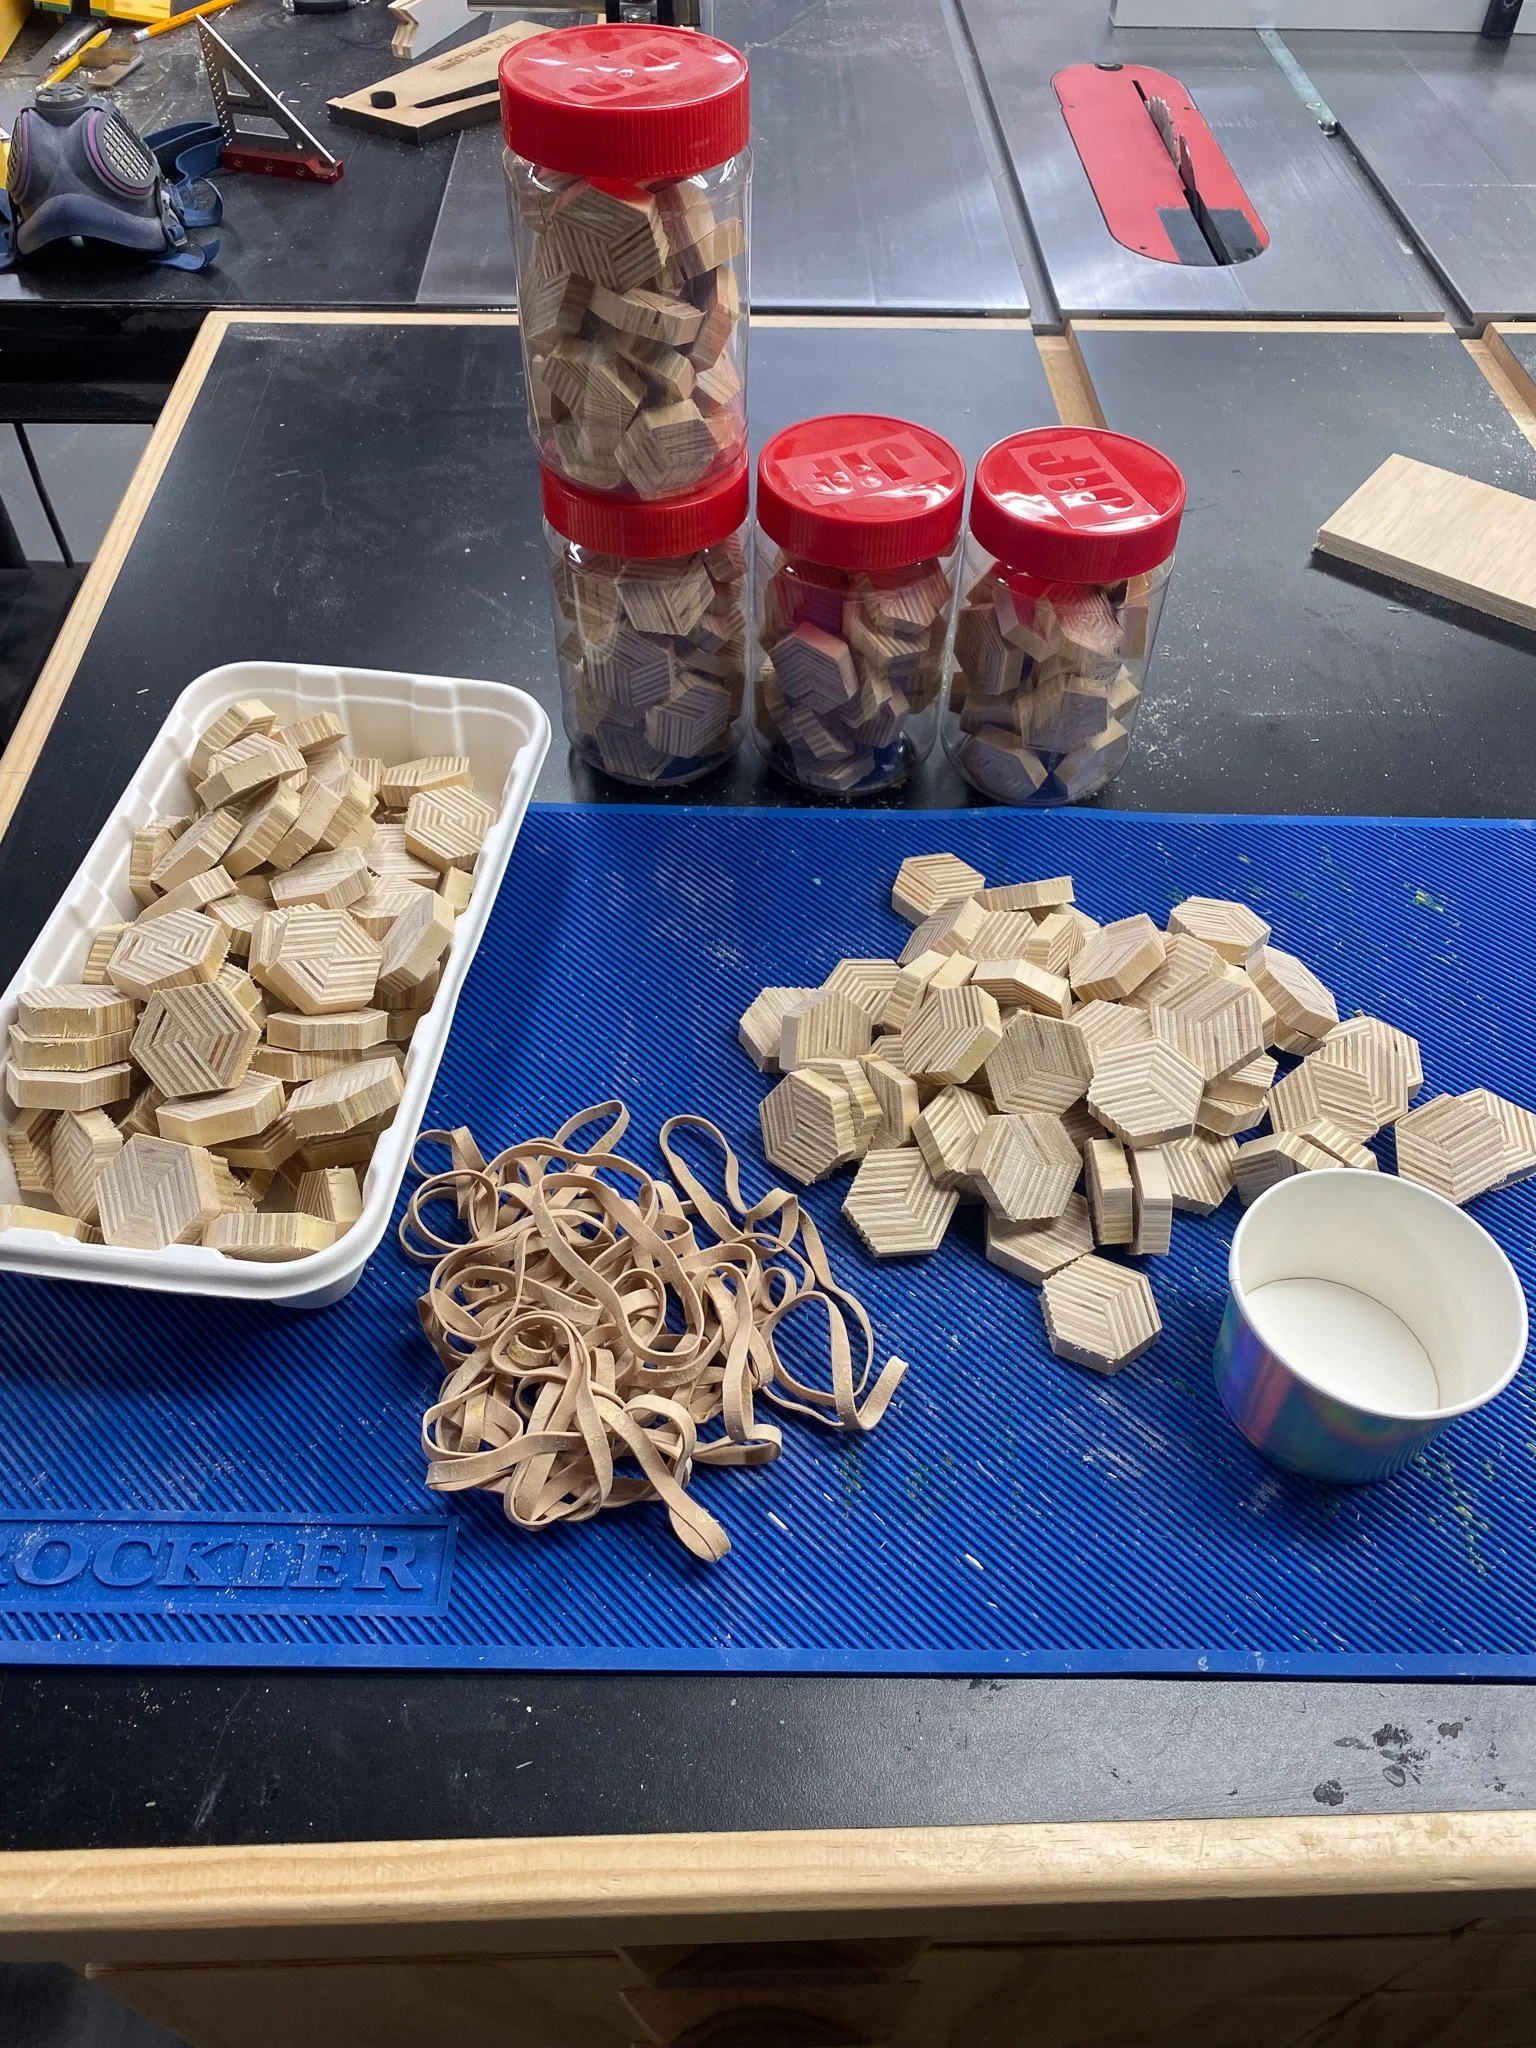
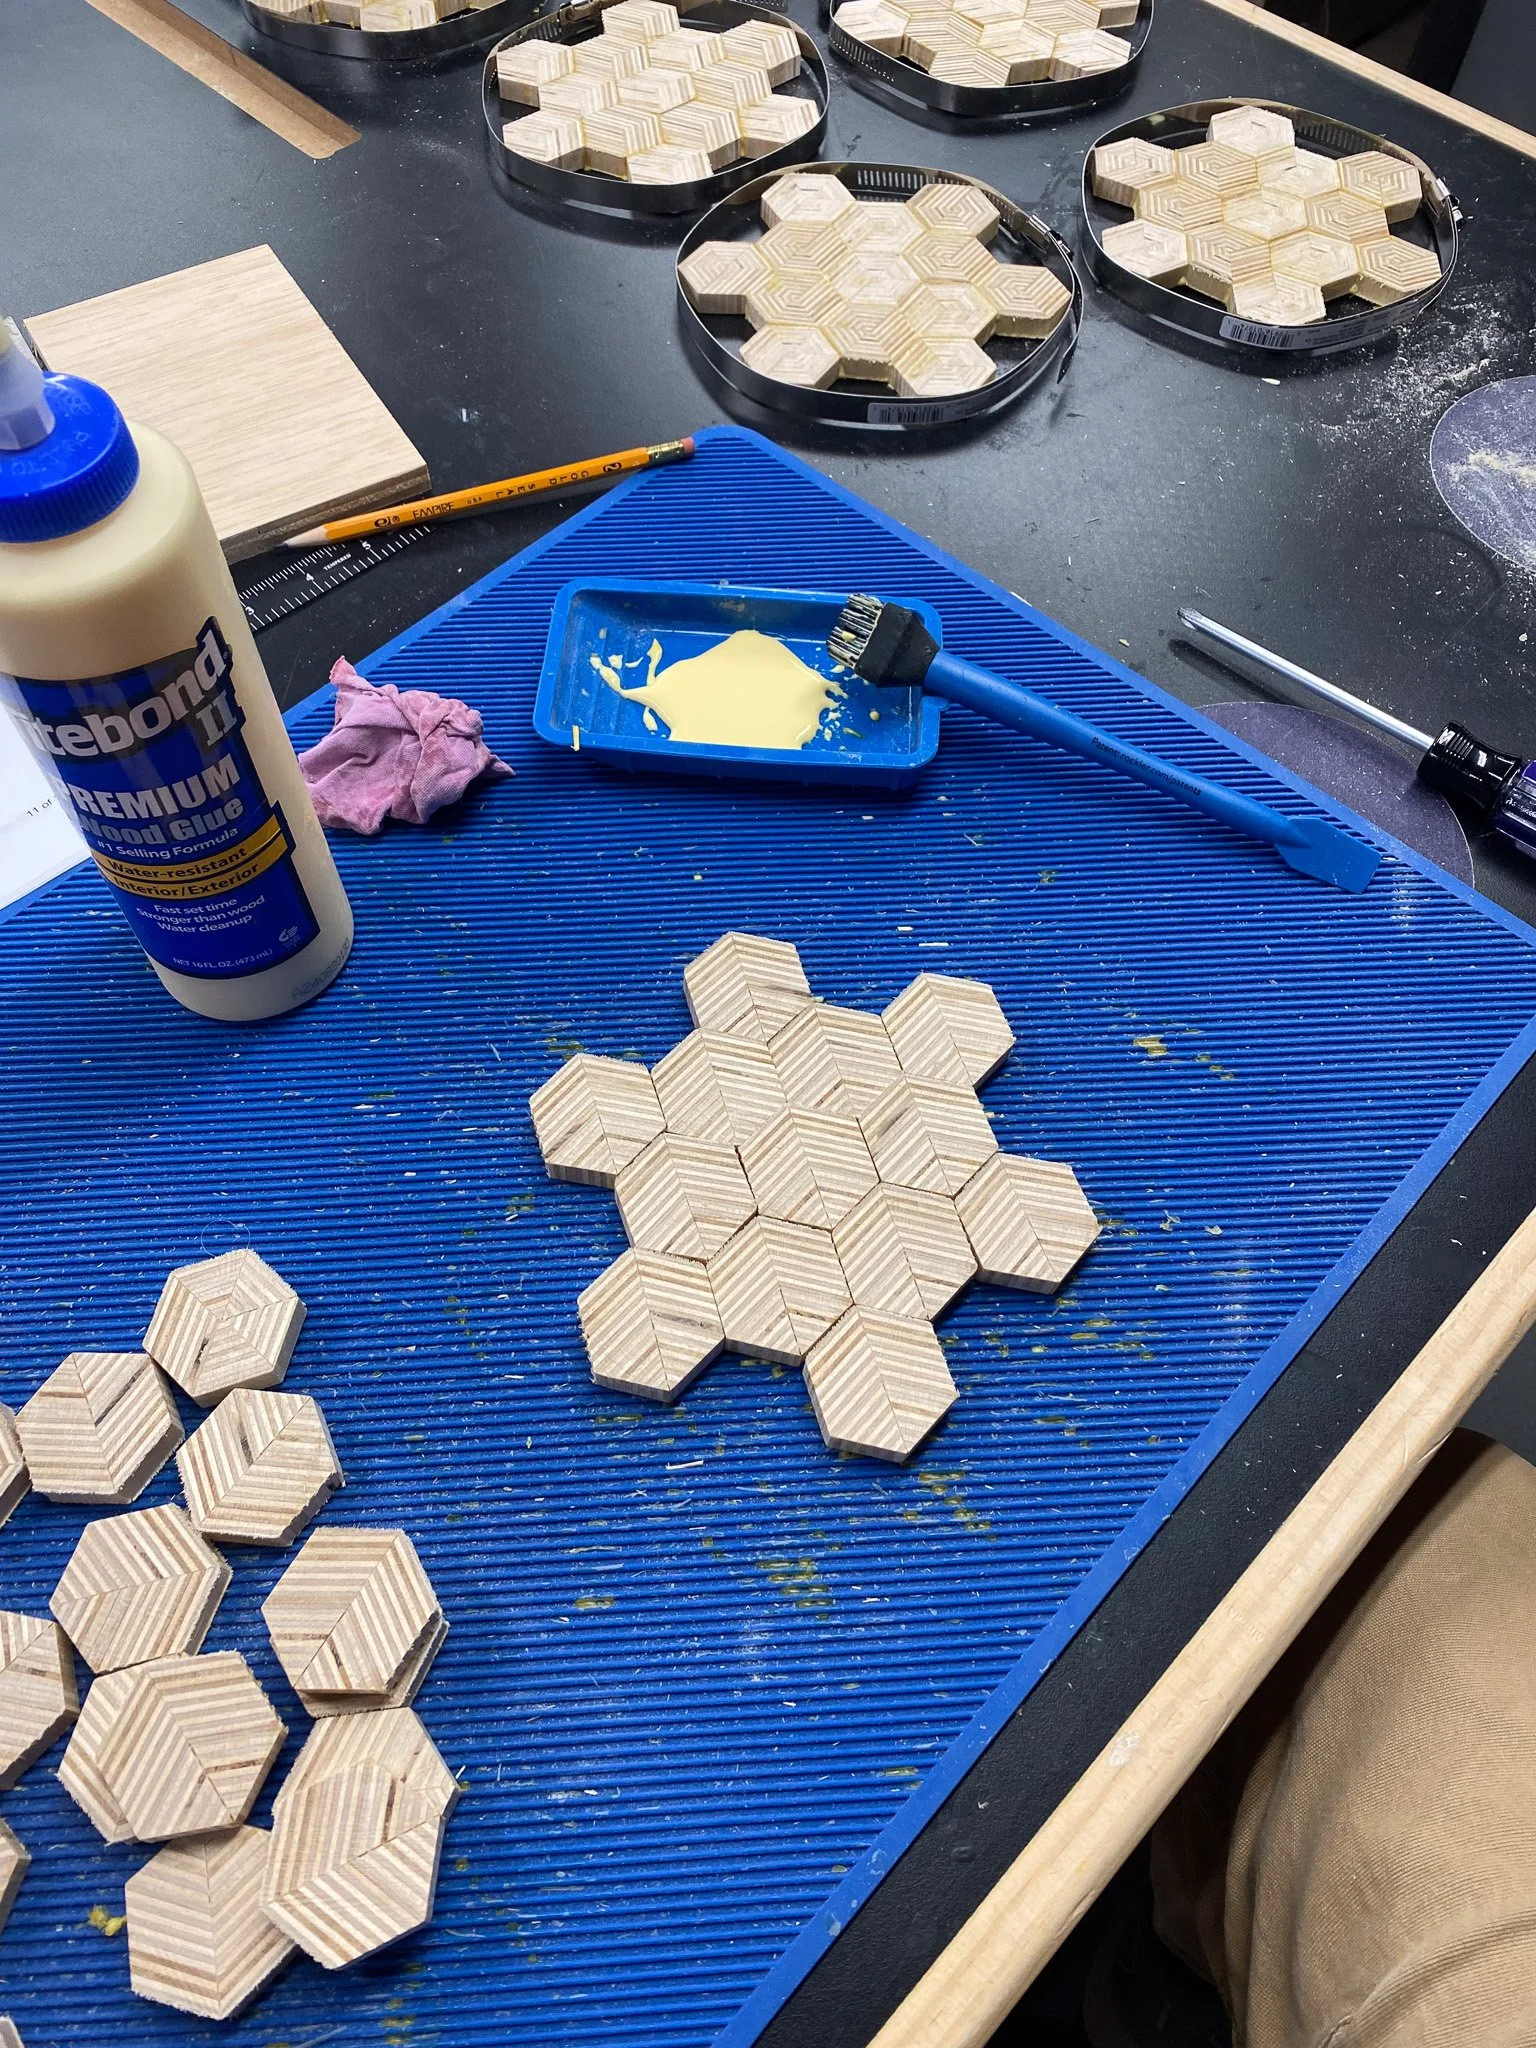
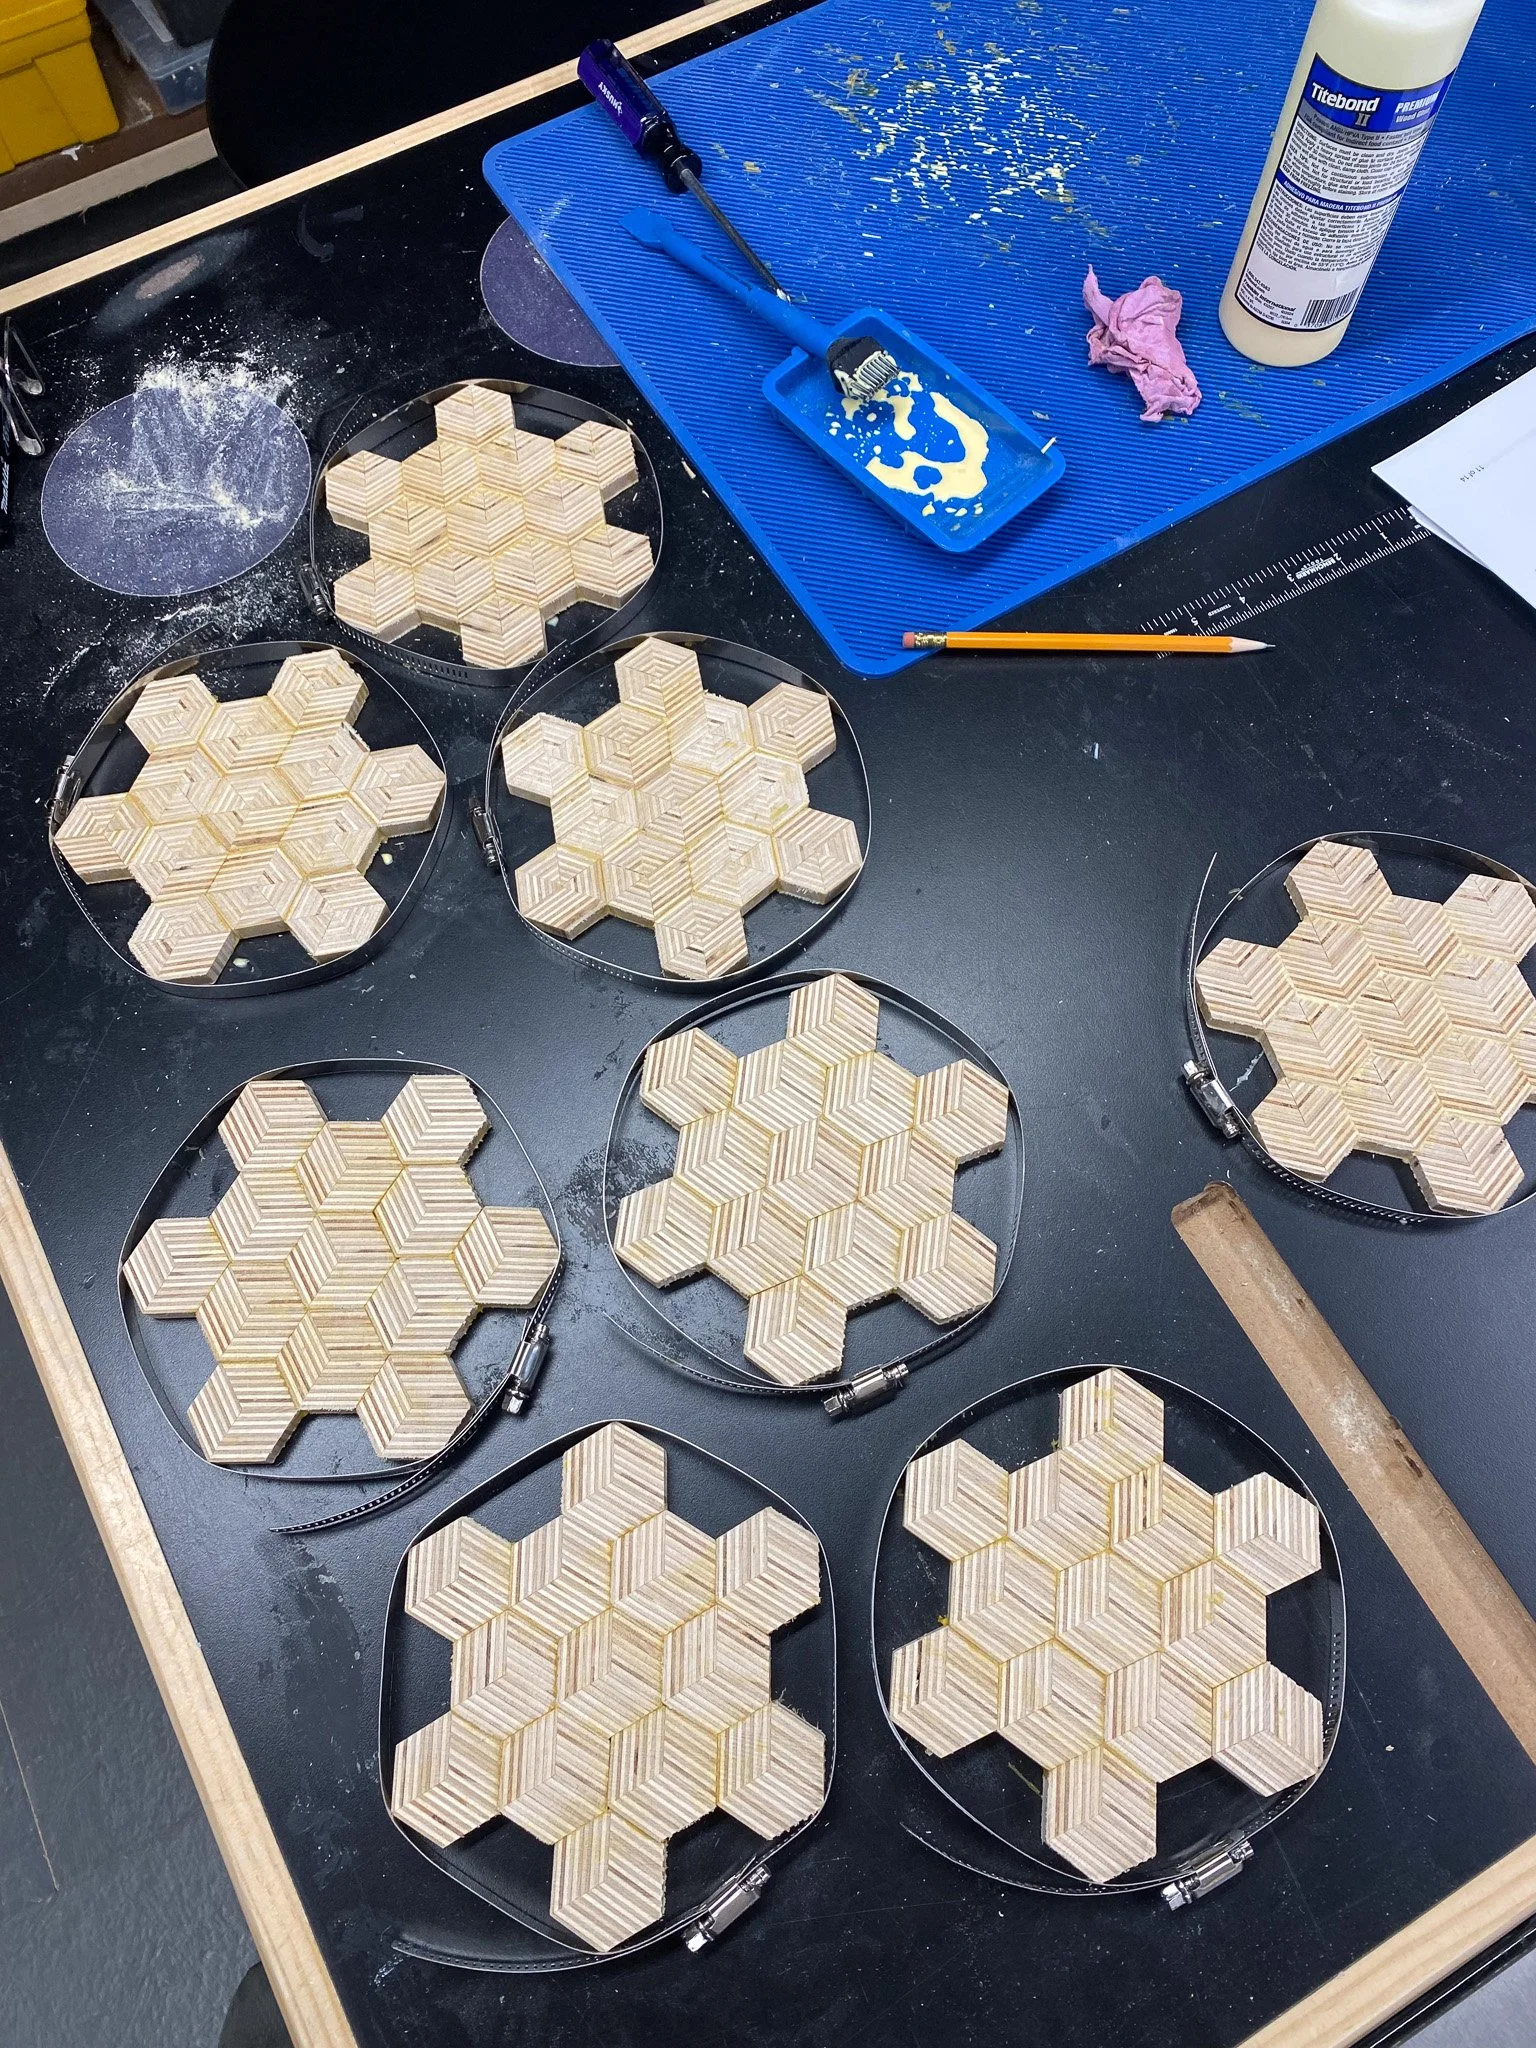
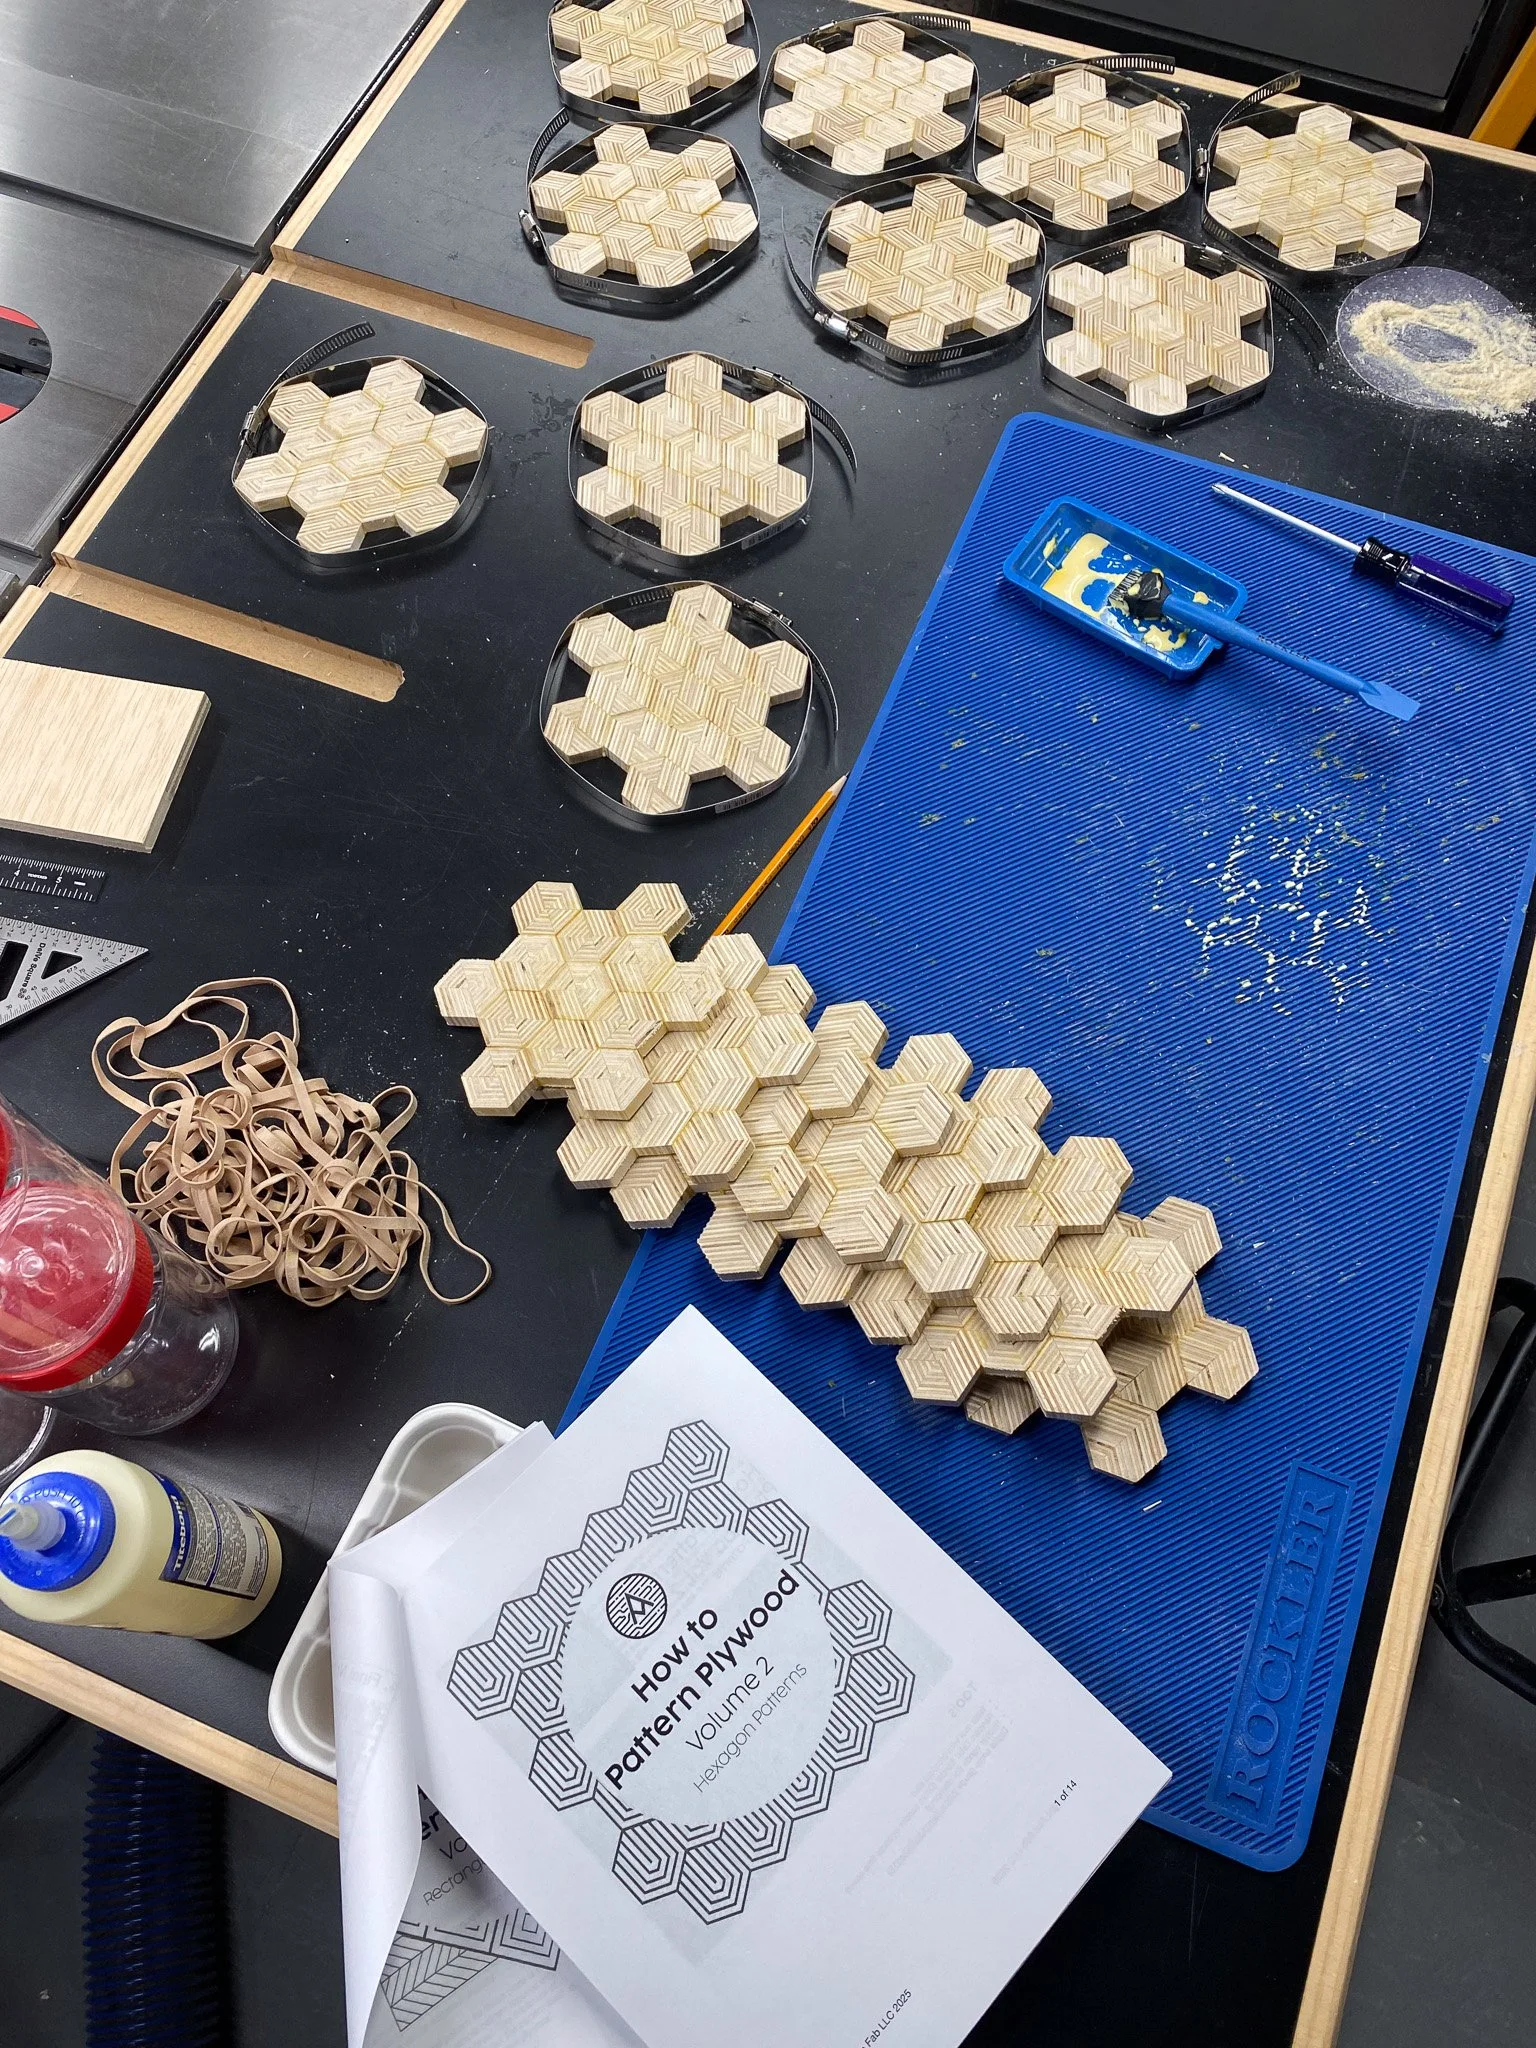
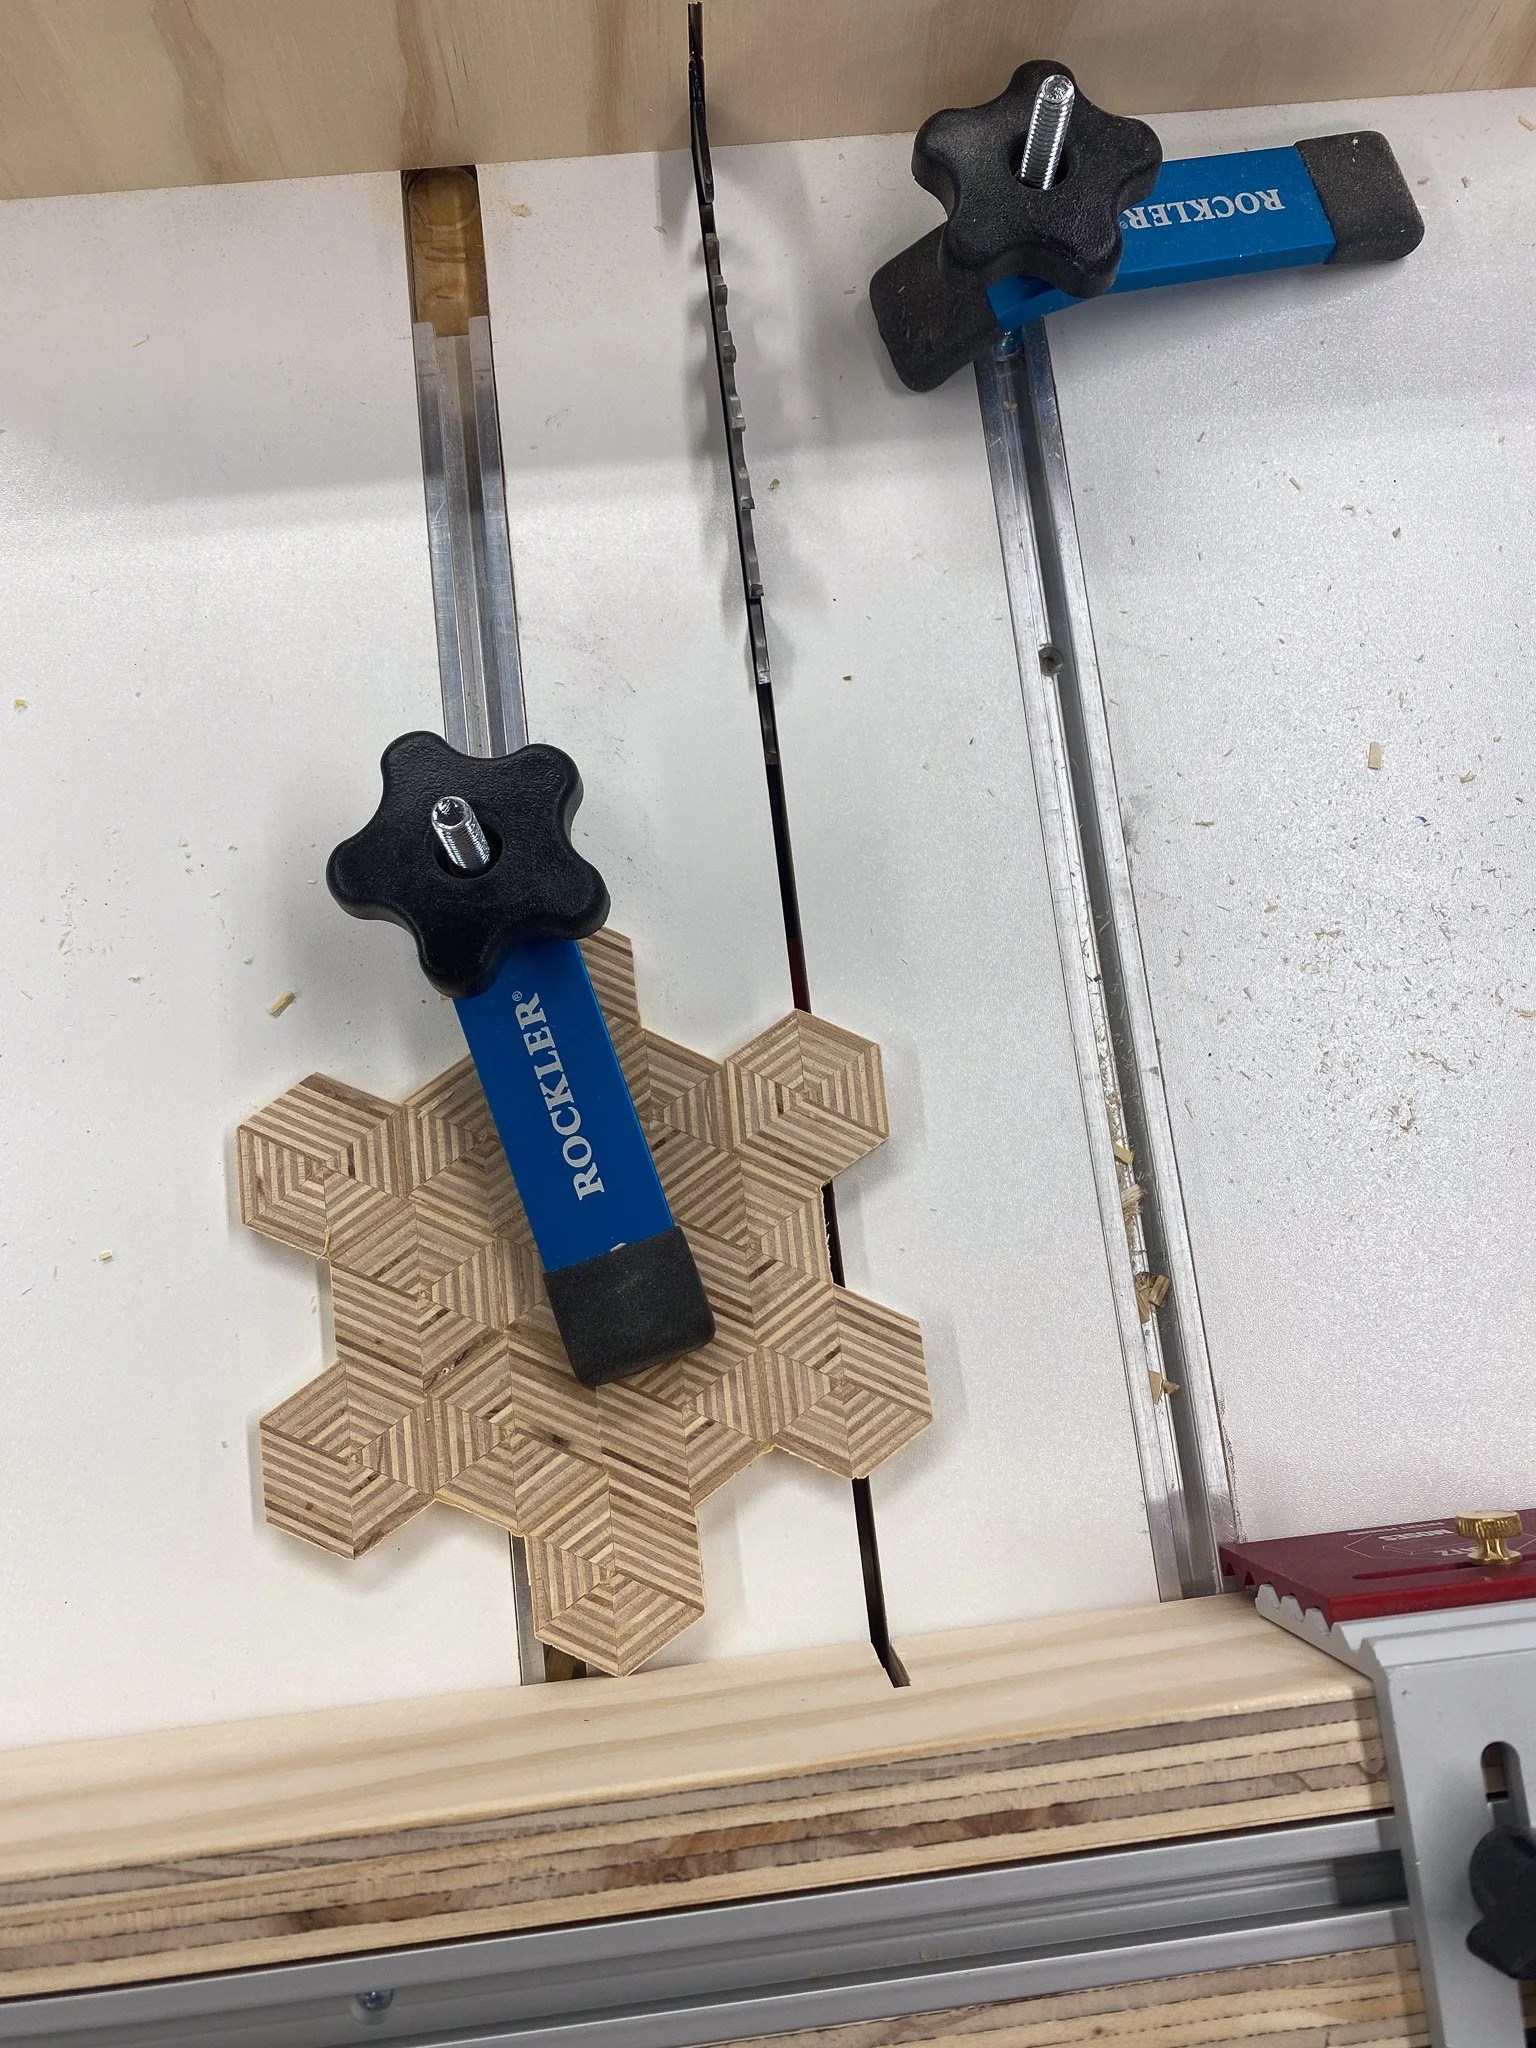
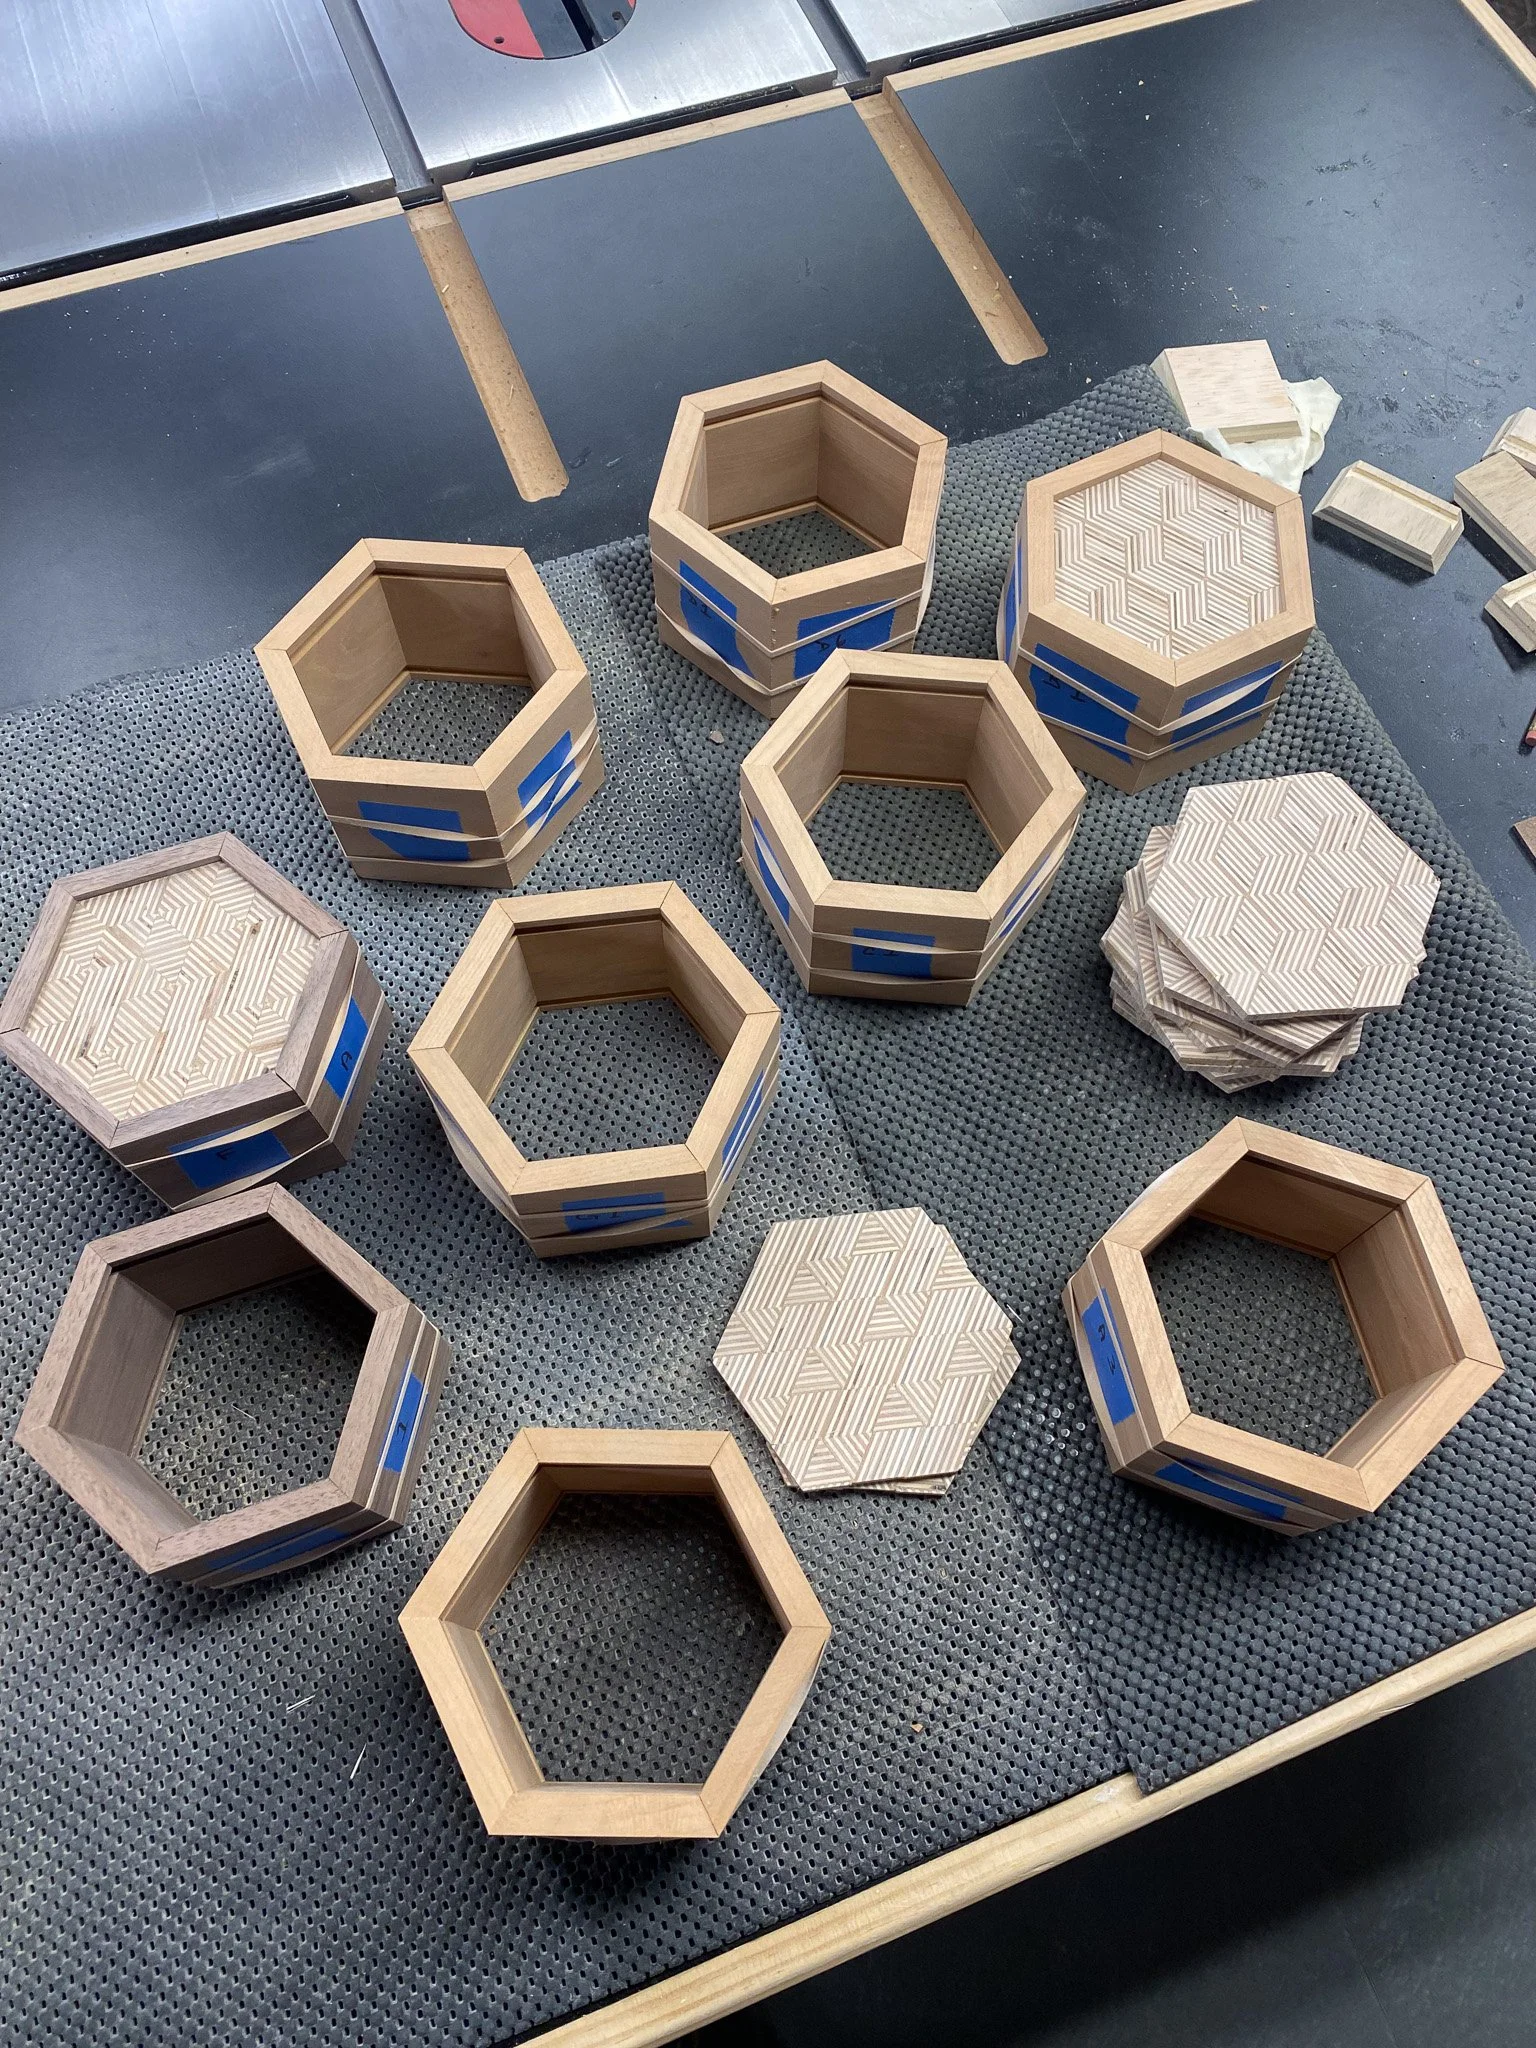
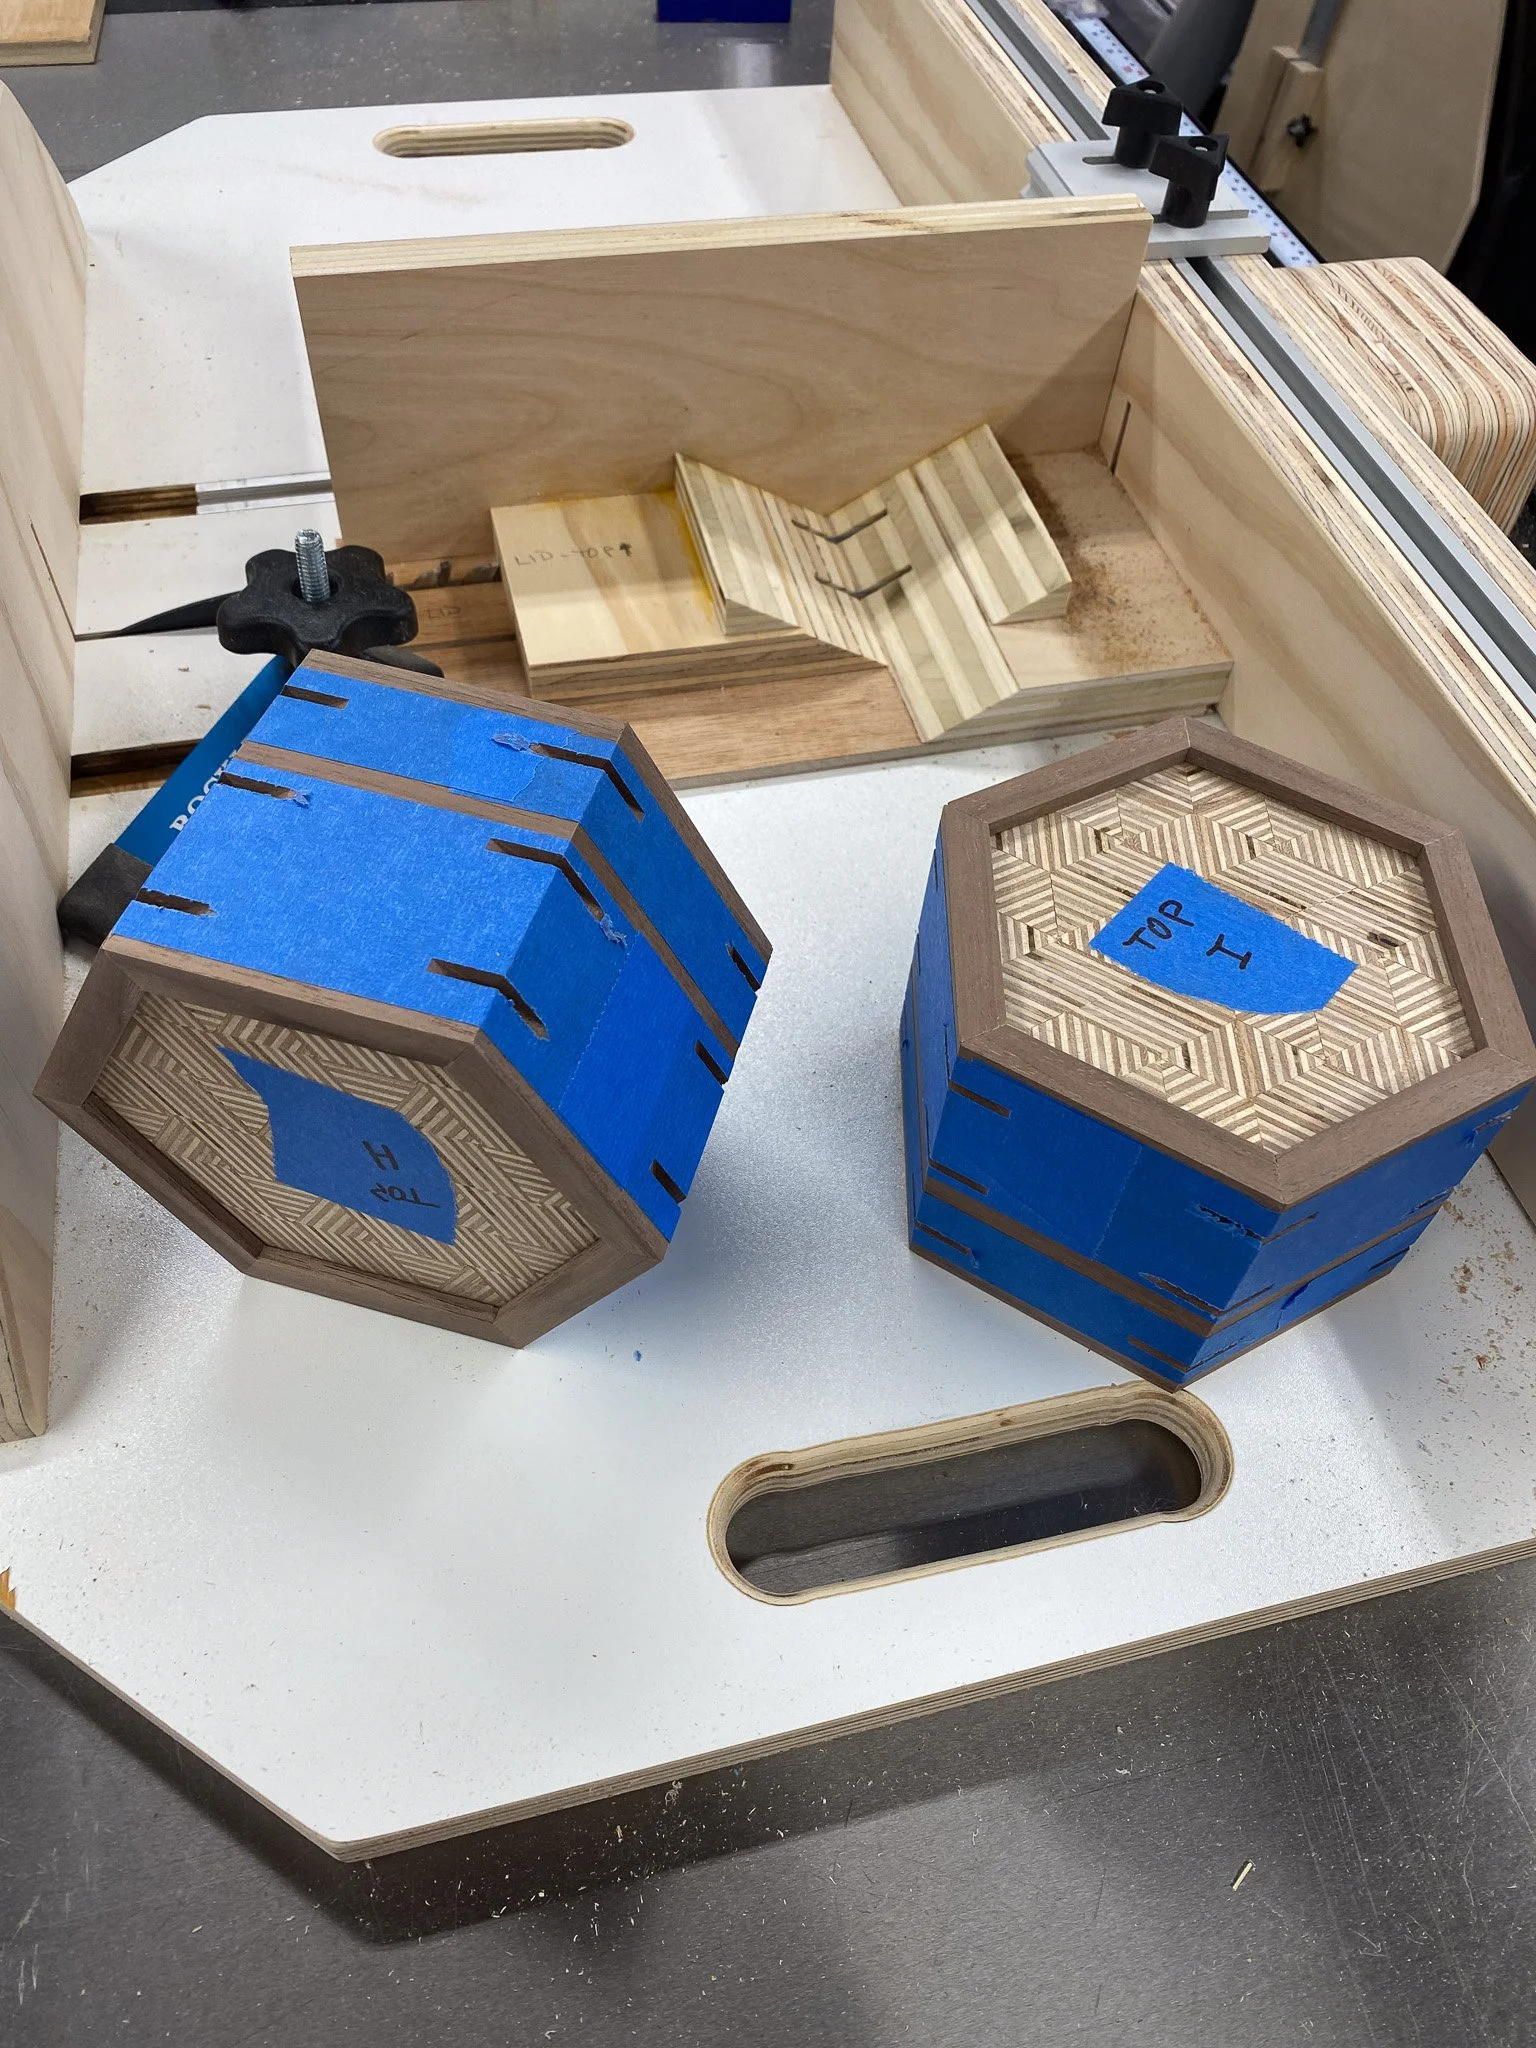
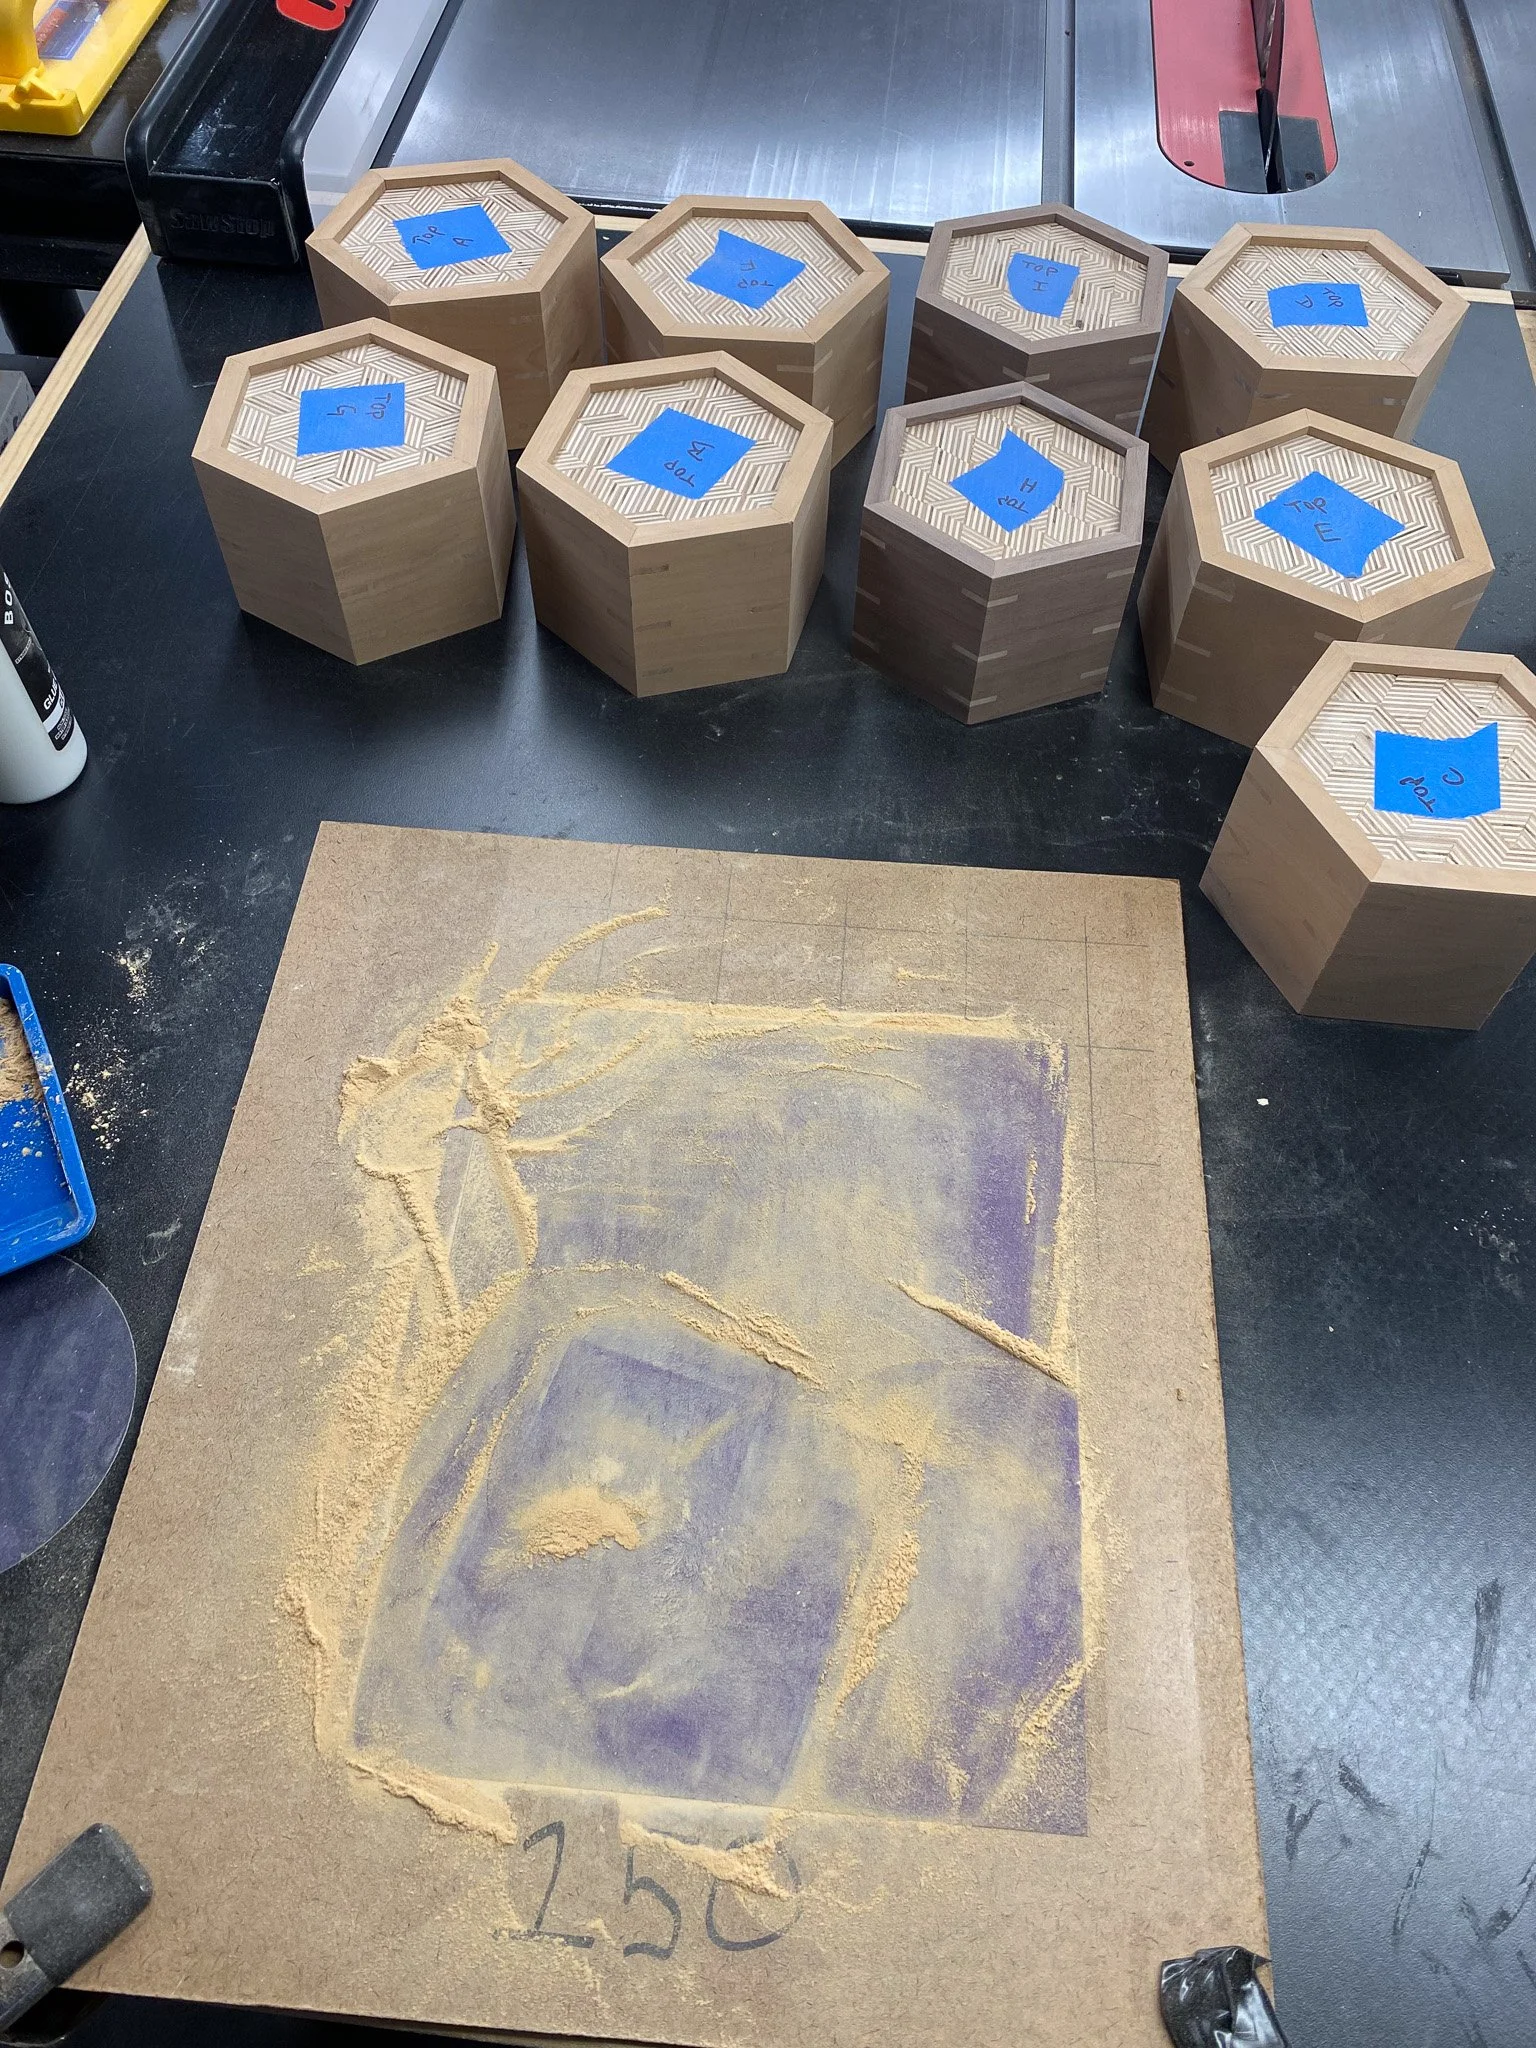
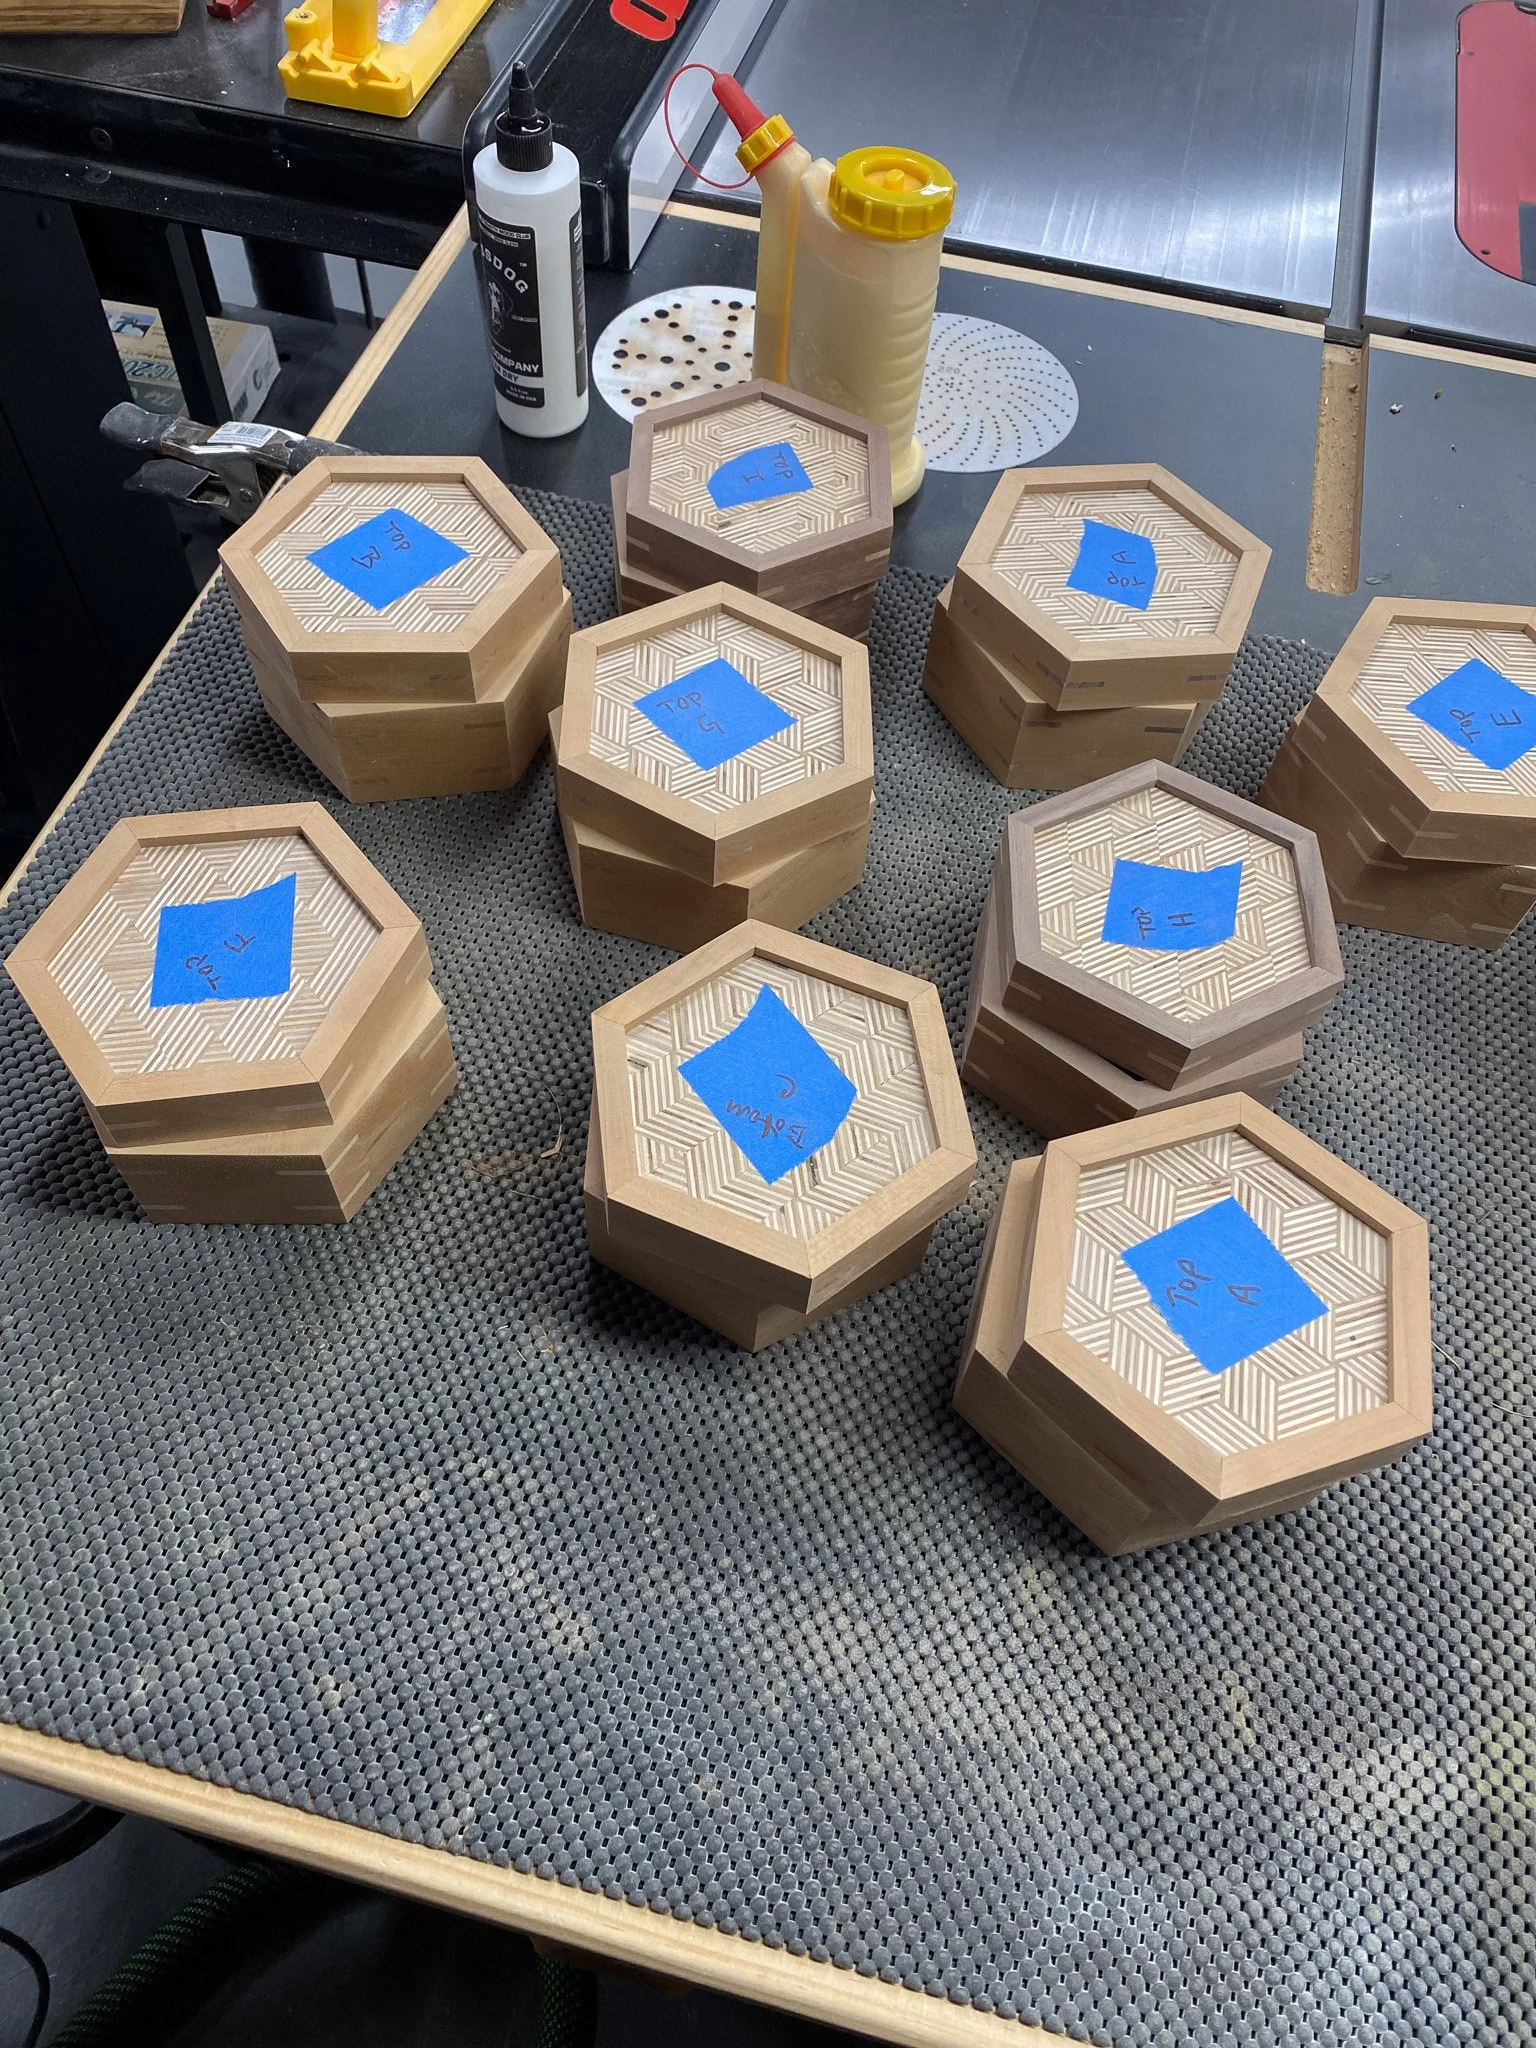
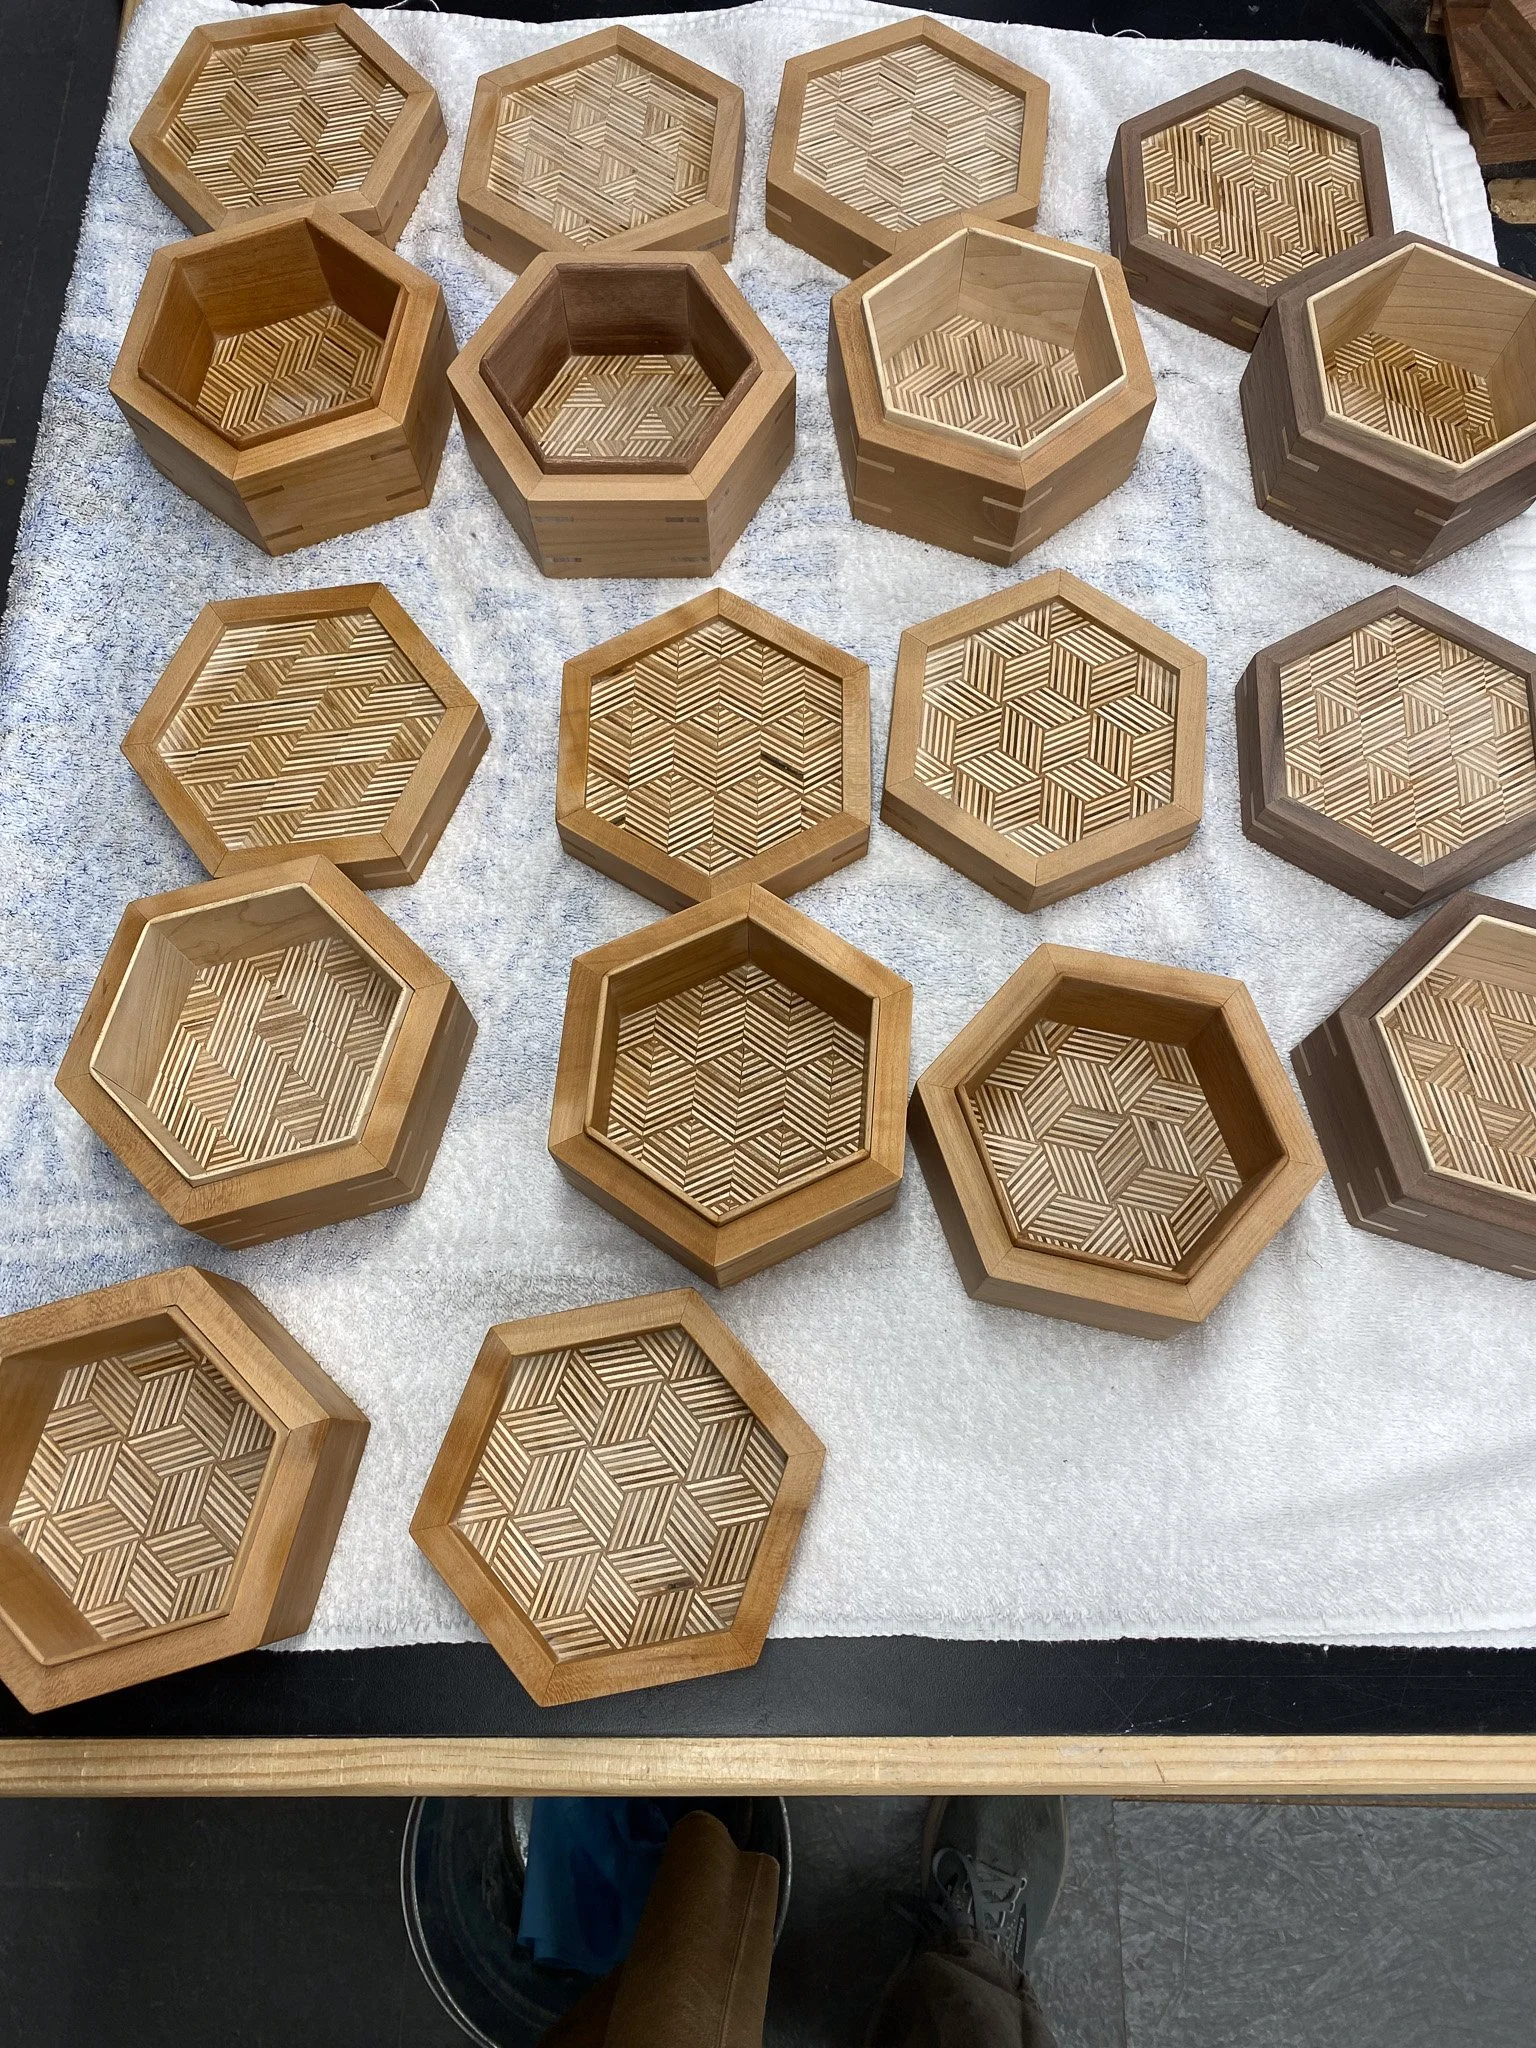
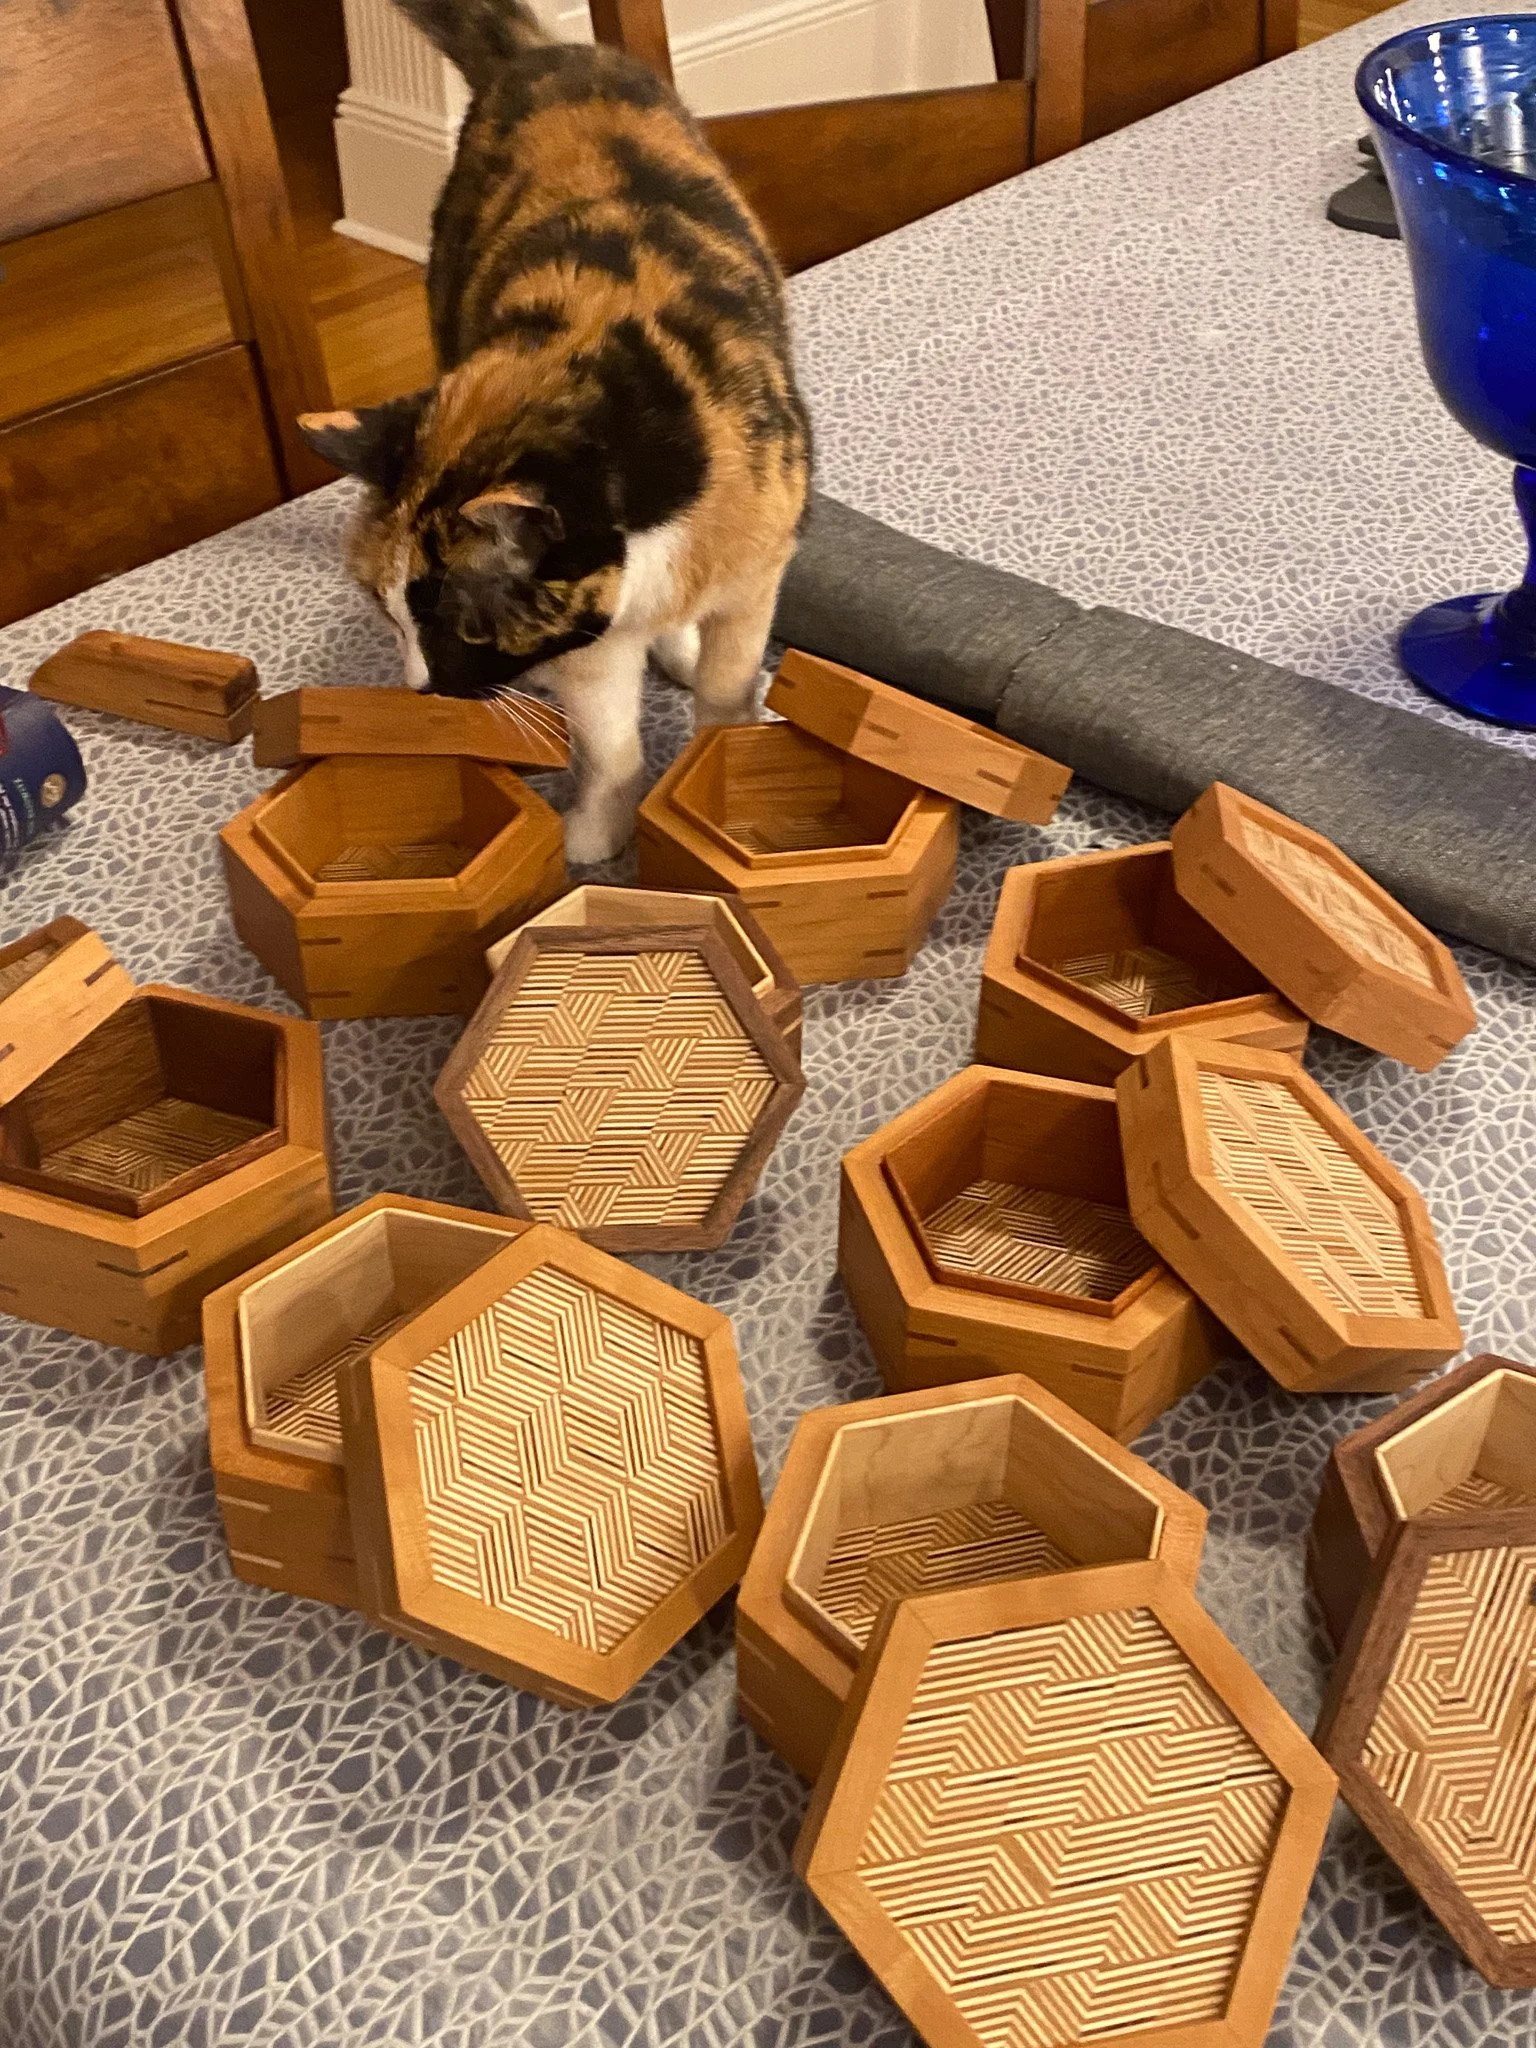
Once all the cookies were cut, and assembled in to the bigger patterns, I glued them up and used hose clamps to keep them tight until the glue set. It was during this phase that the uneven nature of the bandsaw cuts became apparent as the surfaces were not flat. I could sand them smooth, but was worried if I did it with my random orbit sander, that they would be uneven. The best solution was to drive to my parent’s house and use my Dad’s drum sander. A whole bunch of passes for the 18 pieces (9 tops and 9 bottoms) and while they were a bit thinner than I planned, they were level and smooth. The final step was to take the snowflake shaped cookies and trim them down to a proper hexagonal shape, which I did on my table saw with a crosscut sled. That completed the patterned plywood part of the project.
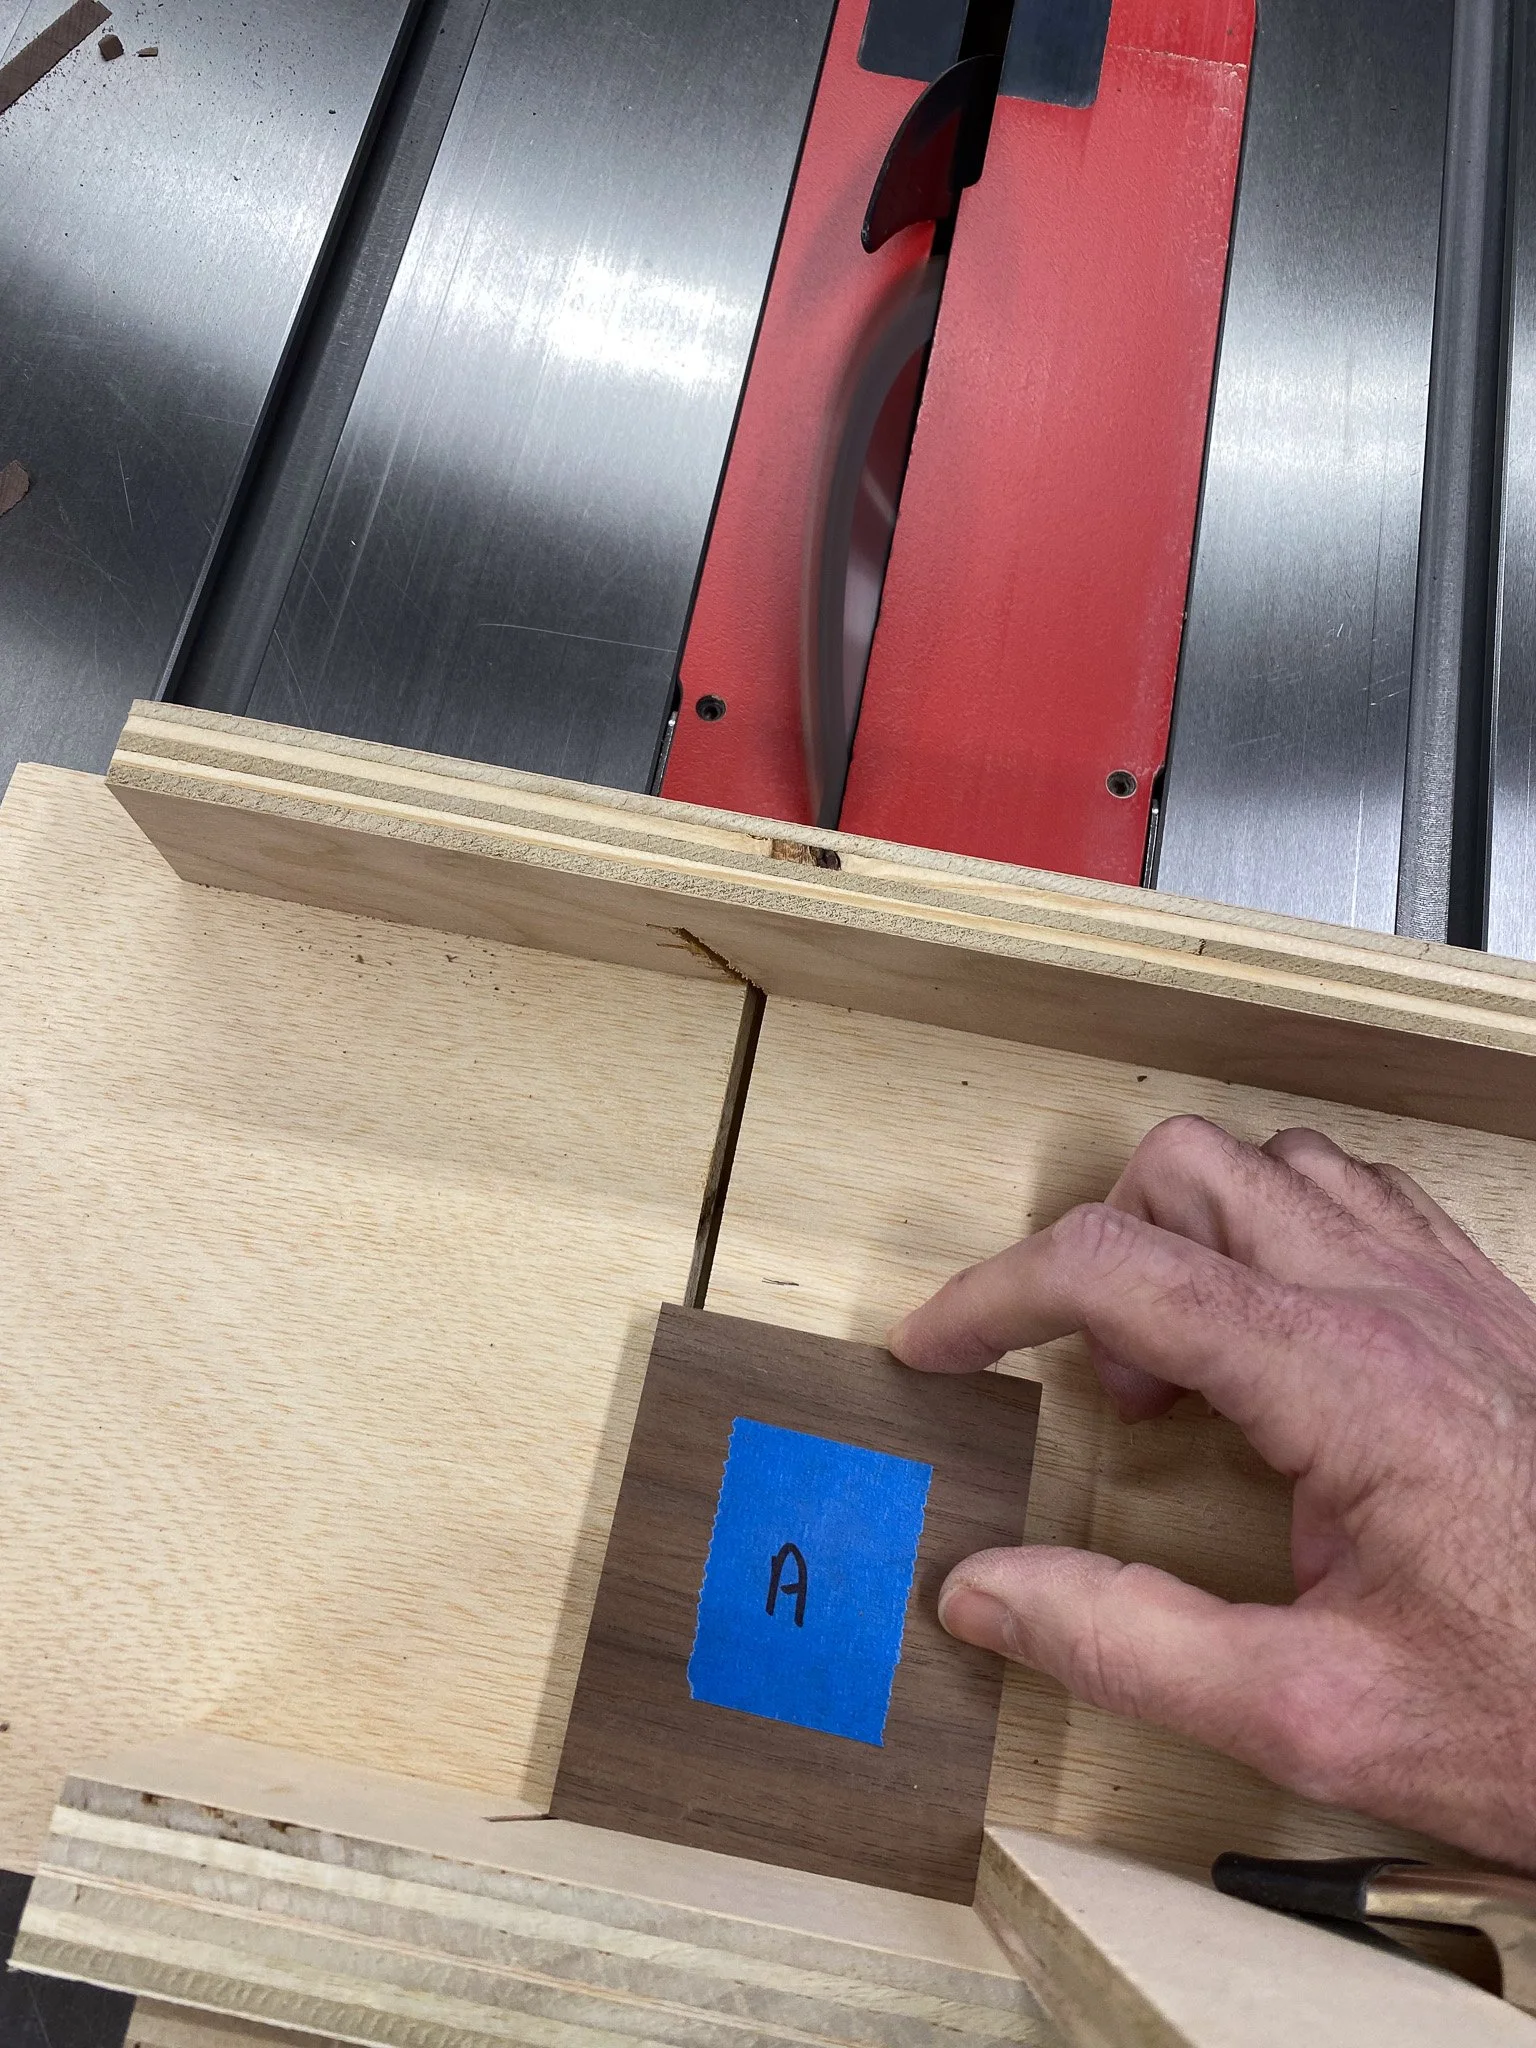
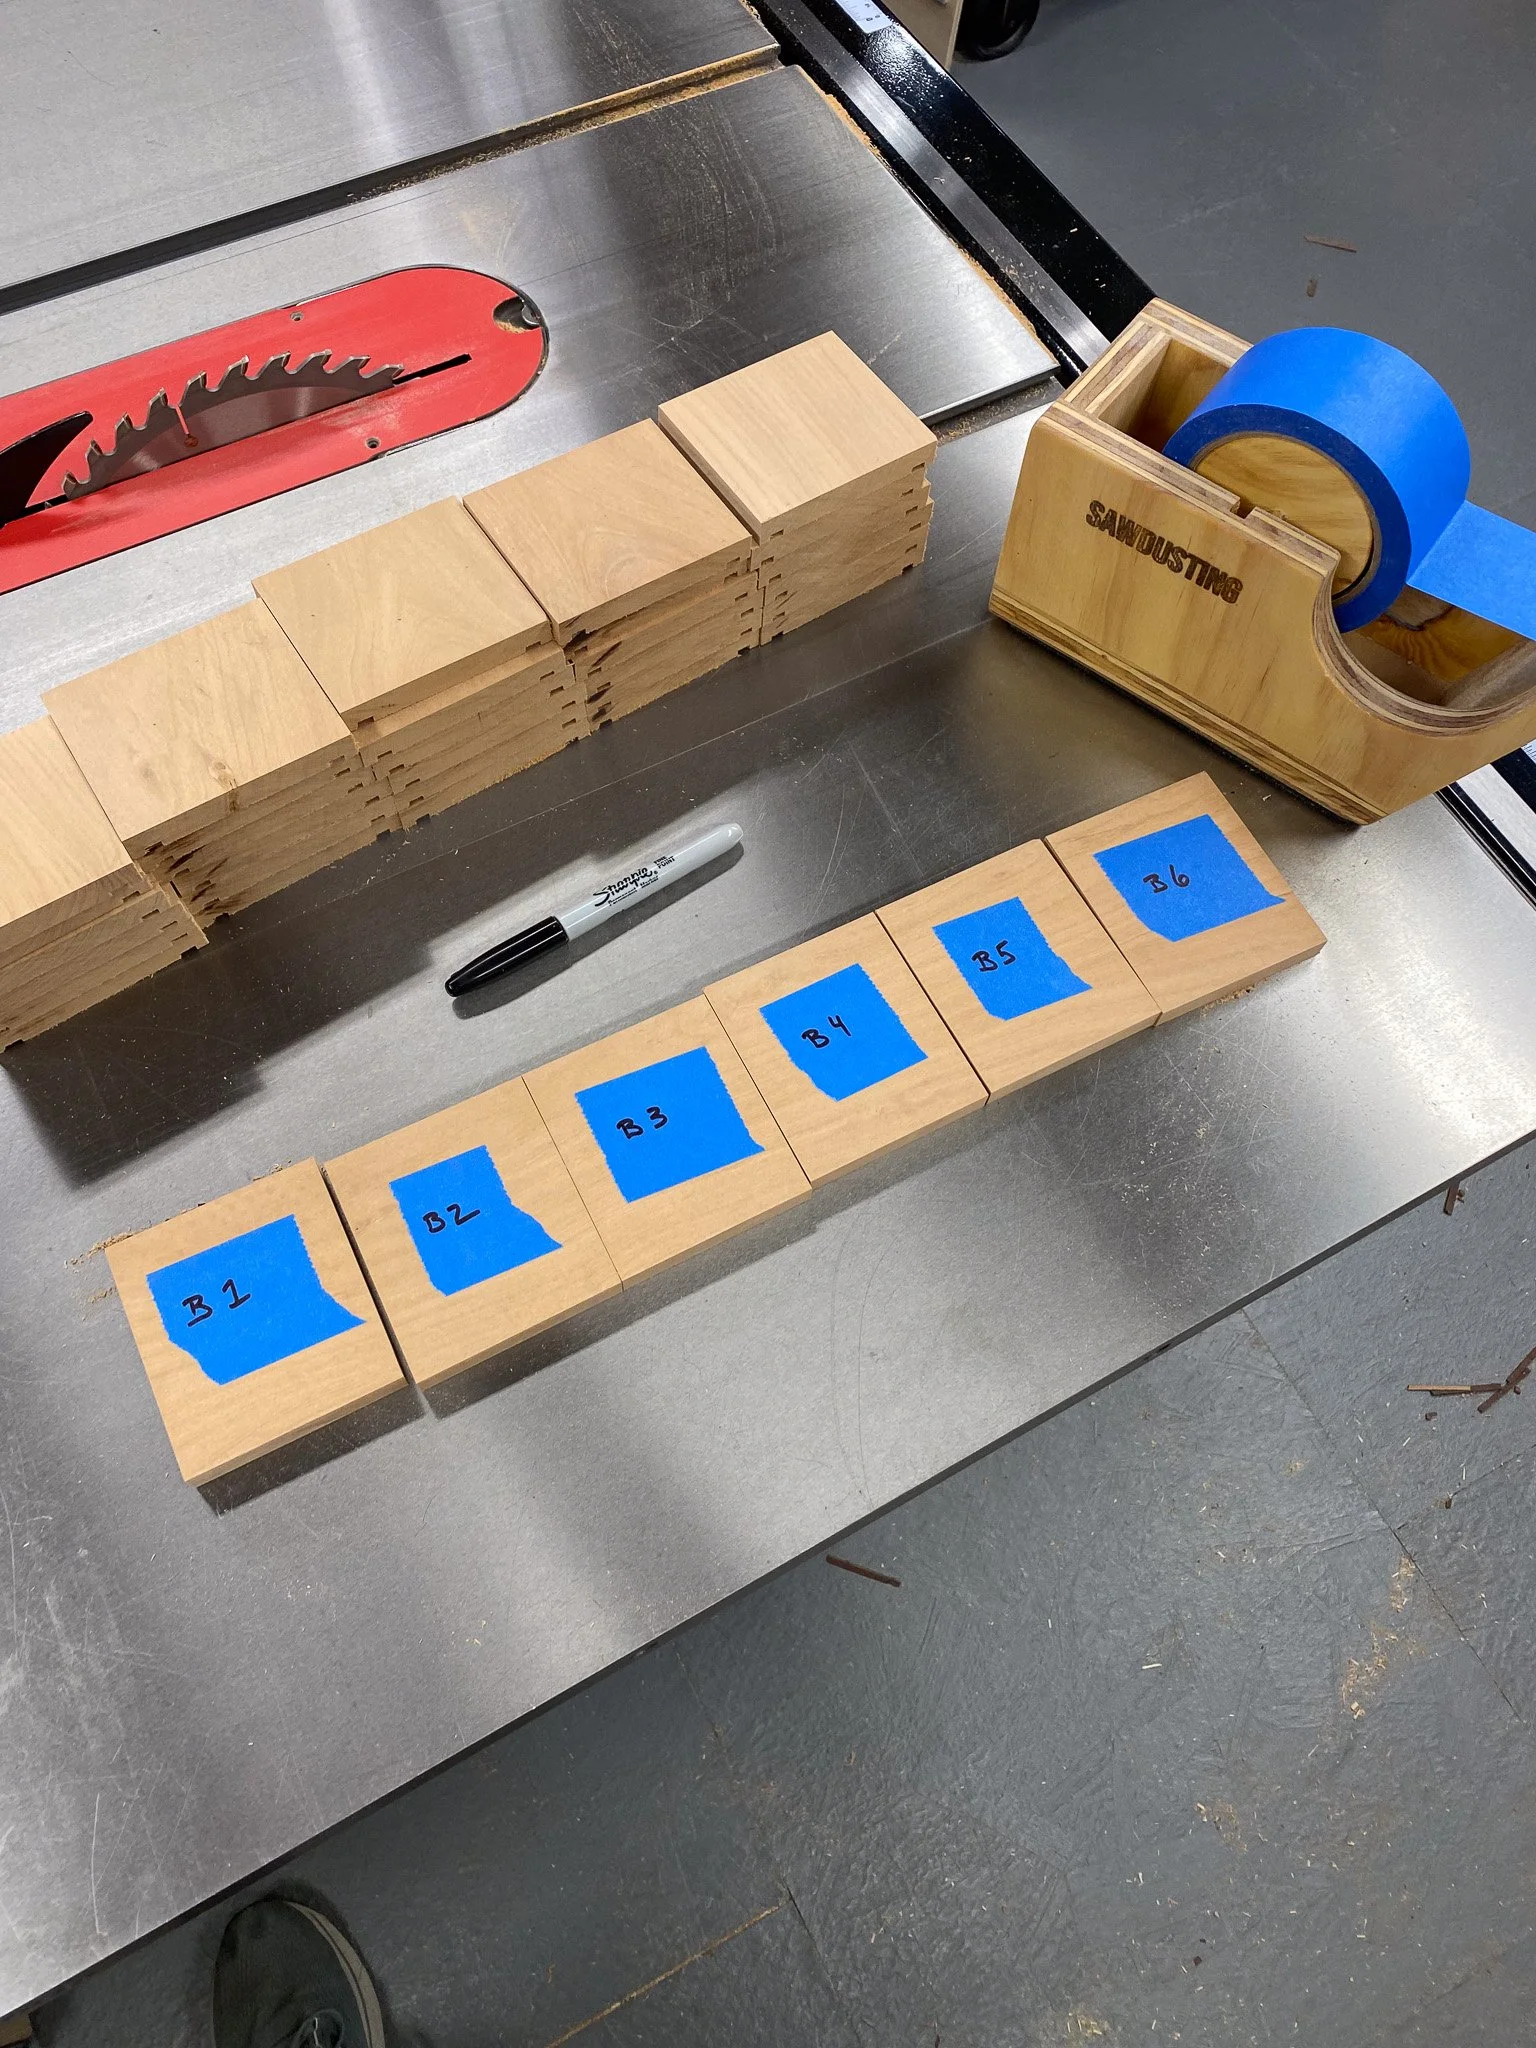
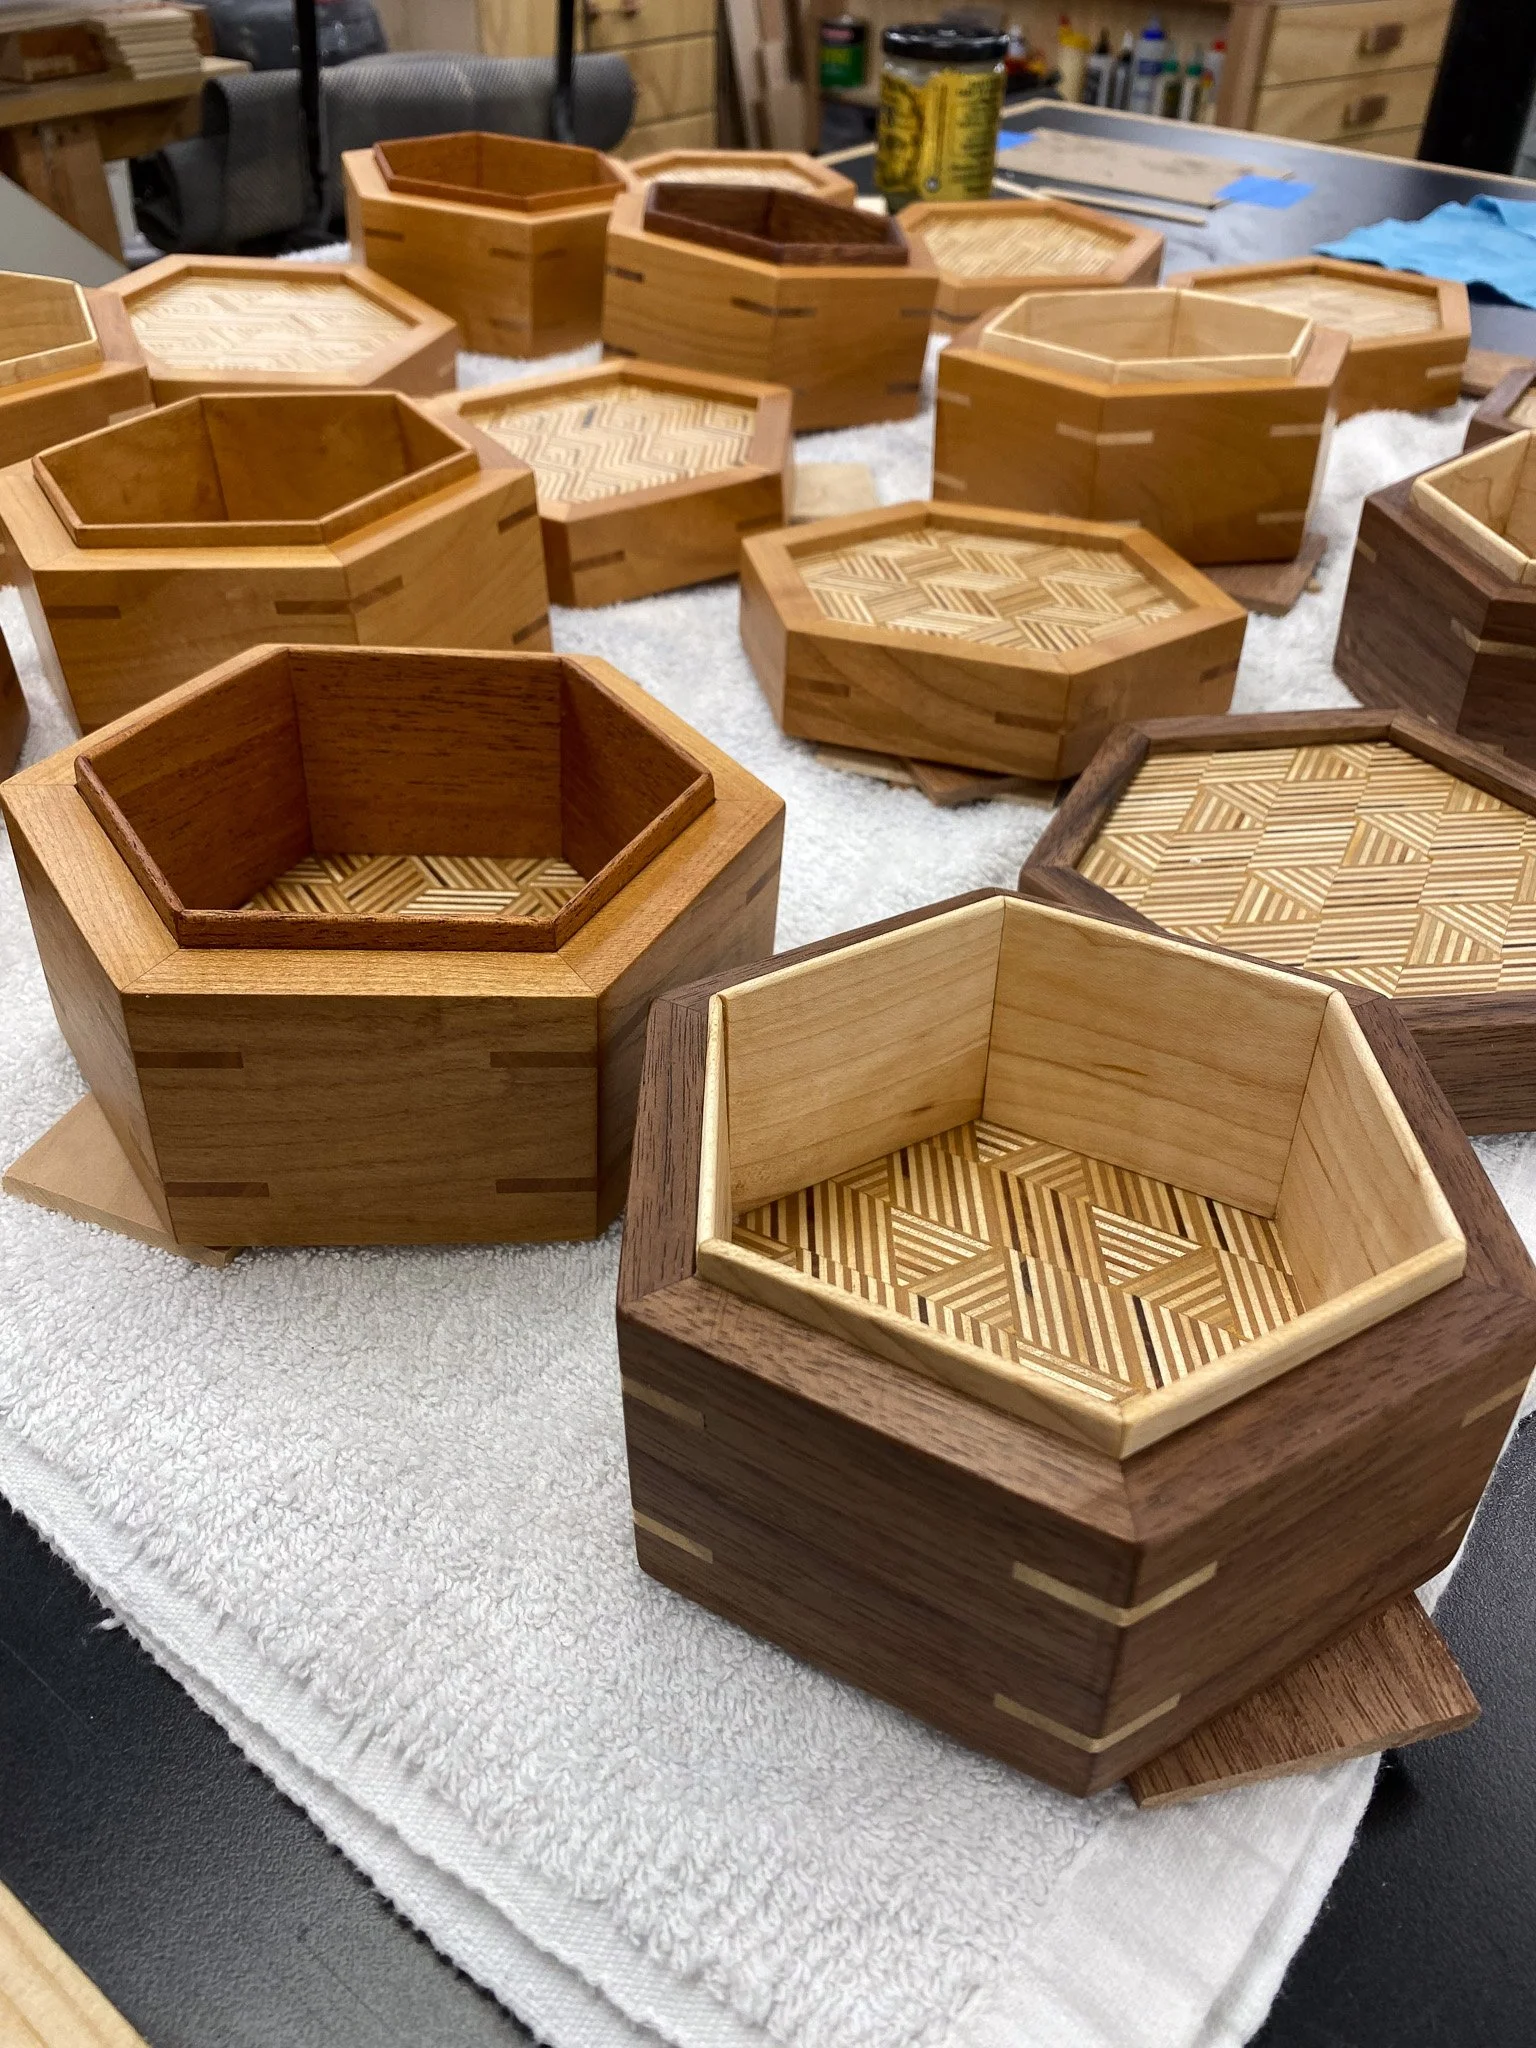
With that step complete, I had the final dimensions of the hexagons that would be the top and bottom of each box, and I could start working on the actual box itself. As noted earlier, this was my first time making hexagonal boxes, so it took a bit of trial and error to get the sizing right to get clean joints, that also fit the tops and bottoms correctly. I milled the cherry and walnut boards to about 1/2 inch thick, and cut in a groove (dado) on the top and bottom to accept the plywood sections. Then each board was cut in 6 pieces, and the angled cuts made on each end. Then I could assemble them and test the fit. I made several sets of pieces from scrap wood to get the fit - and actually had to use two different settings as the walnut boards were a bit thinner than the cherry, bit I got it all to work.
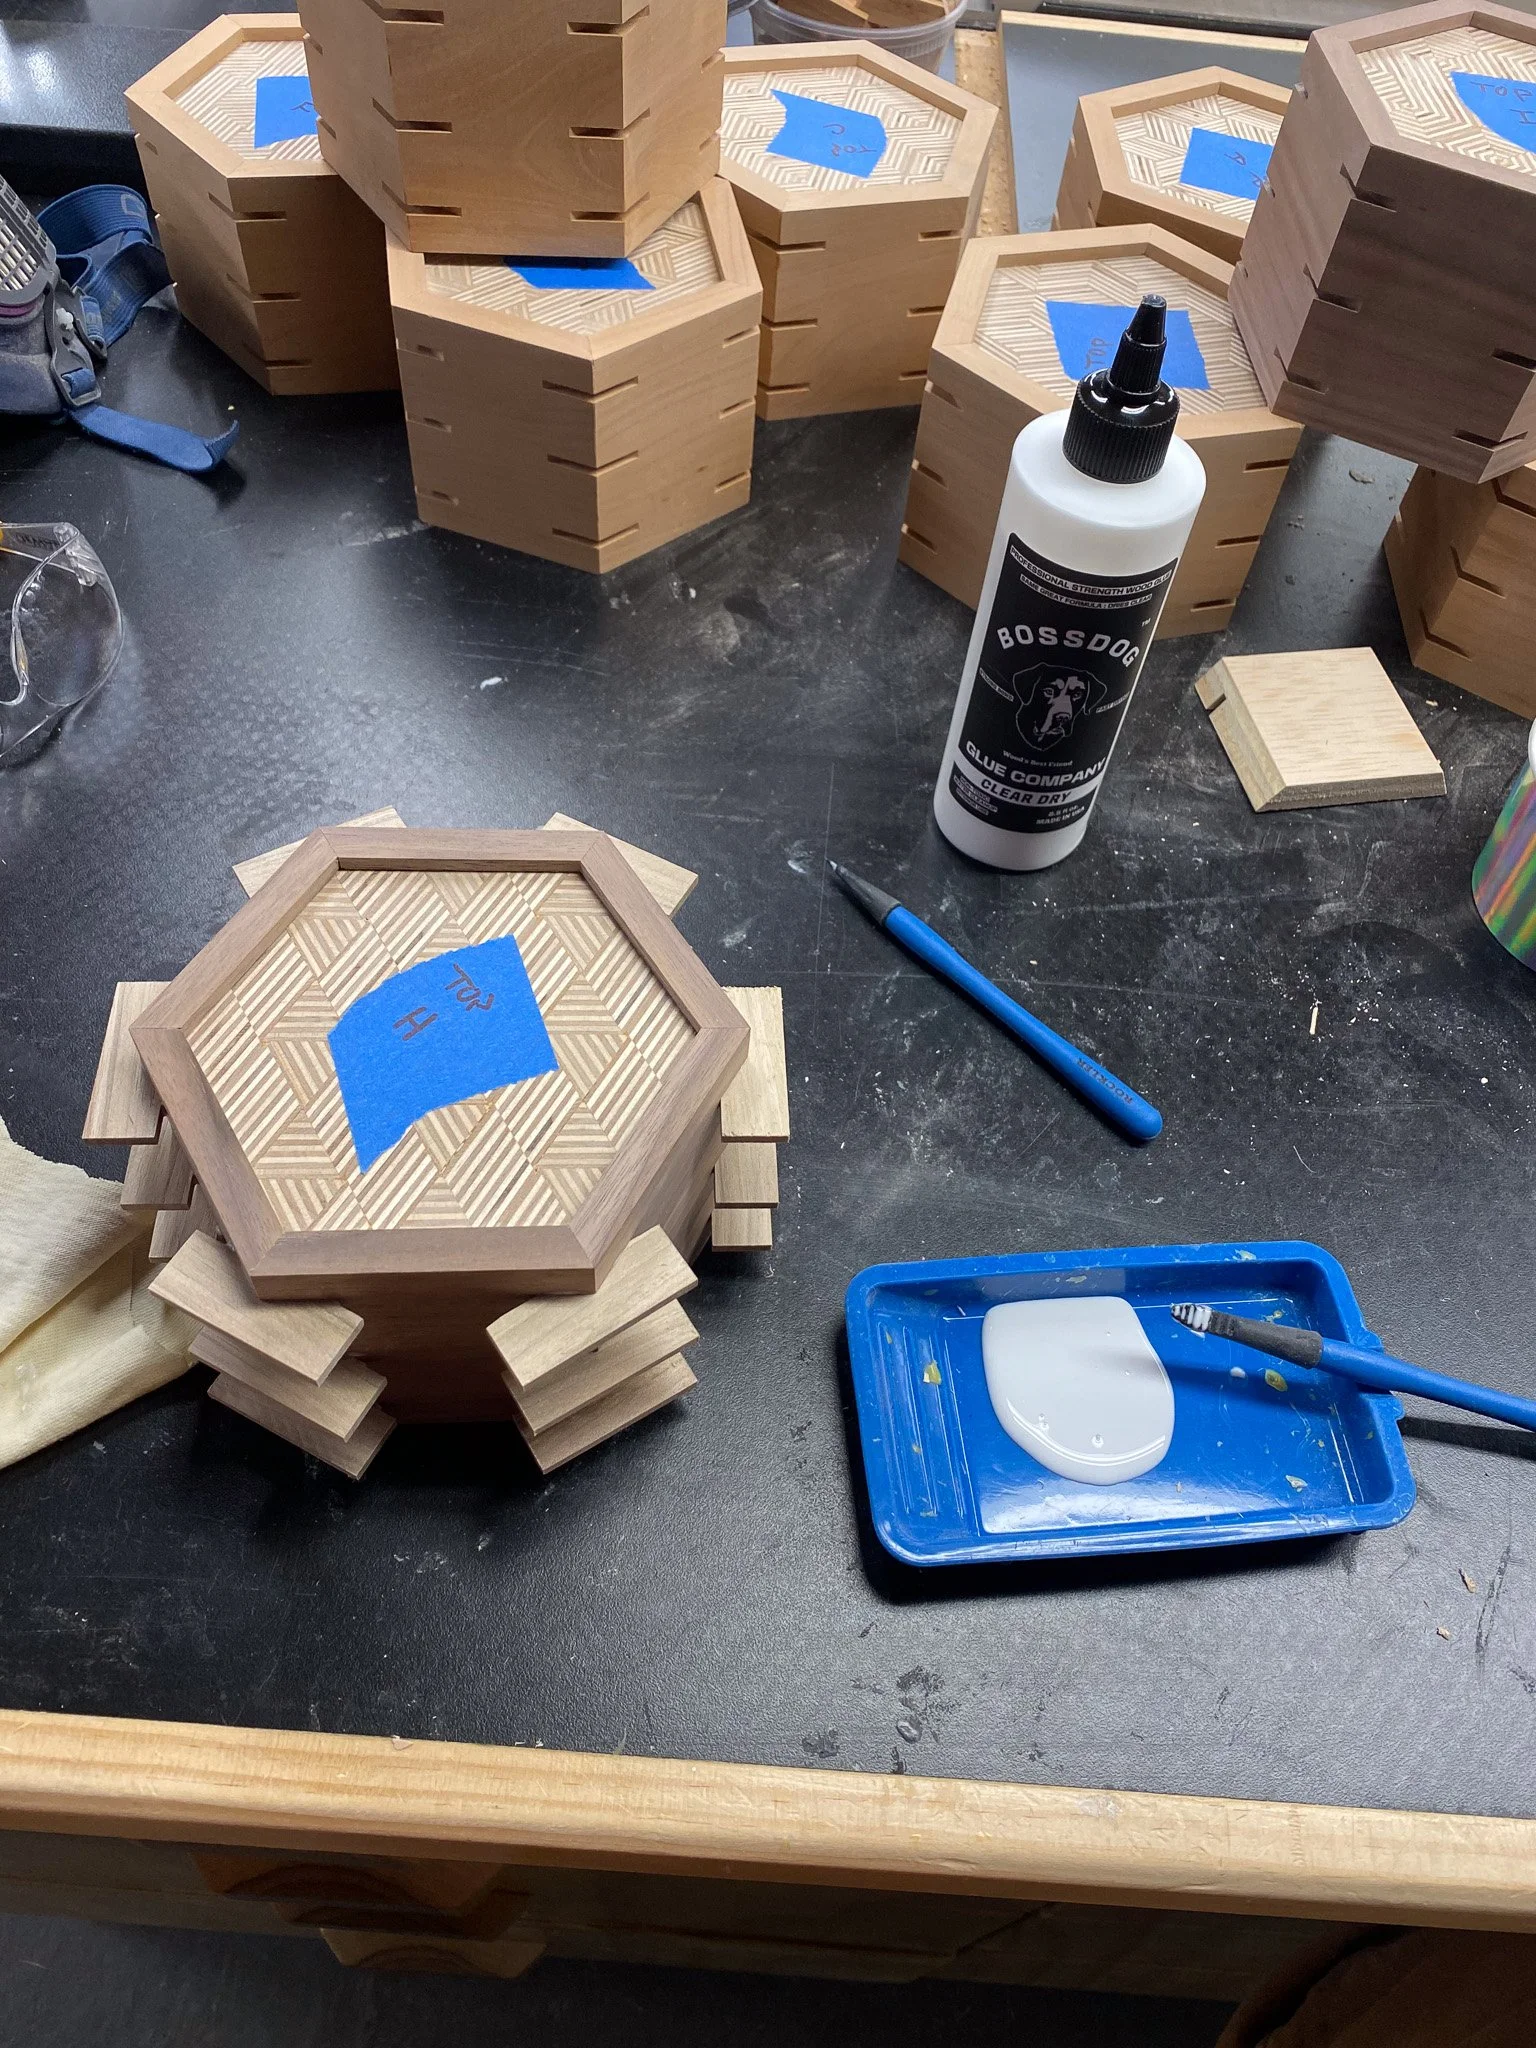
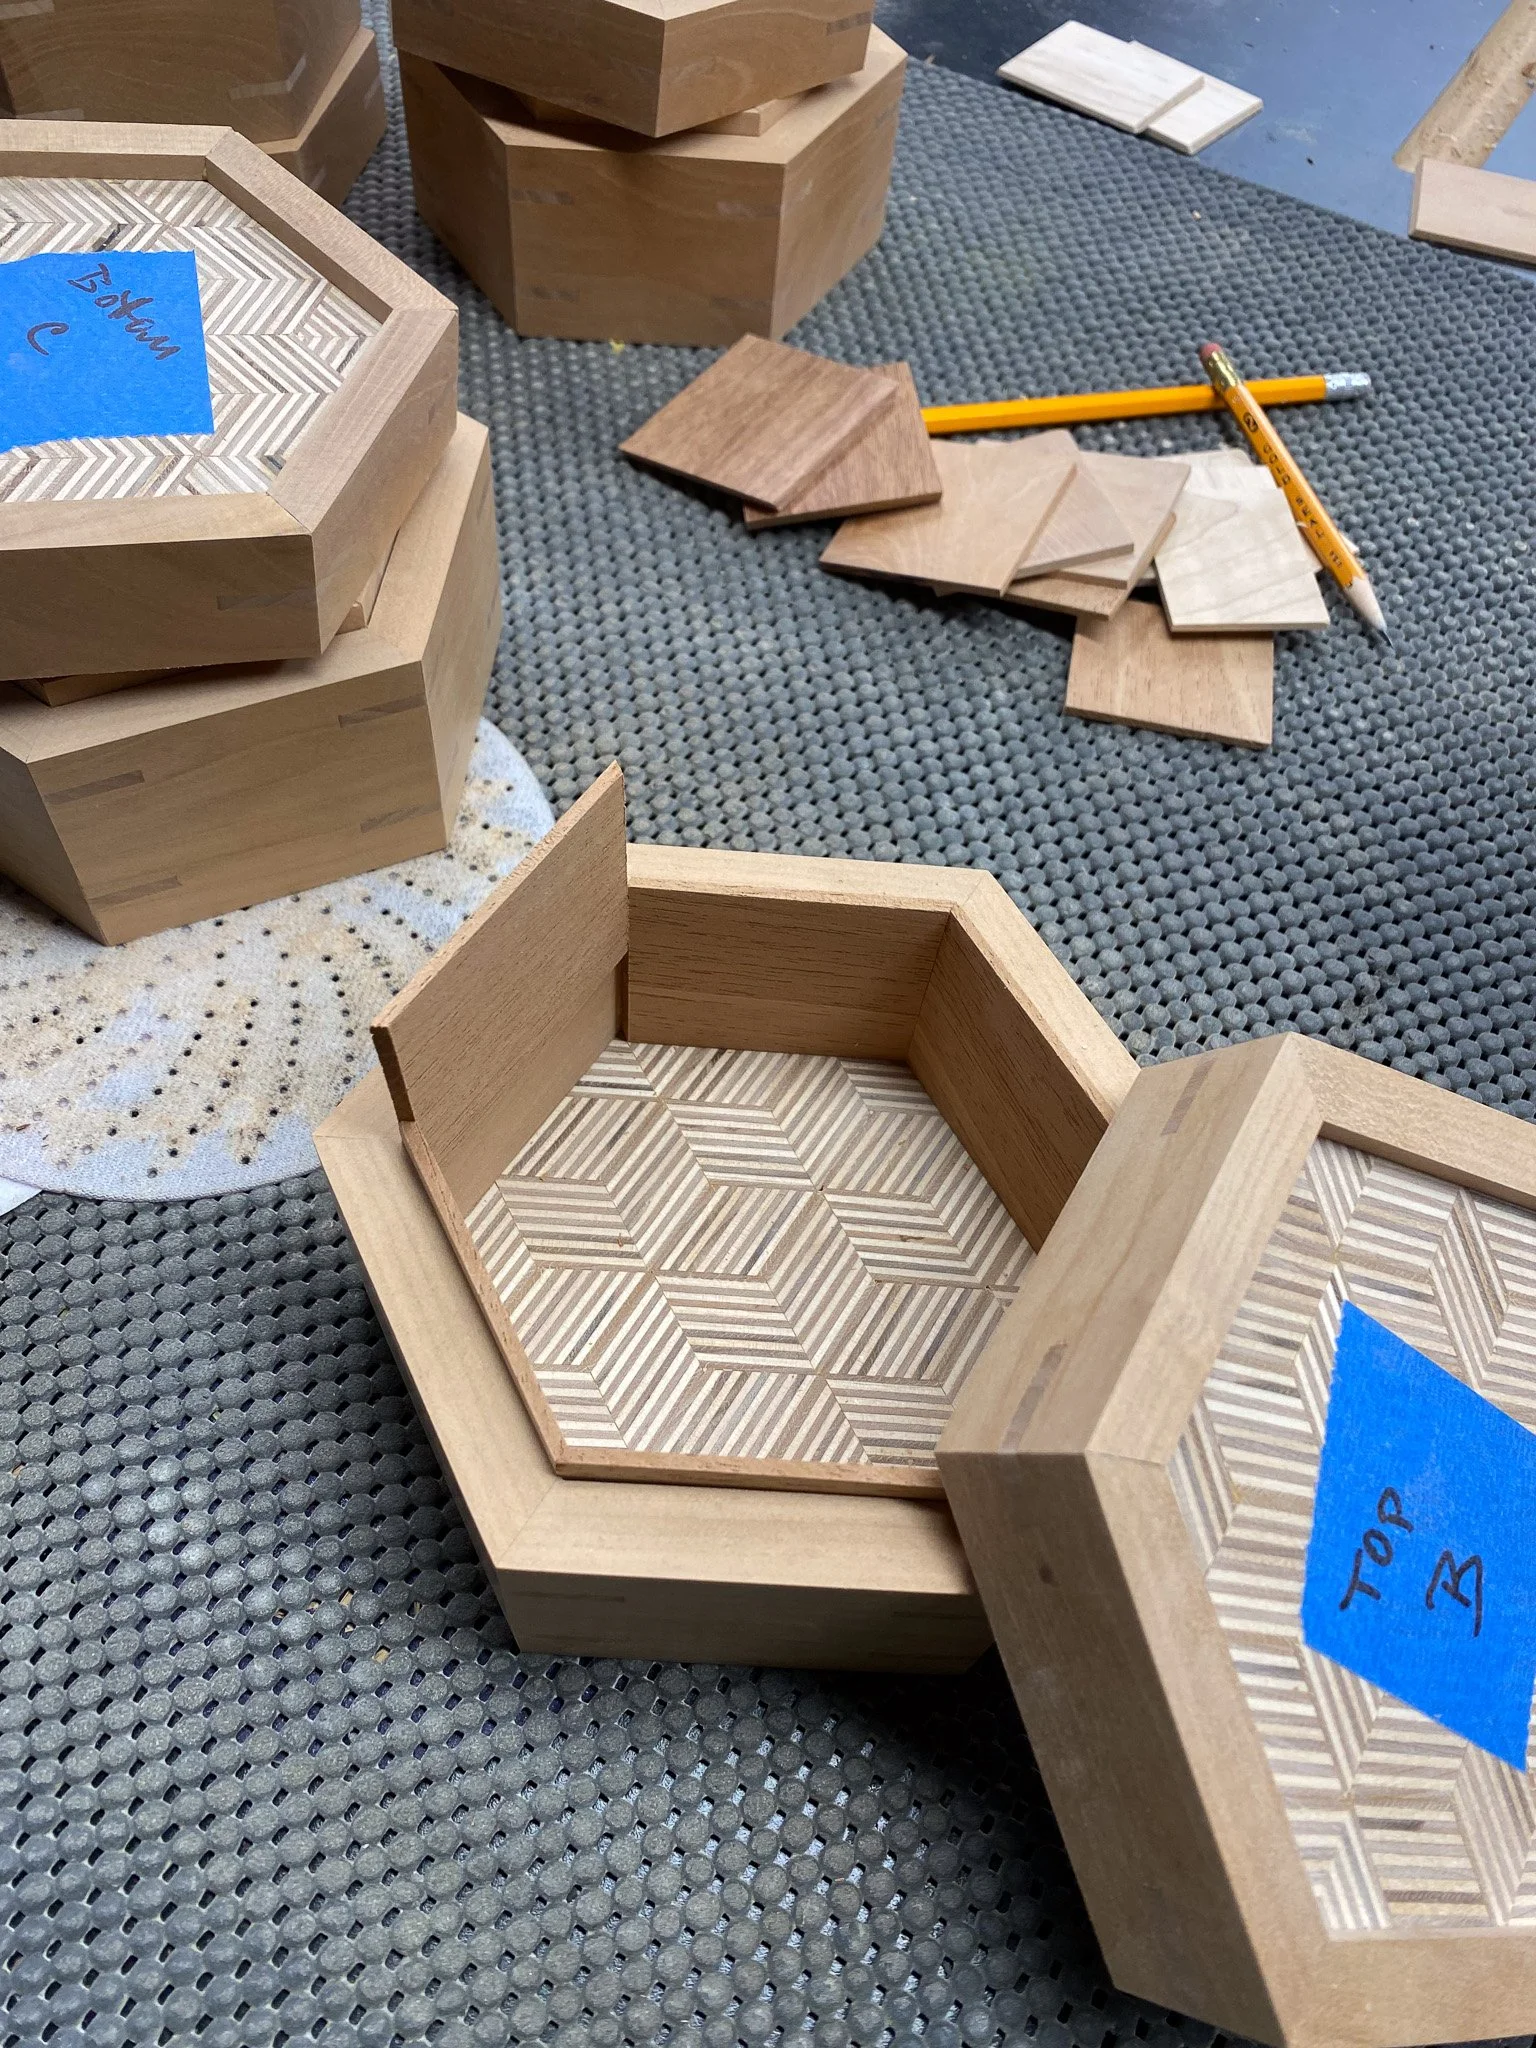
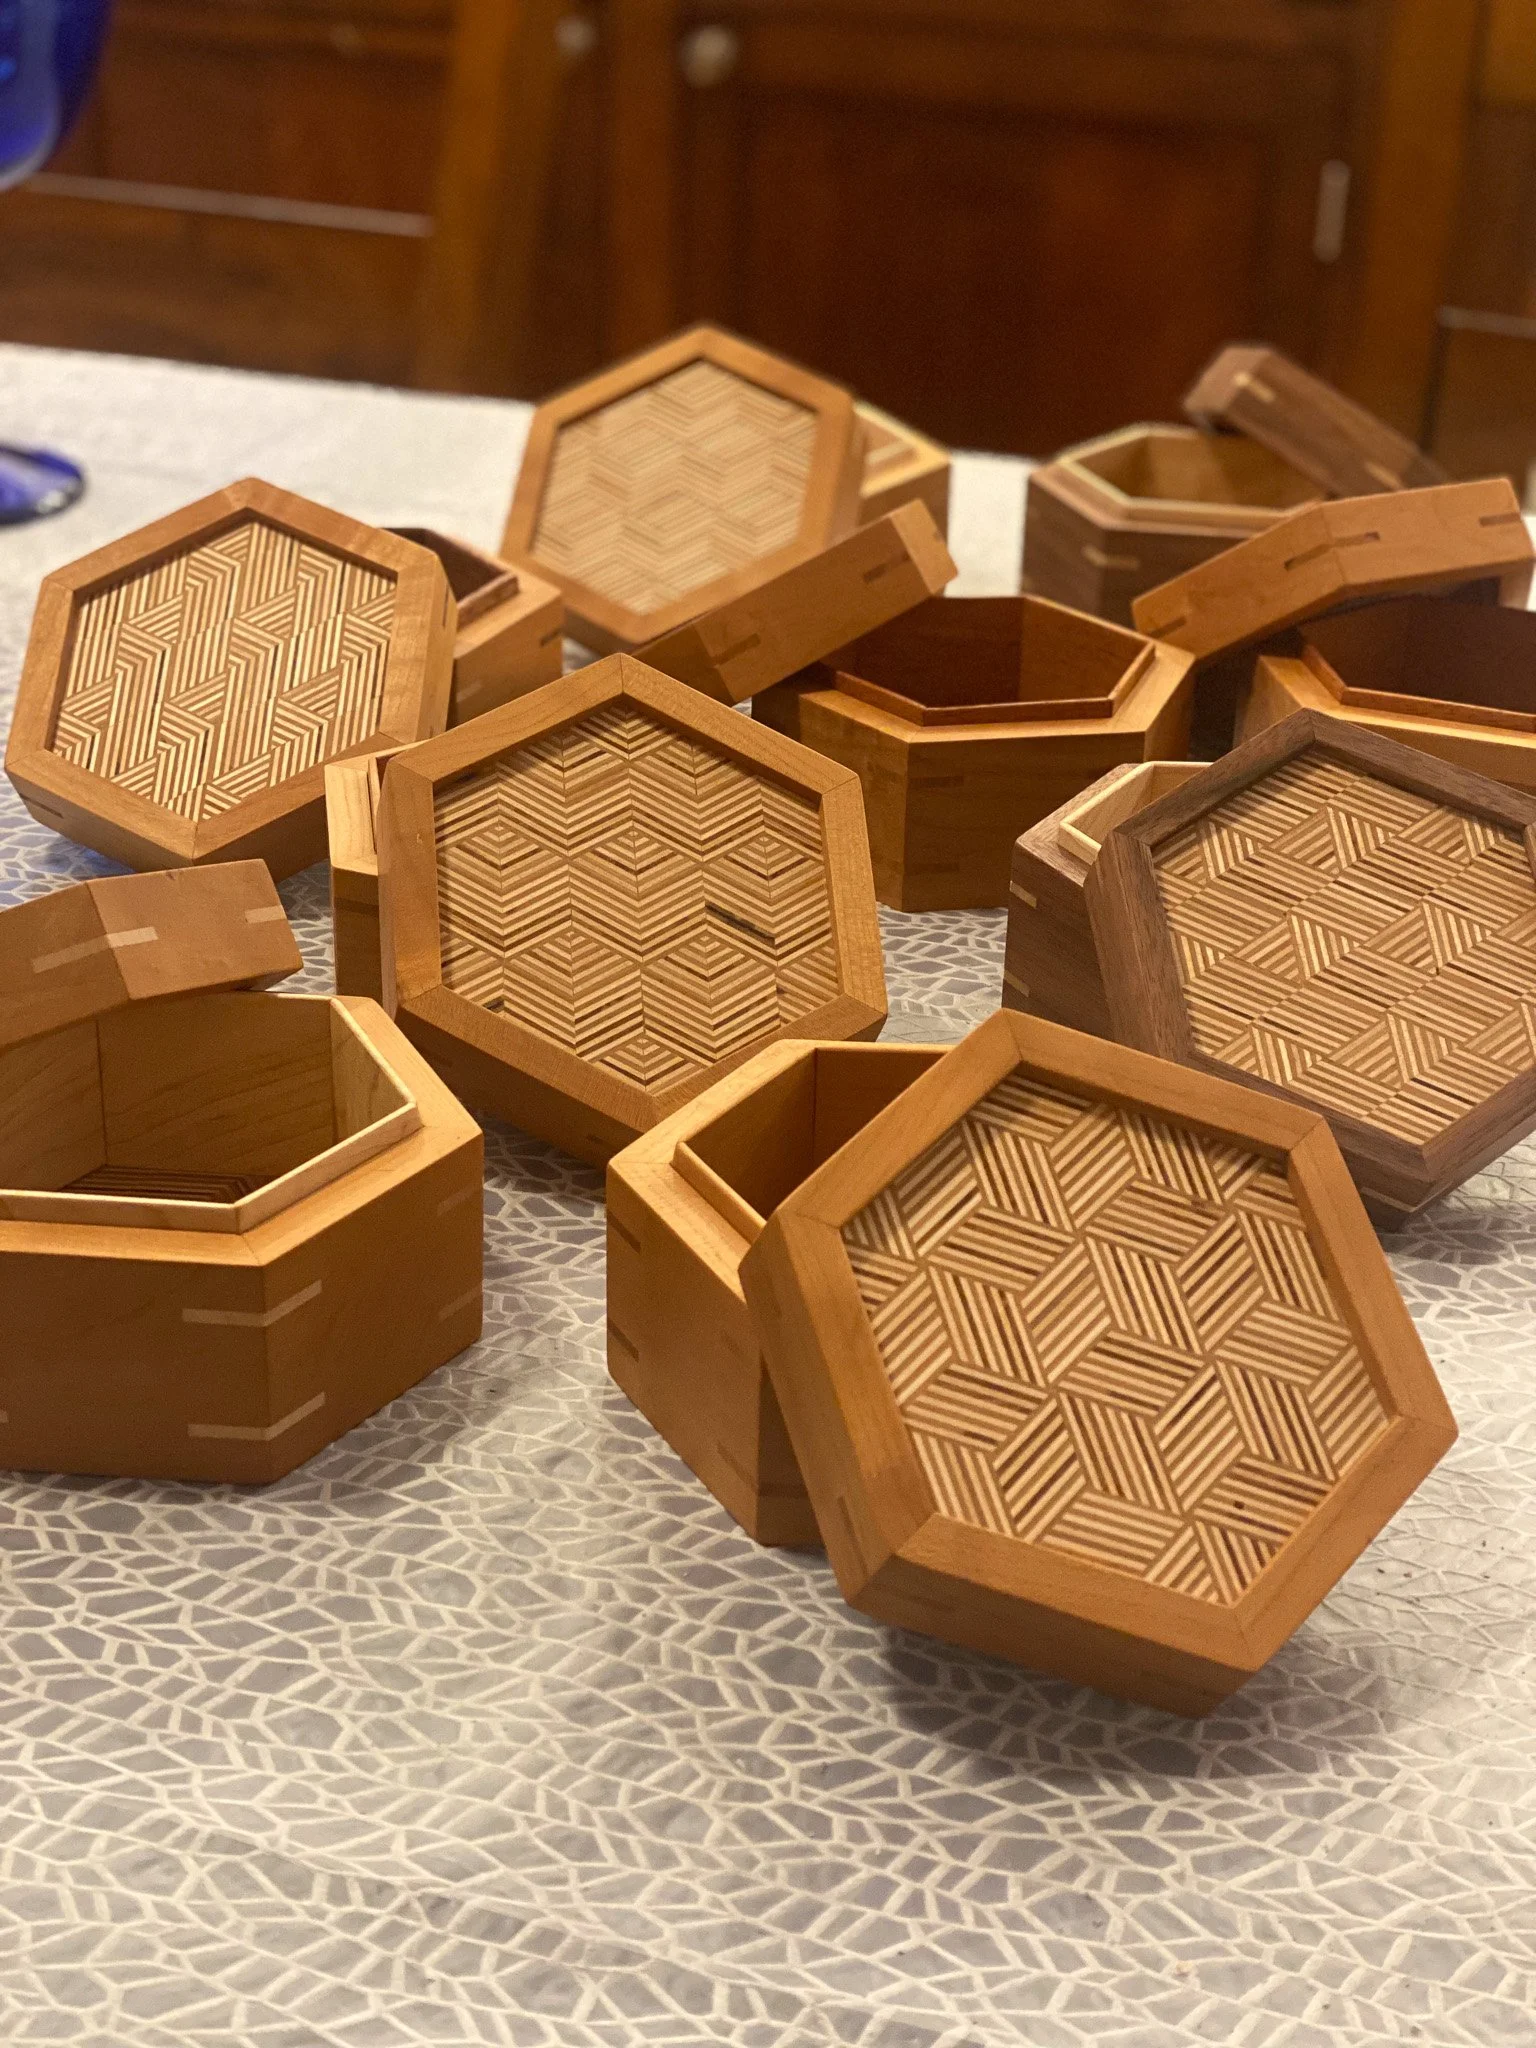
Then I could line up all the pieces against a straight edge, and tape them all together with blue tape. That kept them together so I could apply glue, fit in the top and bottom plywood pieces, and roll it up in to a hexagon. I used the hose clamps again to apply even pressure and waited for the glue to dry. This took some time as I did not have enough clamps to glue them all at once - so glue, wait, and then repeat. In the end, I think the hose clamp approach worked out OK and I was pleased with the joints. By hand I cleaned up any glue squeeze out on the outside and now I had boxes. To make them stronger and add some visual interest to the outside, I wanted to add splines. These are made by cutting a groove where the boards meet at the point of the angle, and then fitting a piece of wood in the groove and gluing it in place. This addition of a wood strip in a different orientation will significantly increase the strength of the joint - and to some, they look nice.

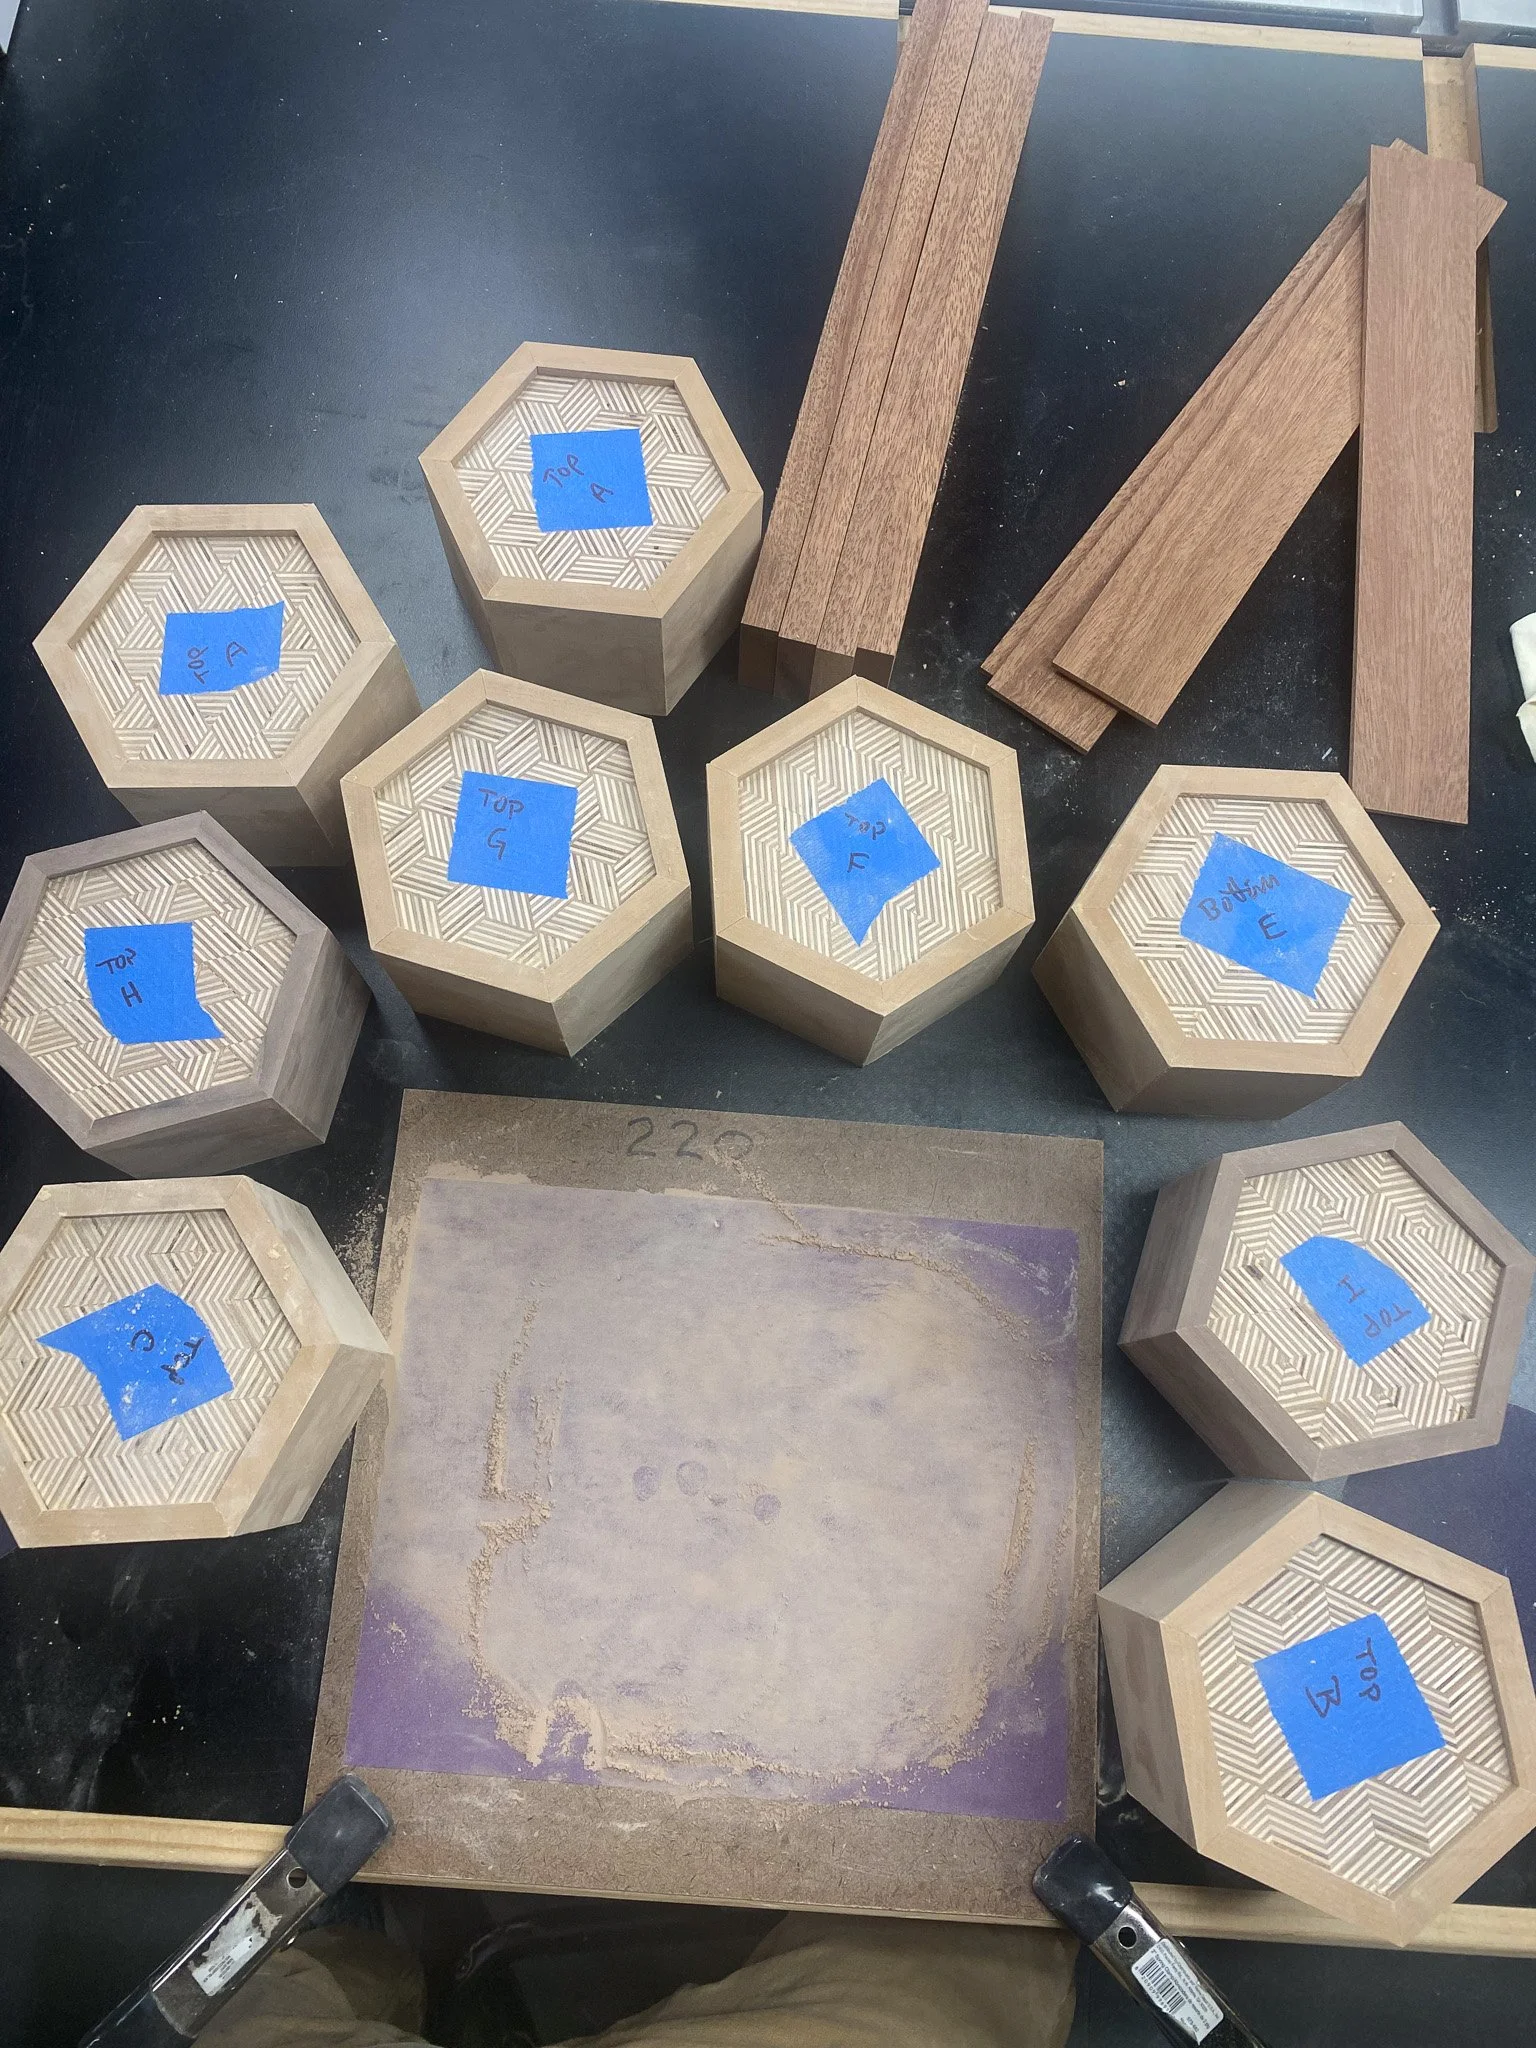
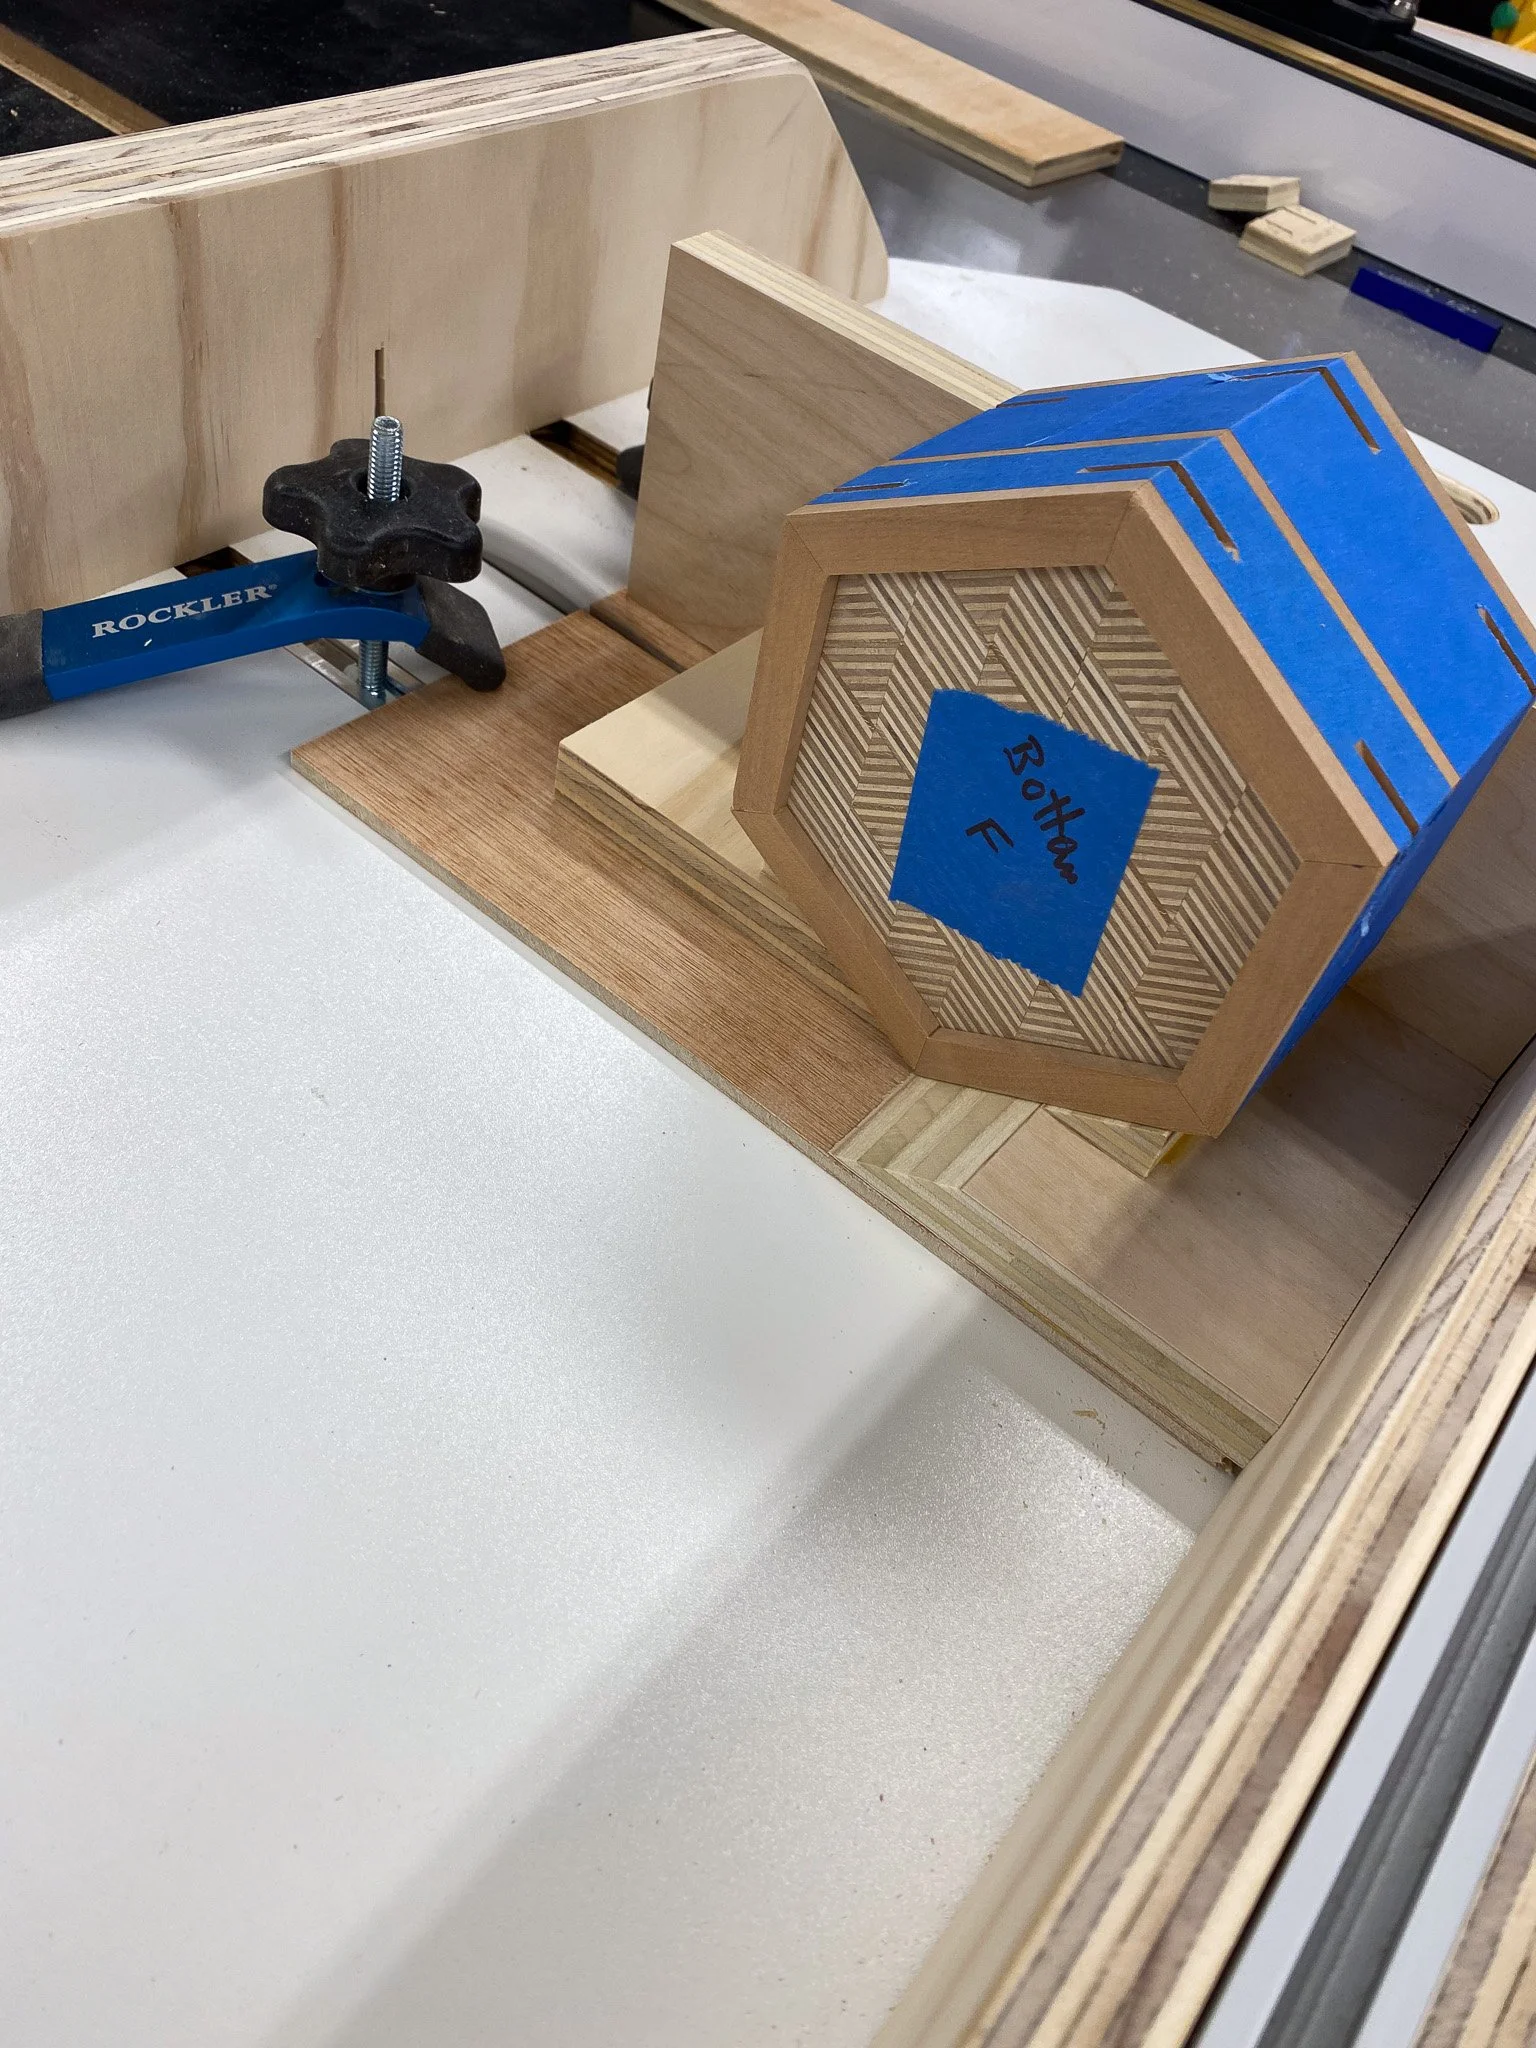
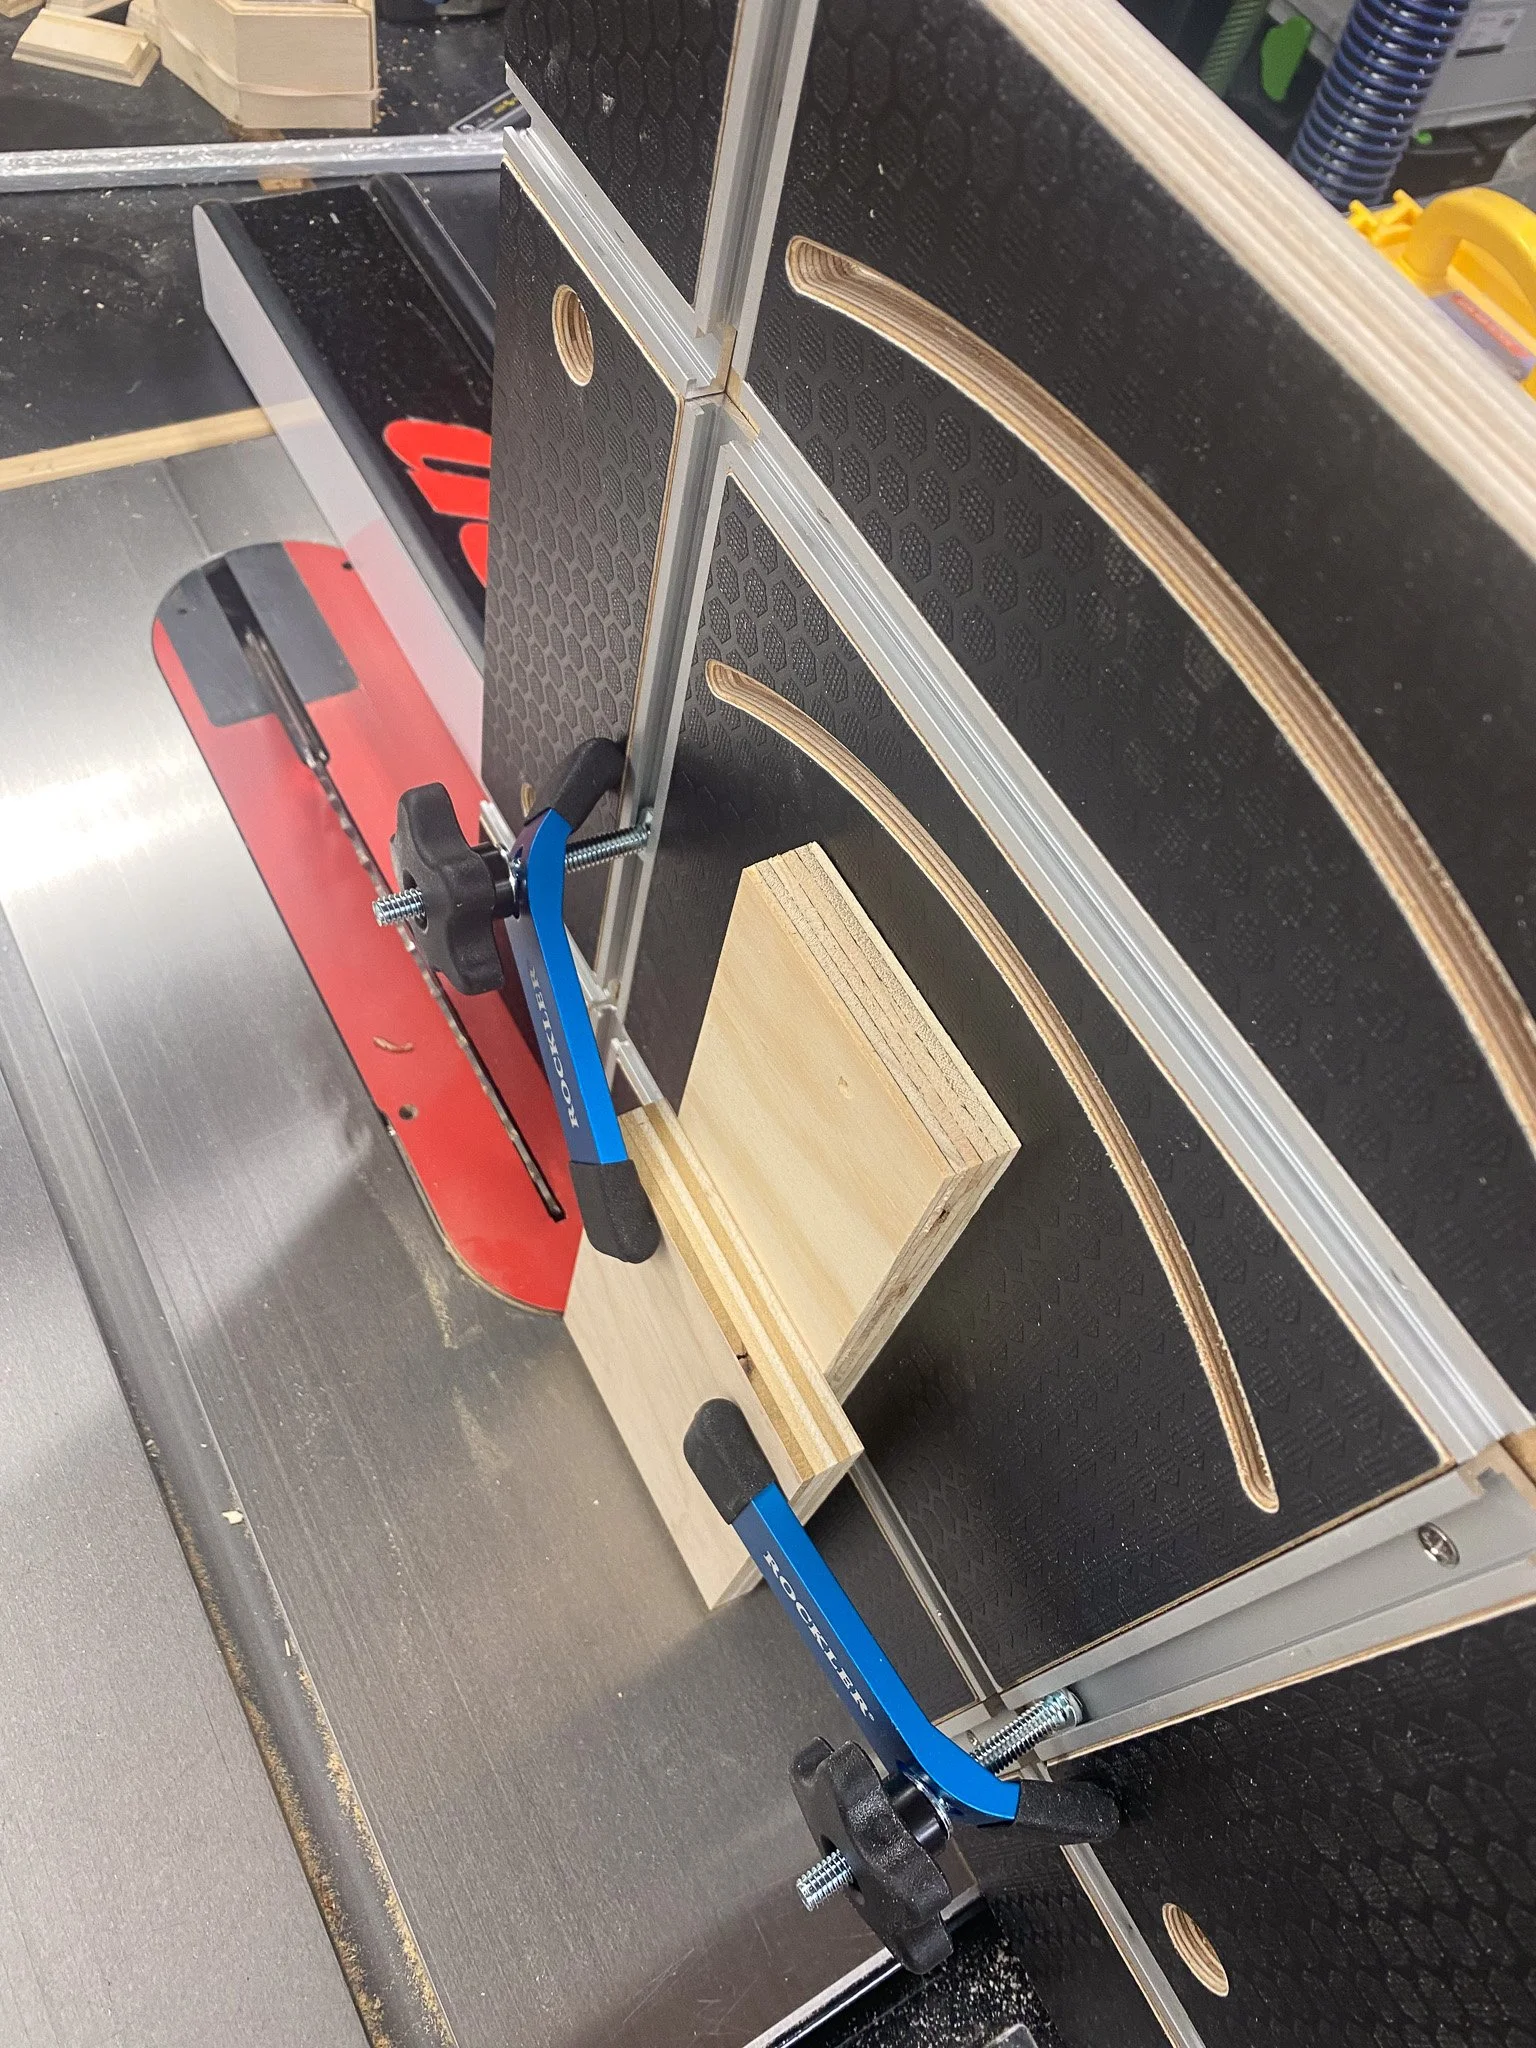
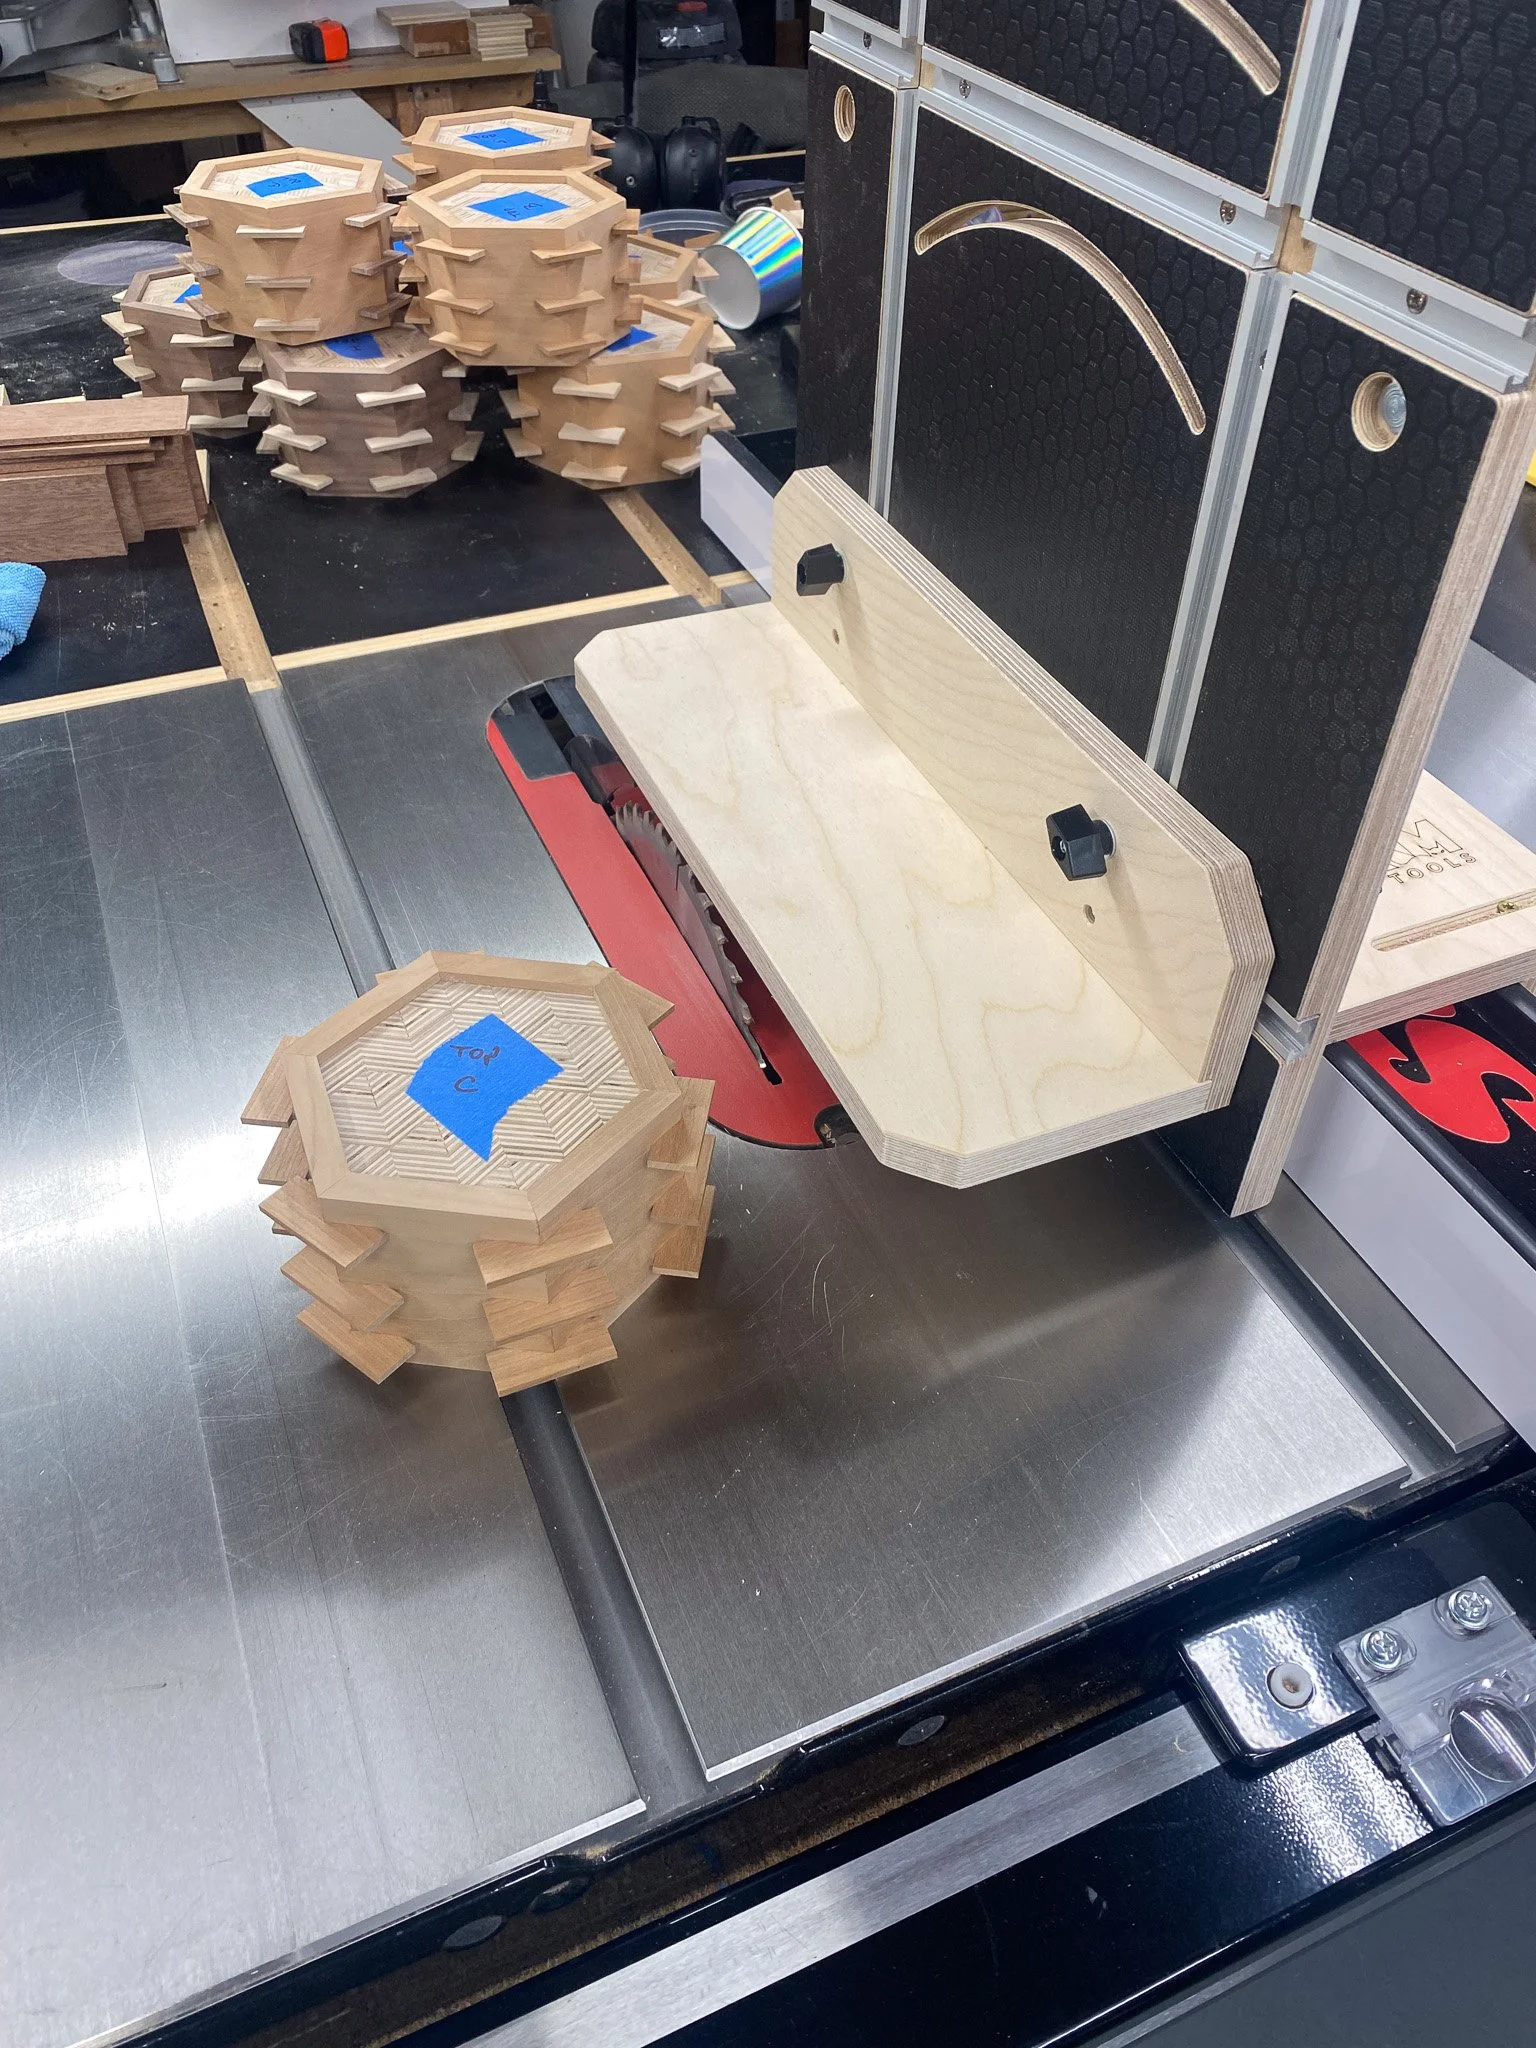
To accurately cut the grooves for the splines I needed to make a jig to hold the boxes as I passed them over the blade of the table saw. The groove goes through the point of the joint along the side of the box, and not the flat face, so it is hard to balance the box on the point and slide it through the saw. The jig would need the complementary angles to allow the box to sit in position as it passed over the blade. This made my brain hurt as I tried to remember my high school geometry and eventually I realized that the angle I needed was too steep for the saw - as it won’t tilt that far. The solution is to hold the board vertically over the blade, rather than laying flat on the table like usual, and then you can cut those really steep angles - but that also requires a jig to do safely. Luckily I had just taken delivery of the Katz Moses/Bourbon Moth Universal Jig that I had ordered months earlier on pre order (nifty jig). It would be perfect for this cut - and led to a side project of putting that together.
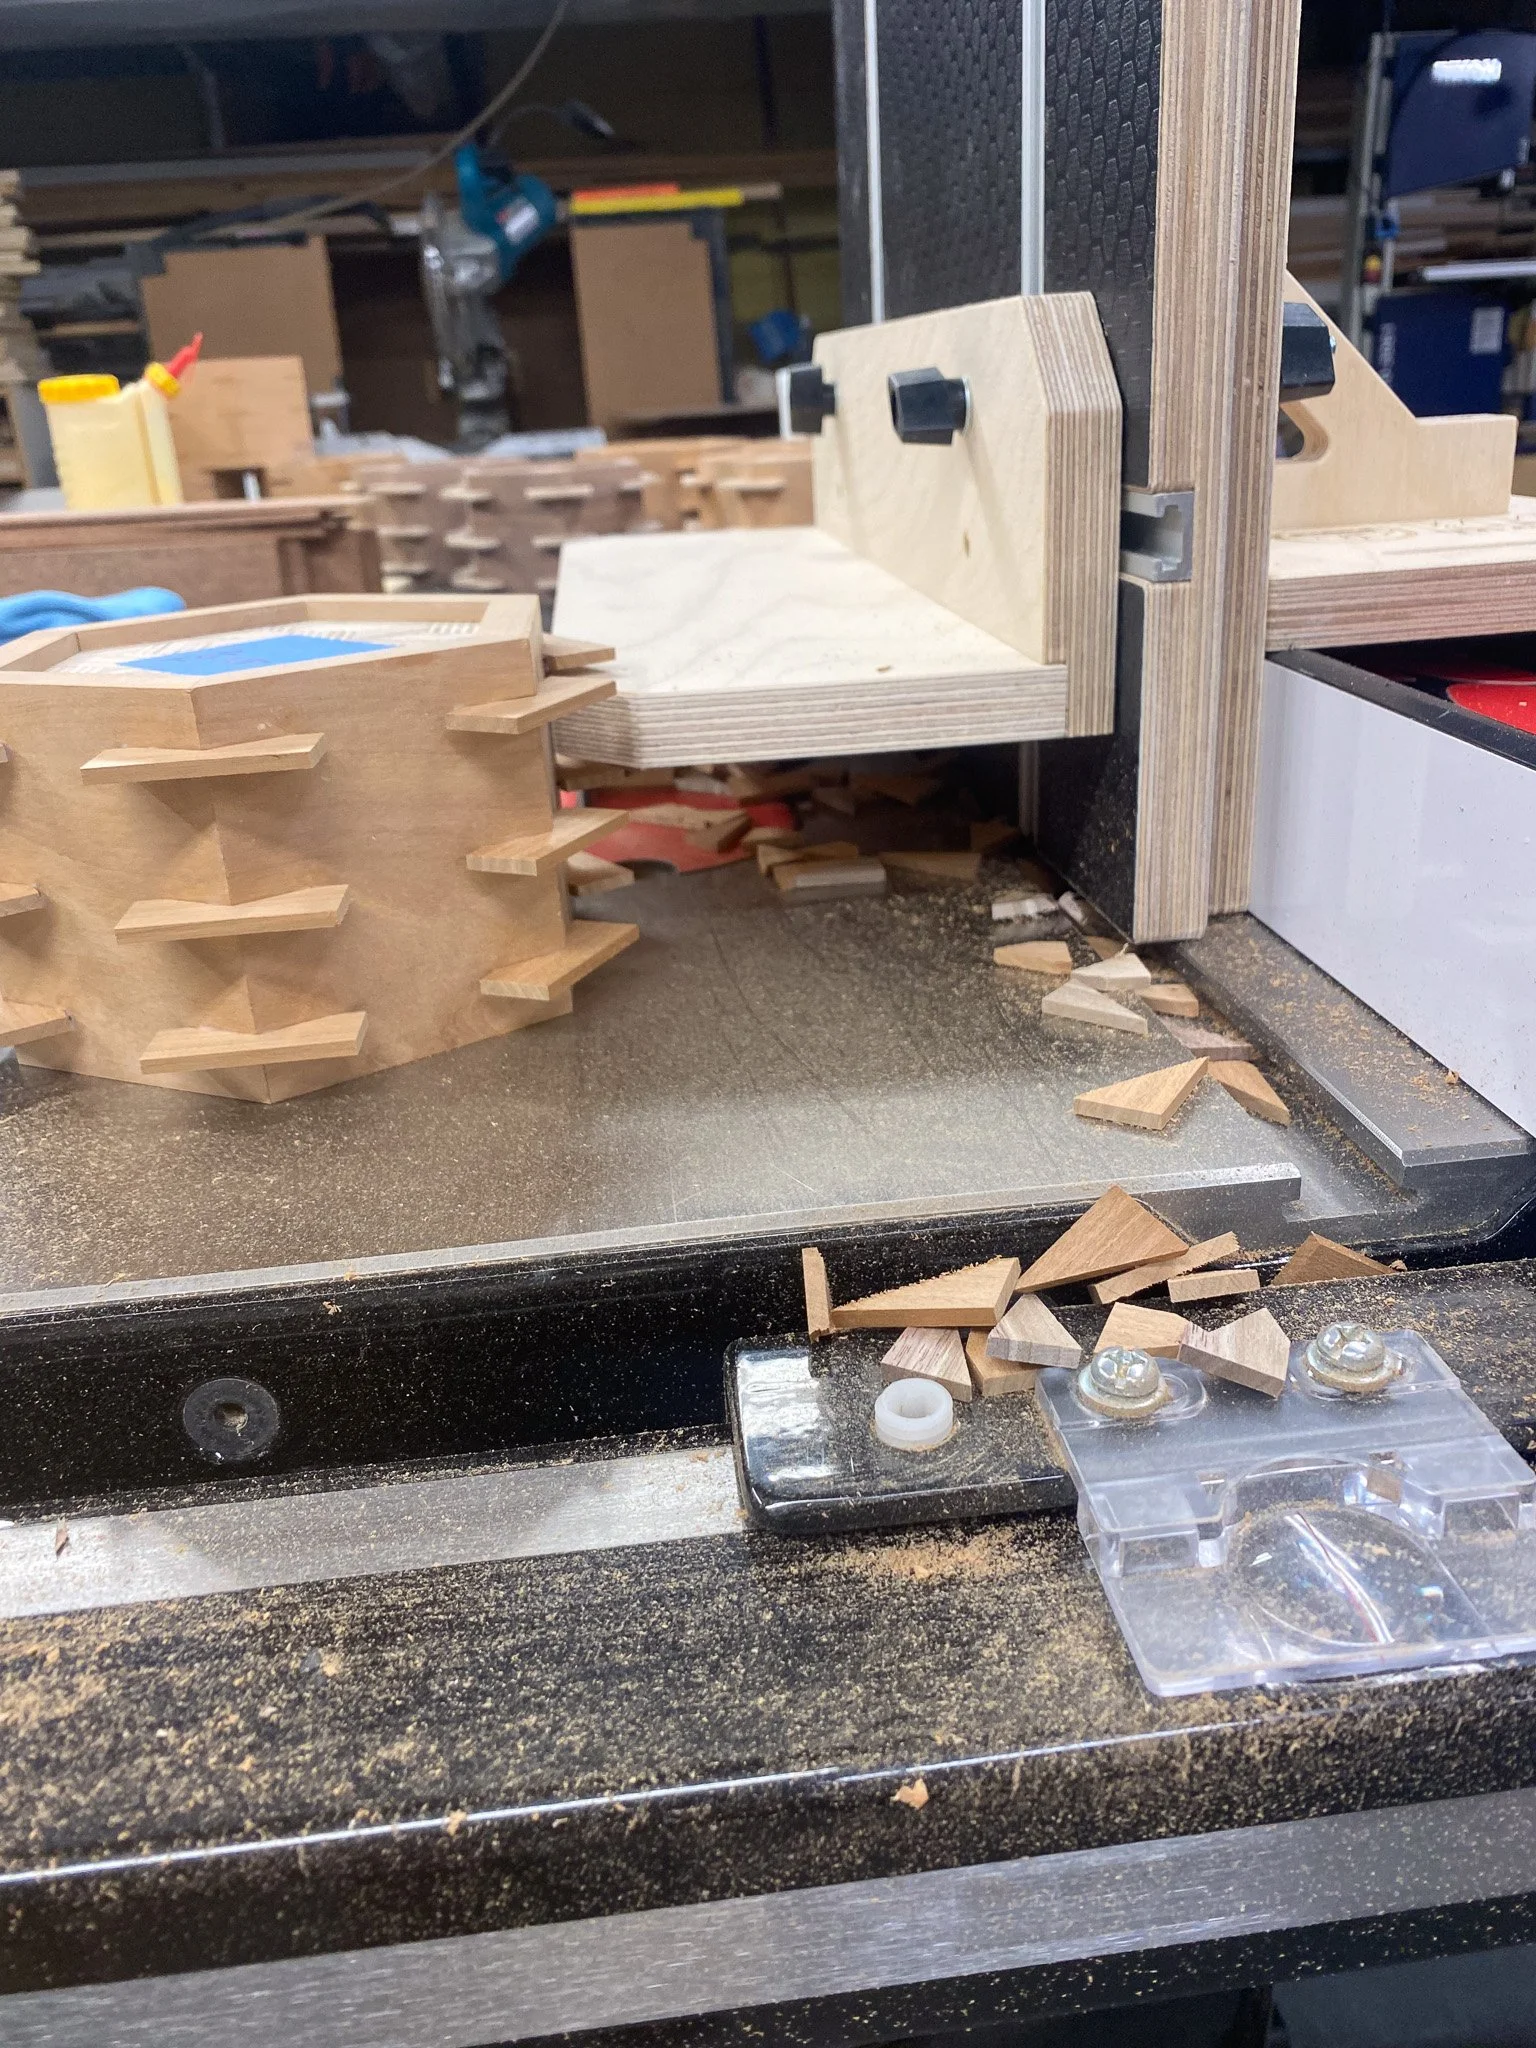
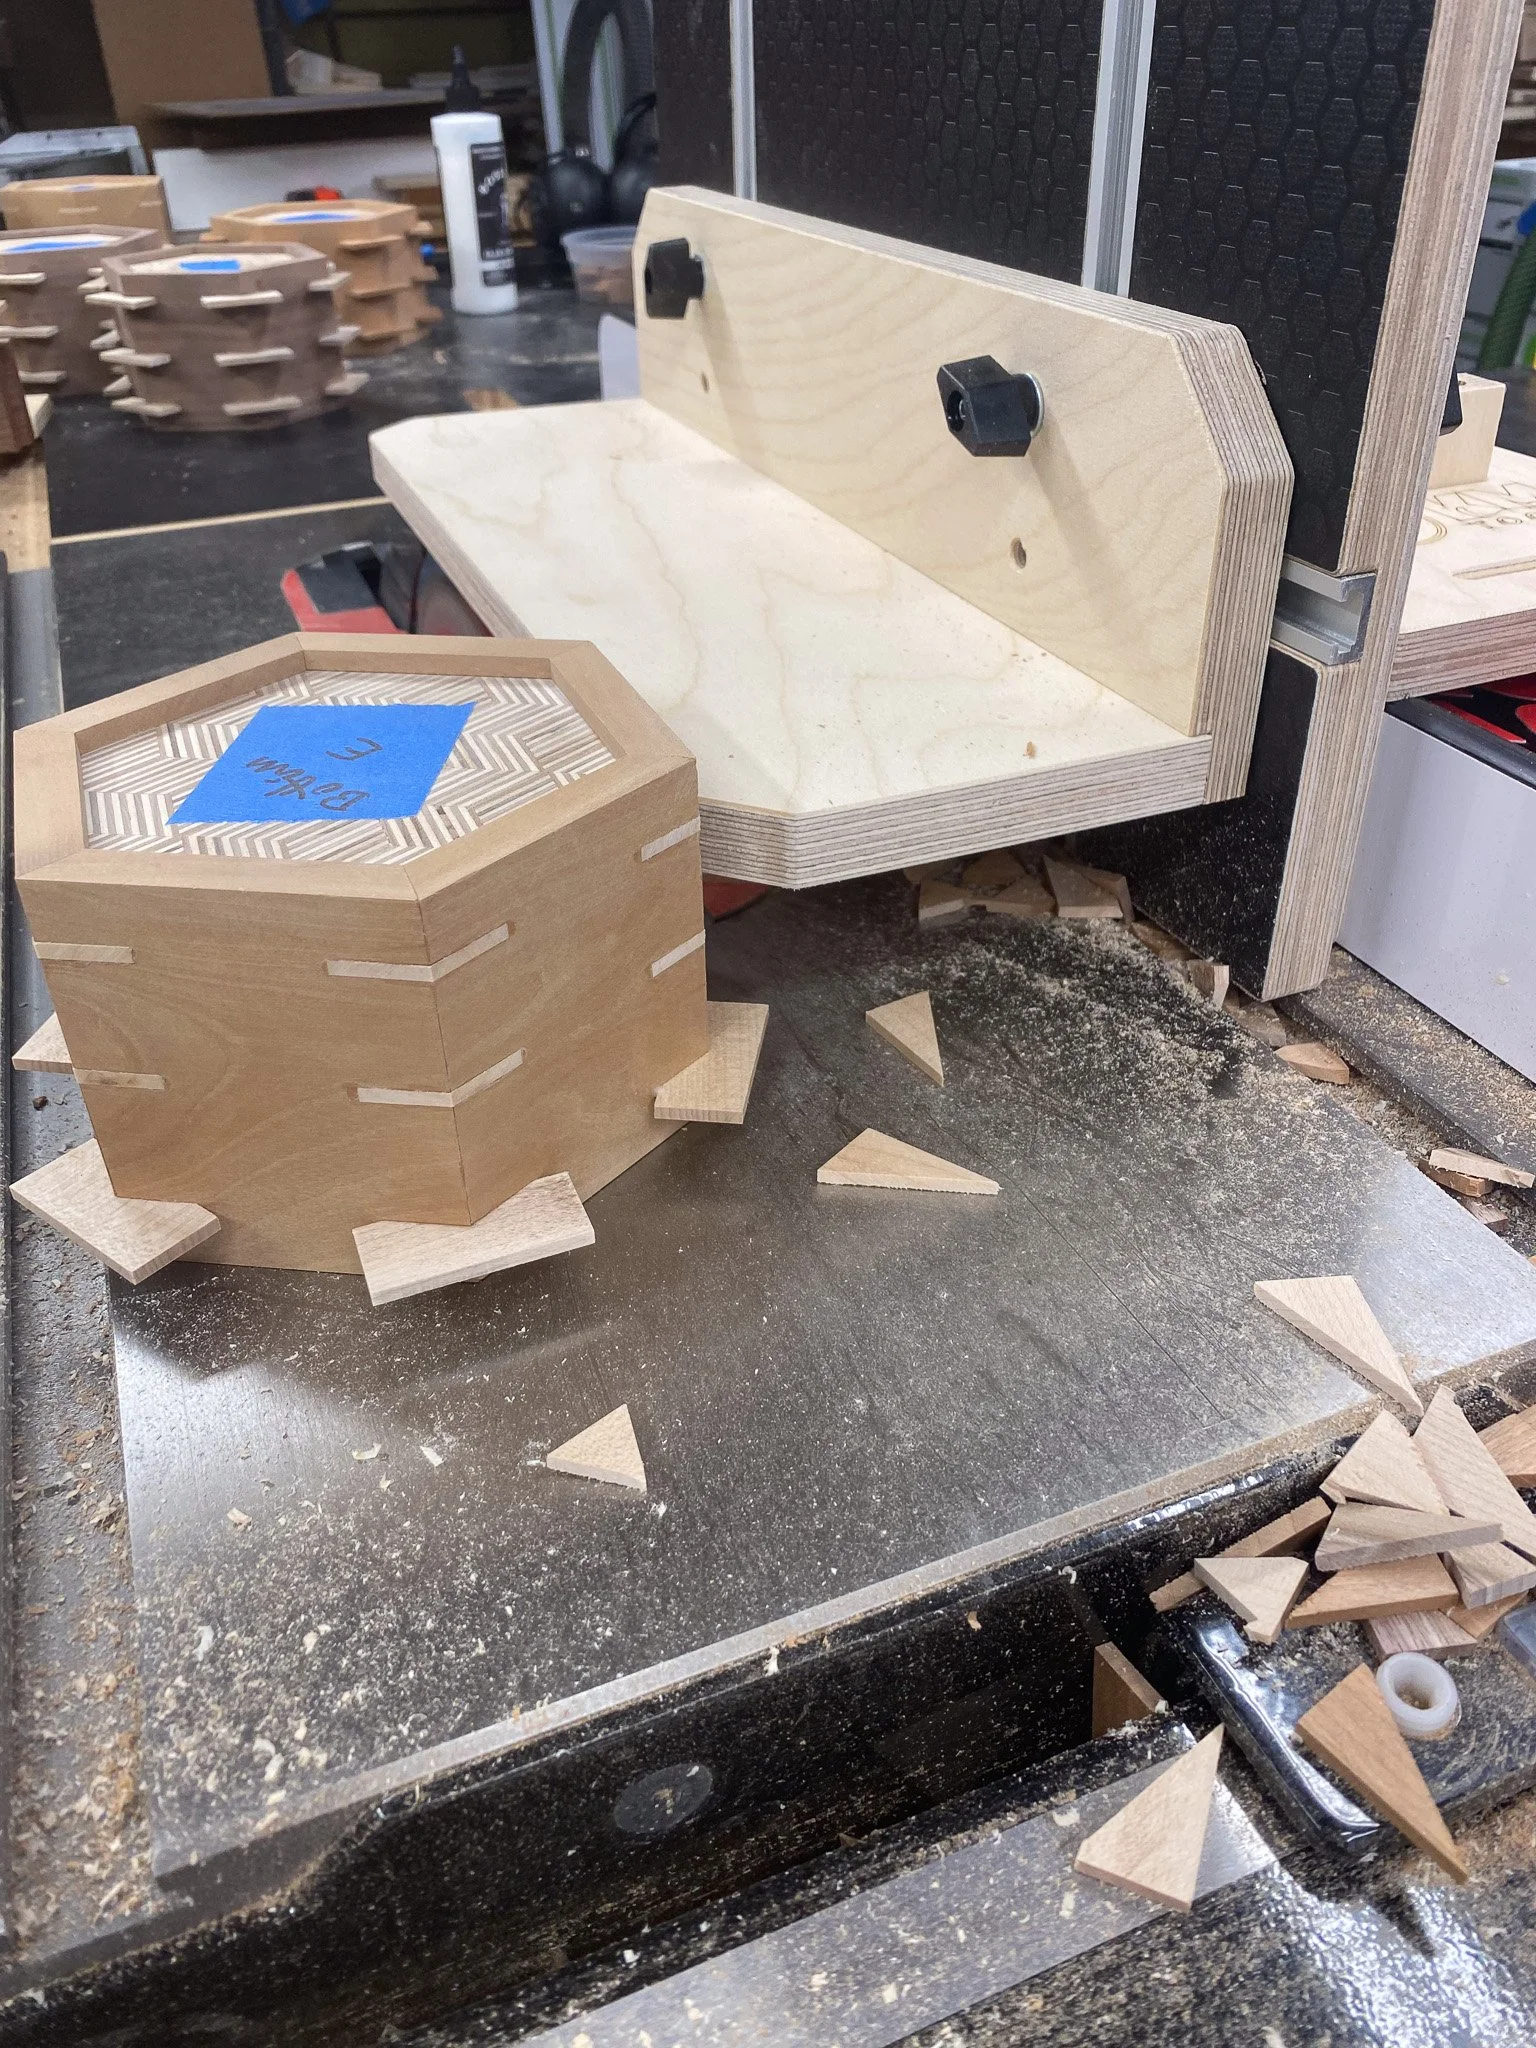
Once assembled, a few quick cuts and then I could build my jig for splines. Some more scraps and superglue later, and I was ready. Over and over I checked my math to be sure the splines would be evenly spaced after the lid was separated from the bottom and then I made my first cut - and quickly realized it was wrong. After checking and rechecking, I had set the box down one way and picked it back up differently and made the cut on the wrong side. Ooops. I finished all the cuts on each of the 9 boxes with no more issues, and I have shown the boxes to a number of folks and so far, no one has picked out which one had the issue, so I think I wriggled out of that one - but I can find it. These things happen. Next was deciding what wood to use for the actual splines. I decided to mix that up as well. For the walnut boxes I used walnut splines, but the sapwood, which is much lighter in color, rather than the normal brown heartwood everyone thinks of when they think walnut. I used cherry splines on some of the cherry boxes, and for others I used maple to enhance the contrast. I glued in all the splines, there were 162 of them (3 per joint, 6 joints per hexagonal box, and there were 9 boxes). Normally I cut them off by hand - but that requires a cut on each side of the spline, or over 300 cuts. Ugh. Then I remembered that watching a video about the fancy jig I just got, that Jason Hibbs of Bourbon Moth Woodworking, made a small box with splines, and he used the L fence to cut them off. Seemed like a great opportunity to try that out.

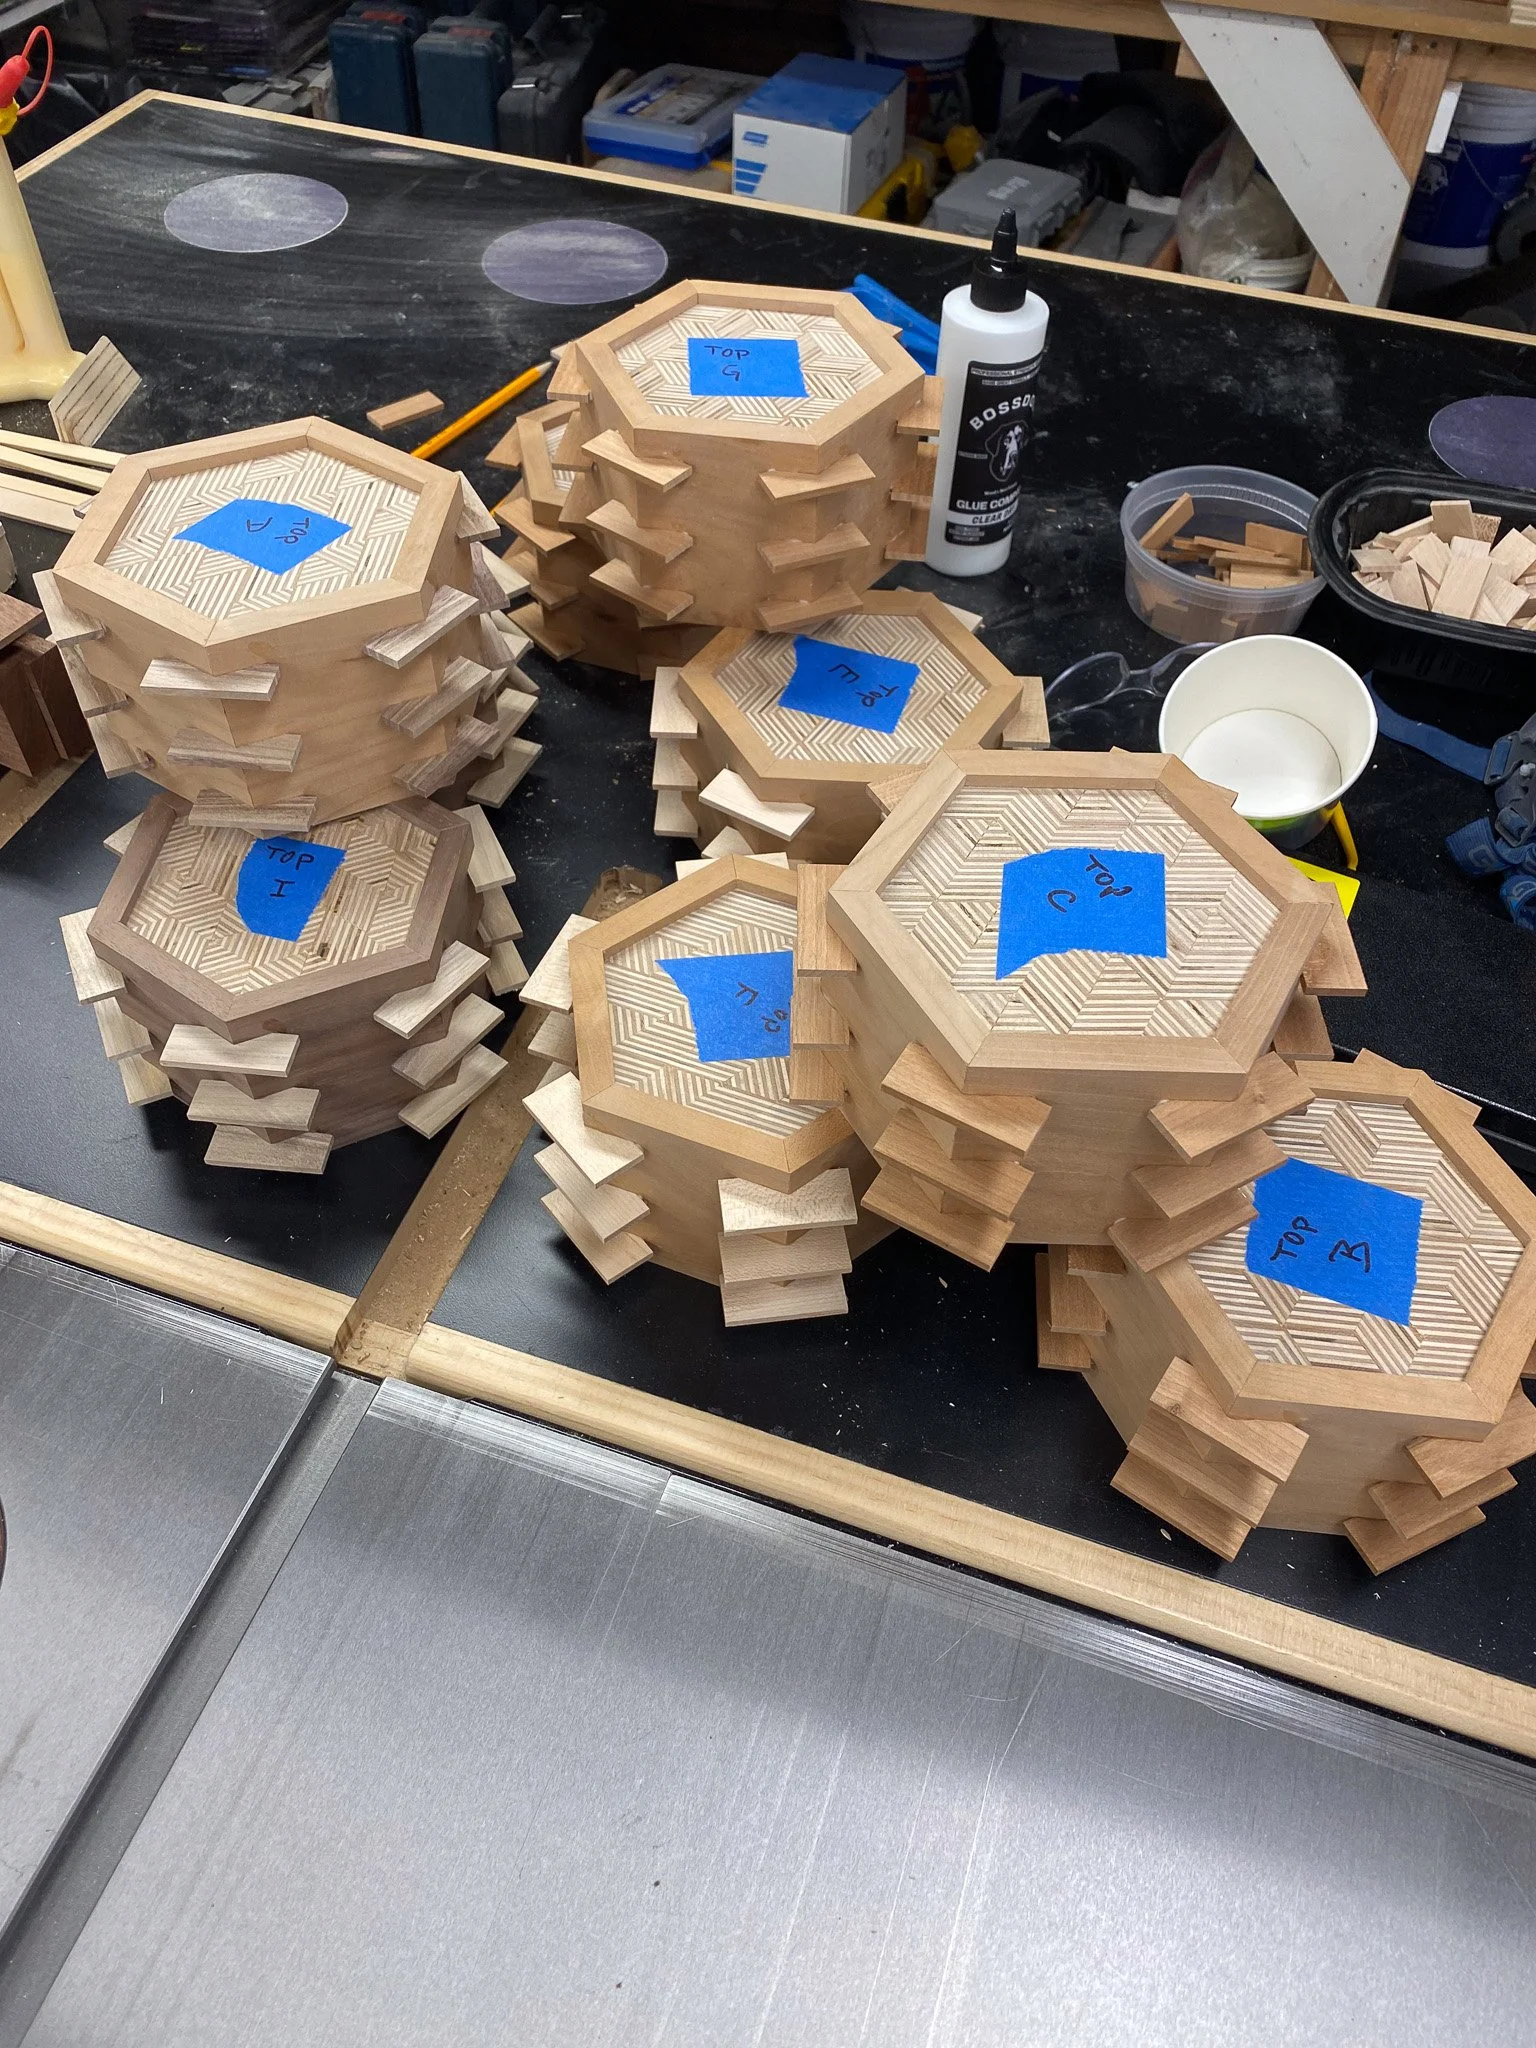
Bascially the L fence sticks out from the vertical panel of the jig and goes over the blade of the table saw. The idea is to line that up perfectly to the edge of the blade and then run the box along the L fence. That allows the box to ever so slightly miss the blade, but the splines sticking out get cut off. I was nervous about this, but after pondering for a bit, I just went for it. Turned out, it worked great! I made a pile of little offcuts, but in hardly any time, I had them all cut off and ready for some sanding. It was so much faster than doing it by hand with a flush trim saw. So much faster. Then I could sand the outside flat faces, and get ready for the nest step.
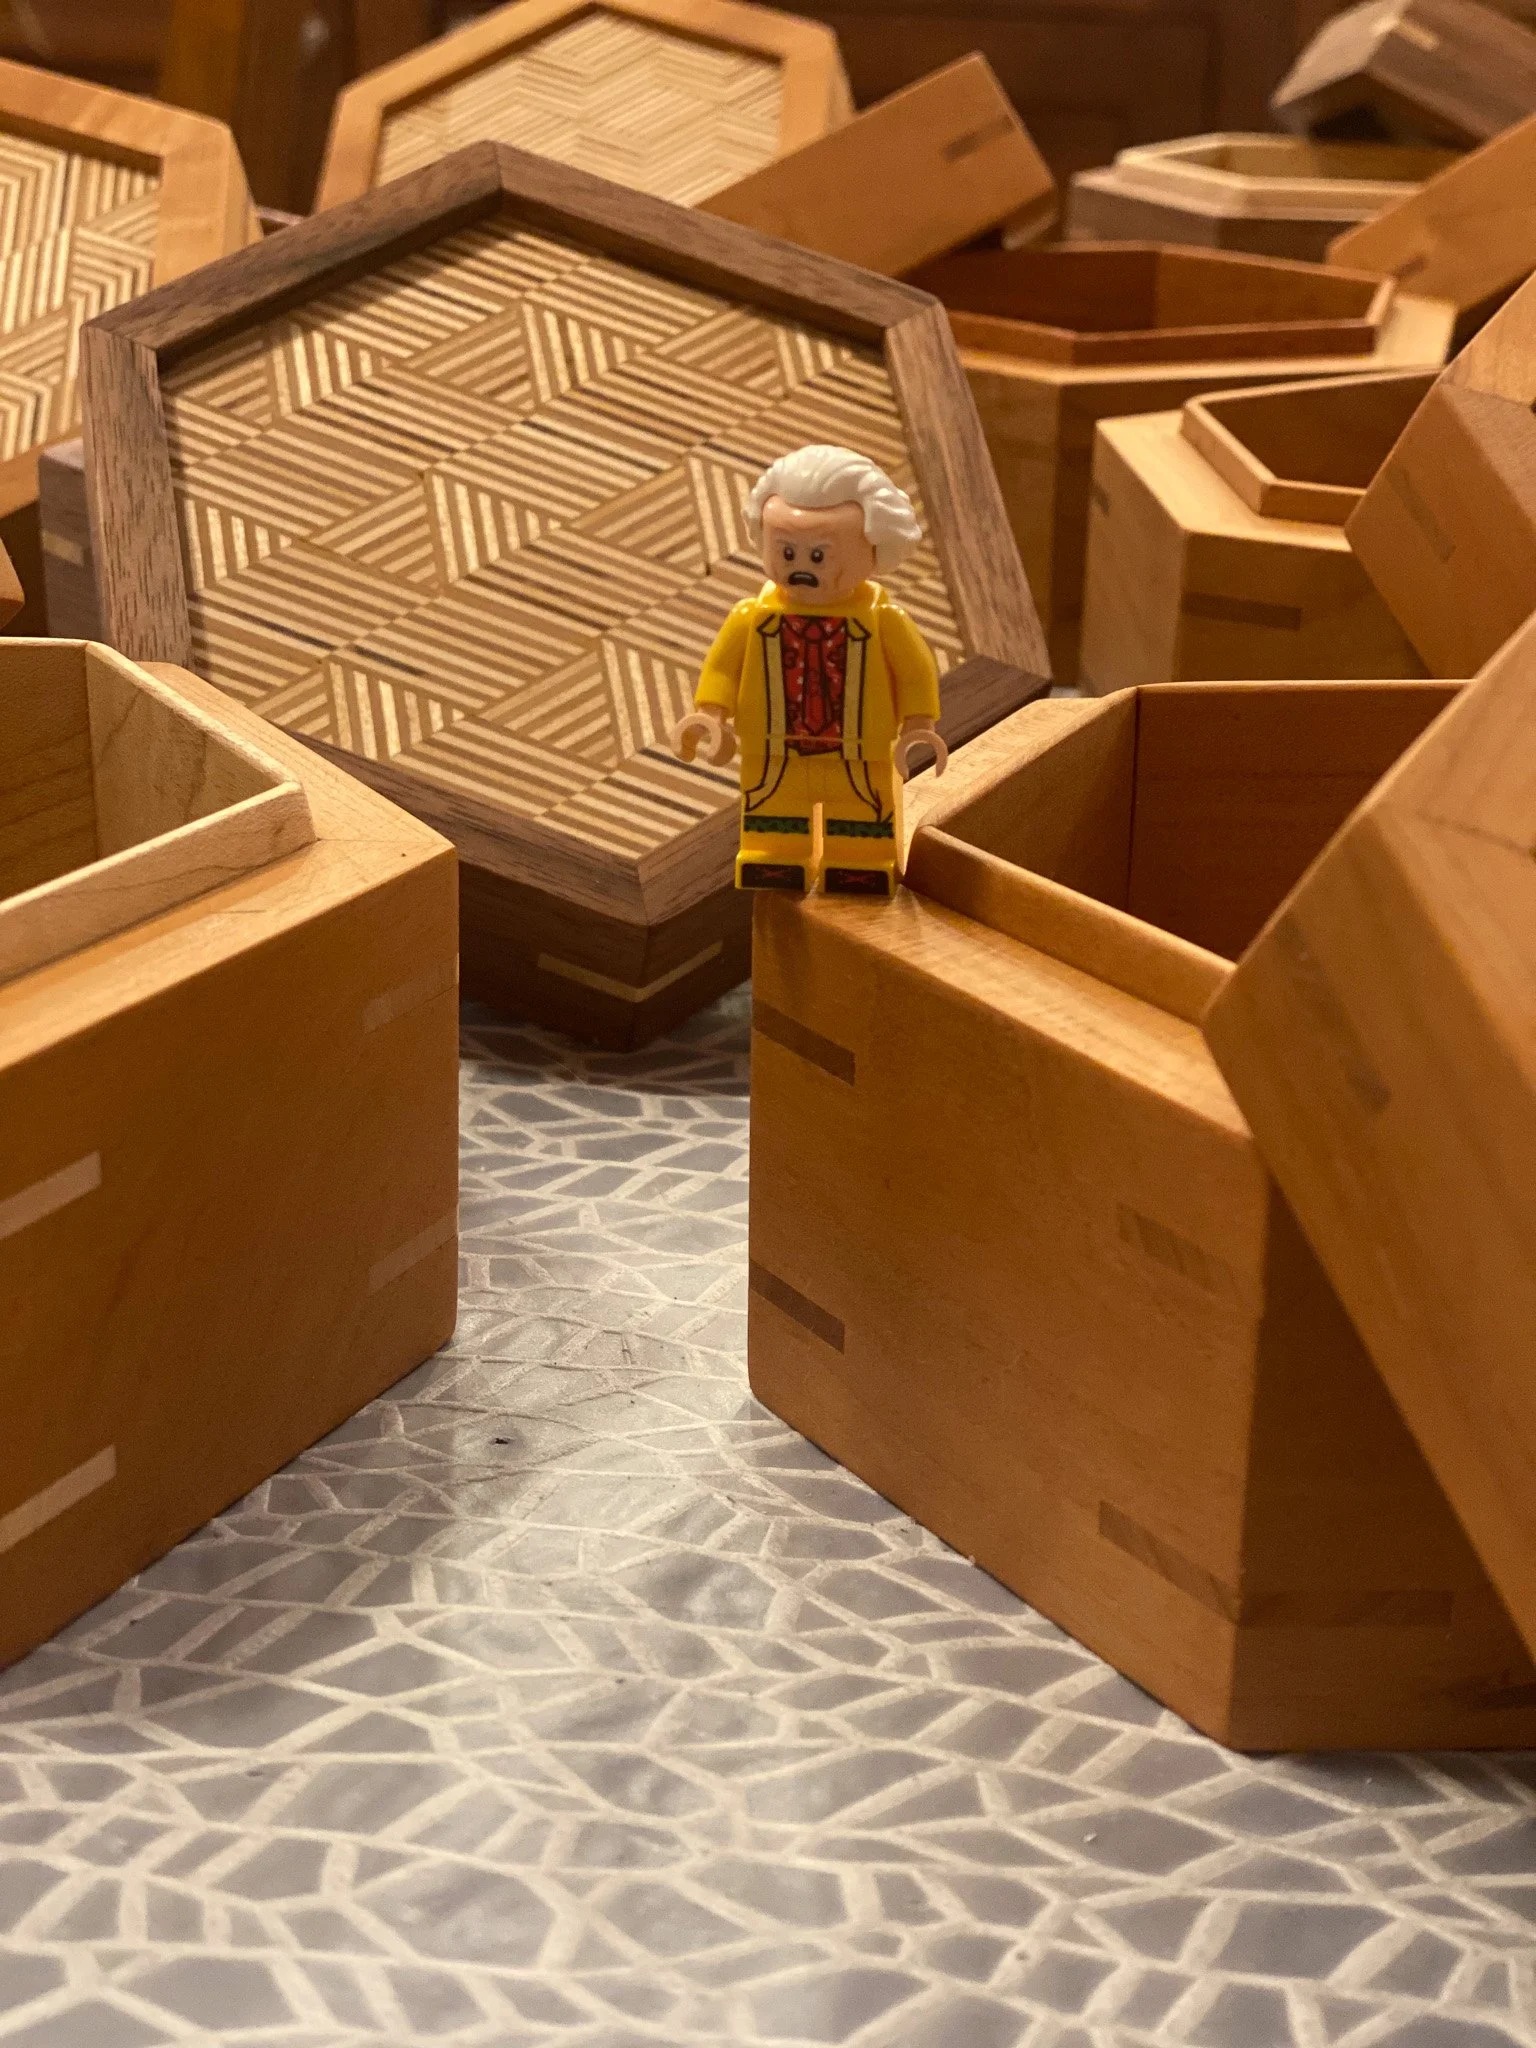
It was time to make the cut to separate the top from the bottom. This time I could rest the flat side of the box on the table saw, and so no jigs were needed. Just set the spacing for the fence, and the height for the blade and go for it. Worried that the lid would wobble in to the spinning blade once released, I instead cut a groove on each of the 6 sides that was ever so slightly shallower than the thickness of the wood - thus keeping the top attached. Then a few quick passes with a Japanese pull saw, and the lid was free. After another round of sanding, the boxes all had tops and bottoms, but nothing to seat the lid on, to register them in place. This is where the liner comes in. Essentially I made some very thin strips of wood that were a bit taller than the inside of the bottom of the box - so they would stick out a bit. Then they all got cut to make a hexagon, and were fitted in to each box to line the sides on the bottom. Since the wood sticks up a bit, the lid can seat on that edge, and stay in the right spot, rather than simply sliding off. There’s no hinges, the lid lifts all the way off. I used cherry, maple and some mahogany scraps to make all of those pieces.
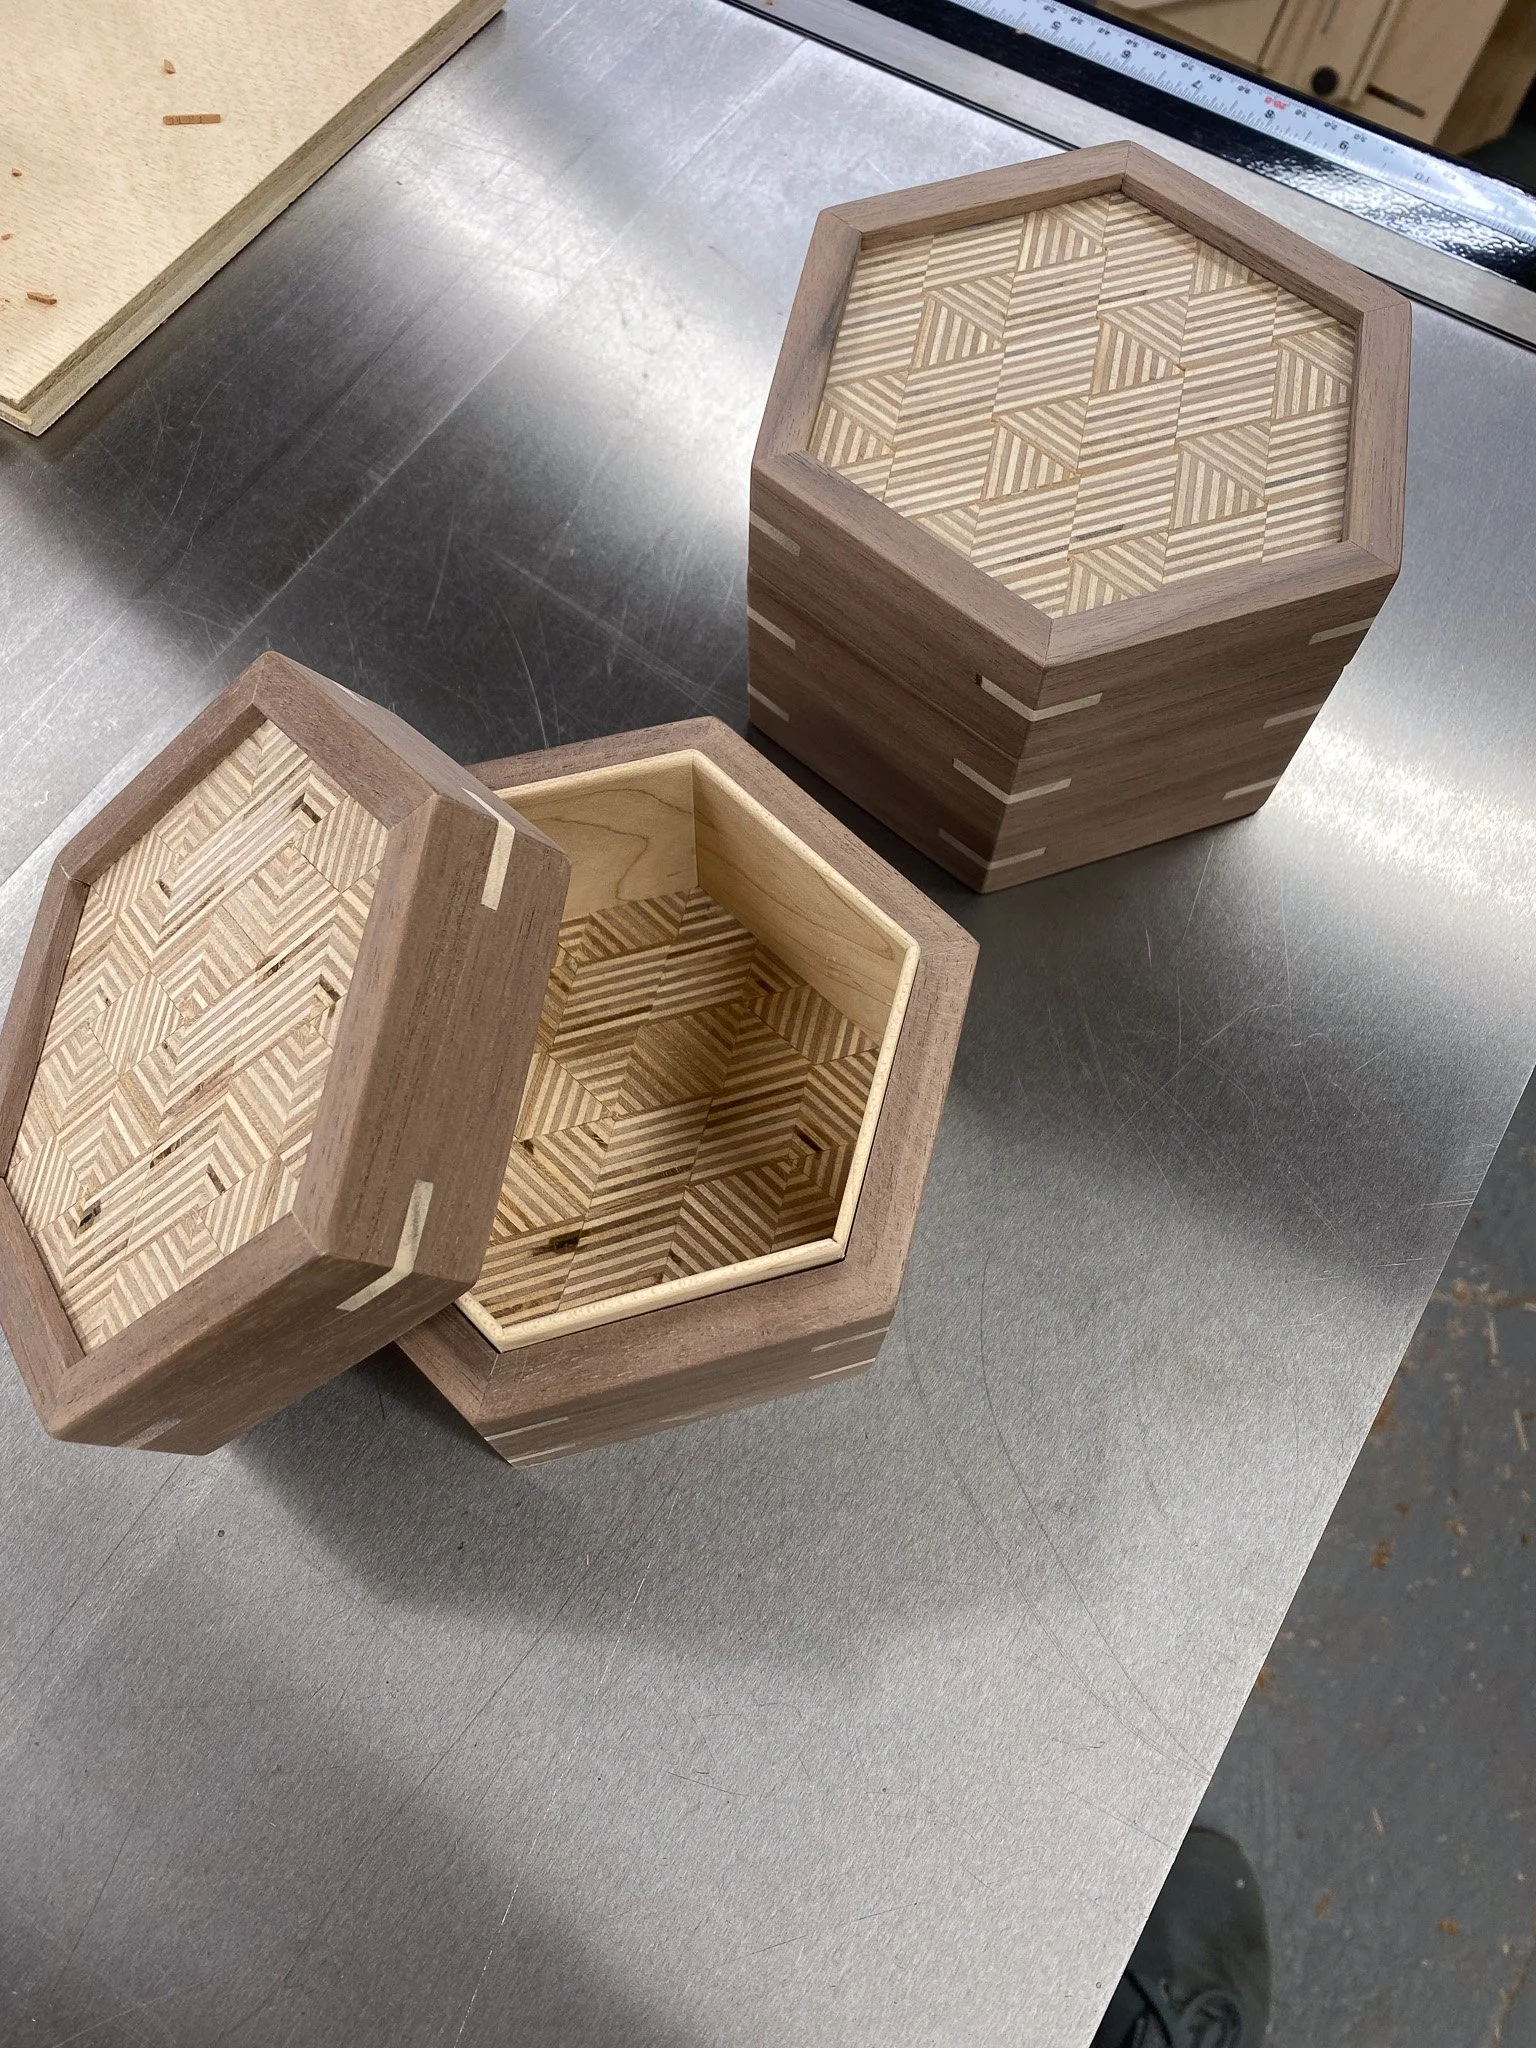
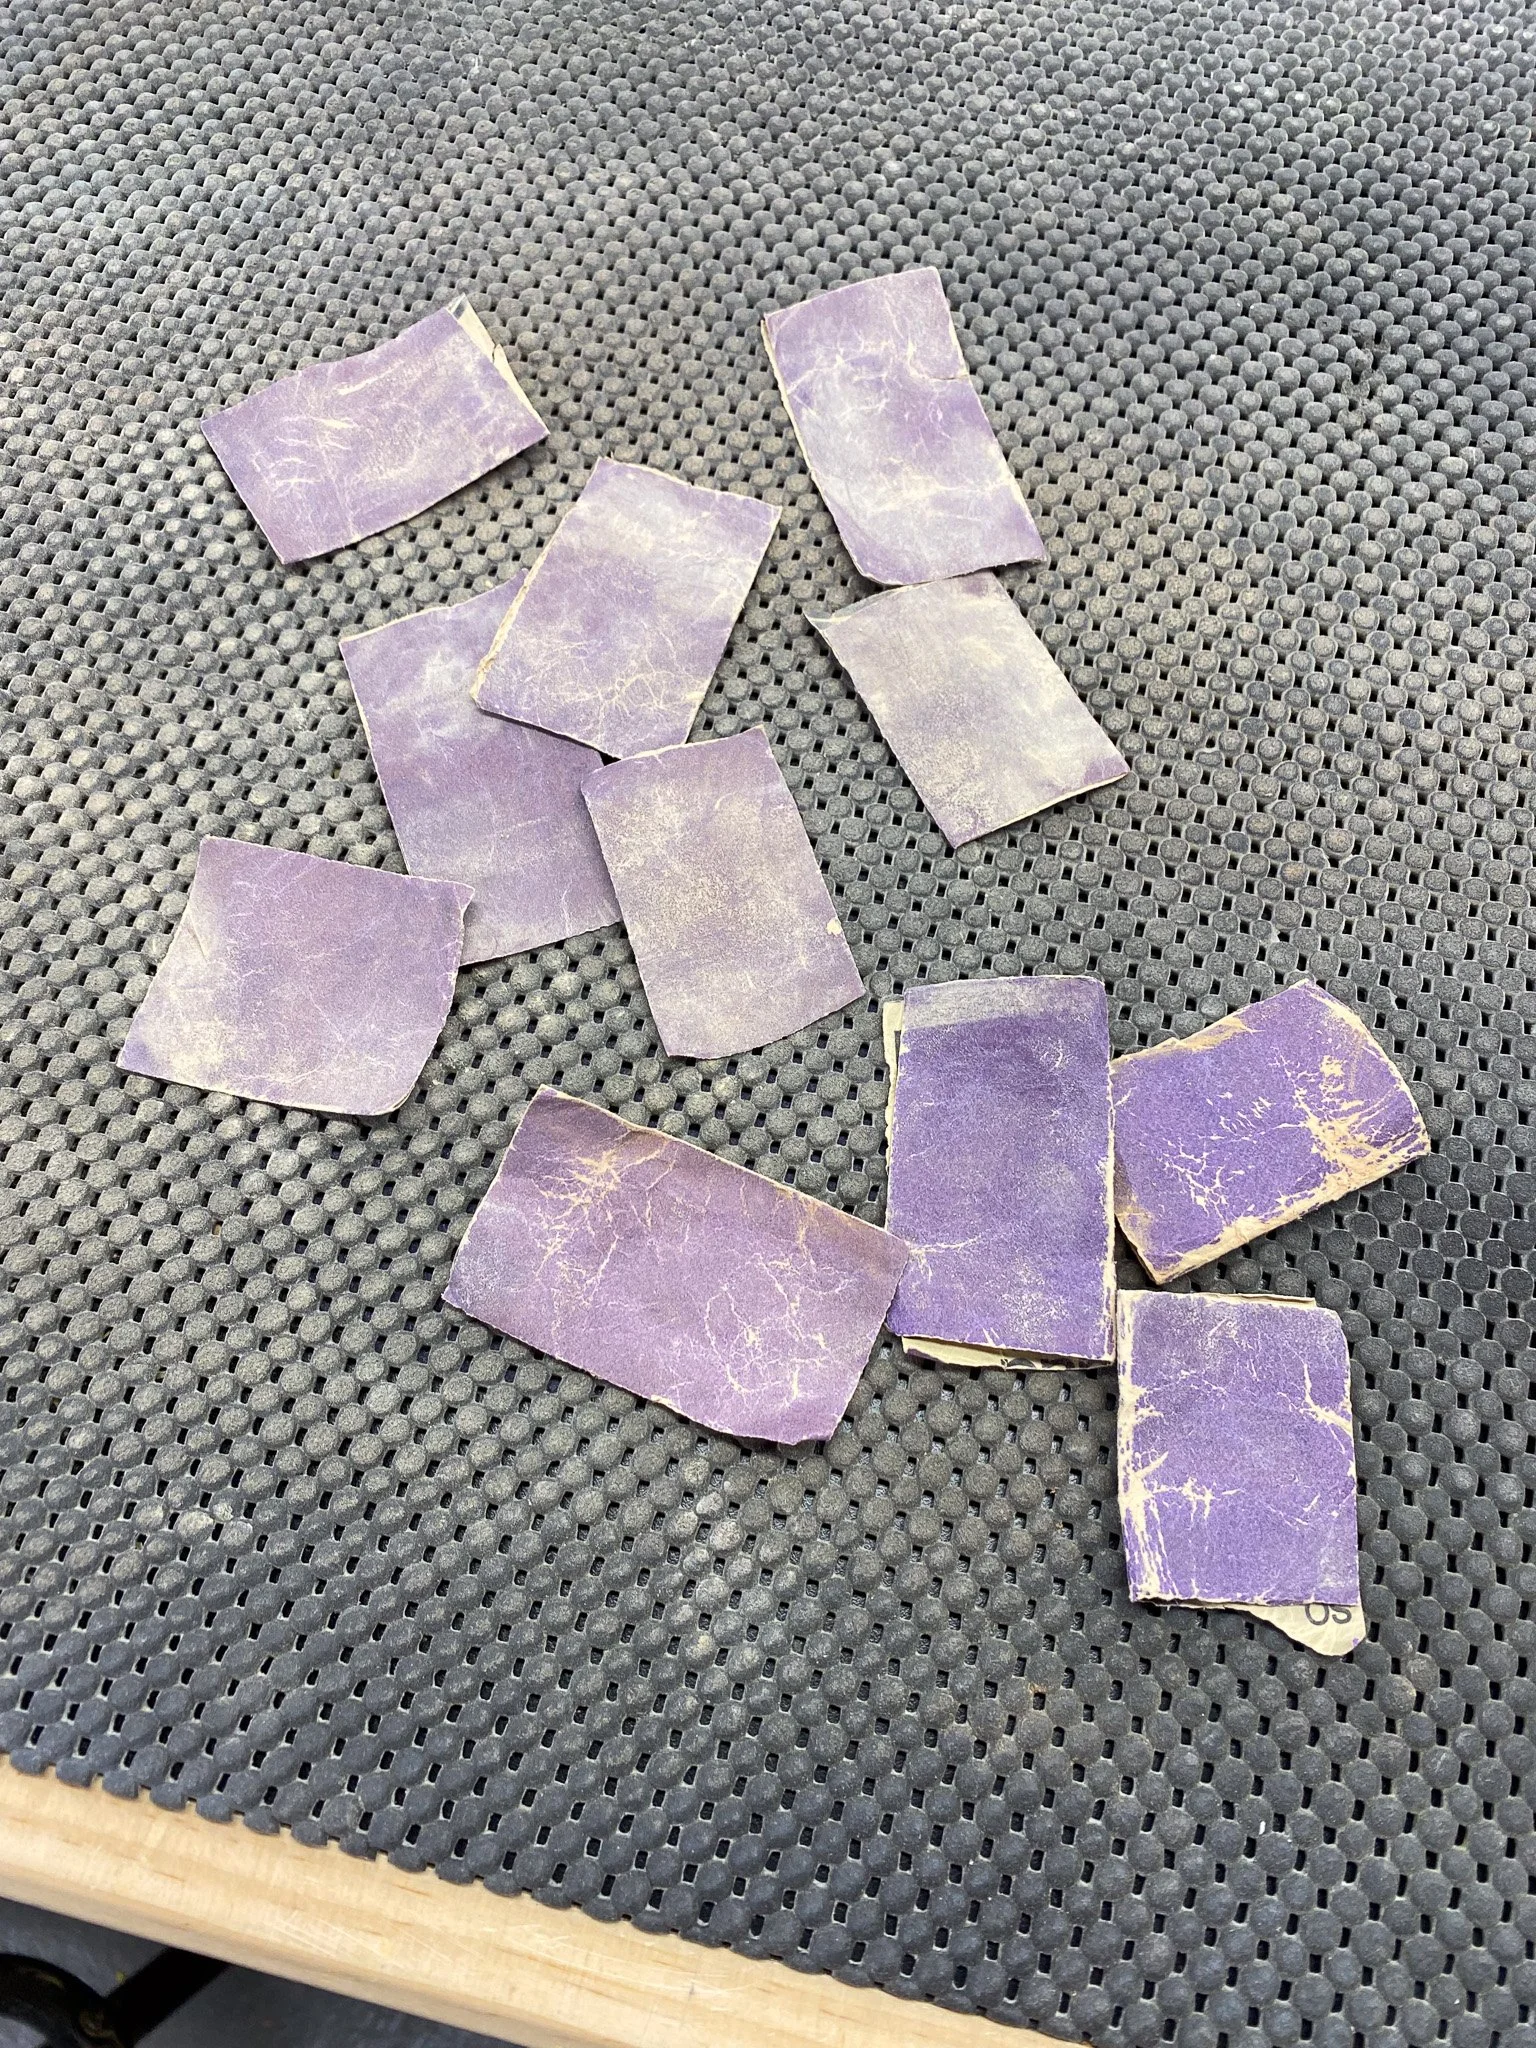
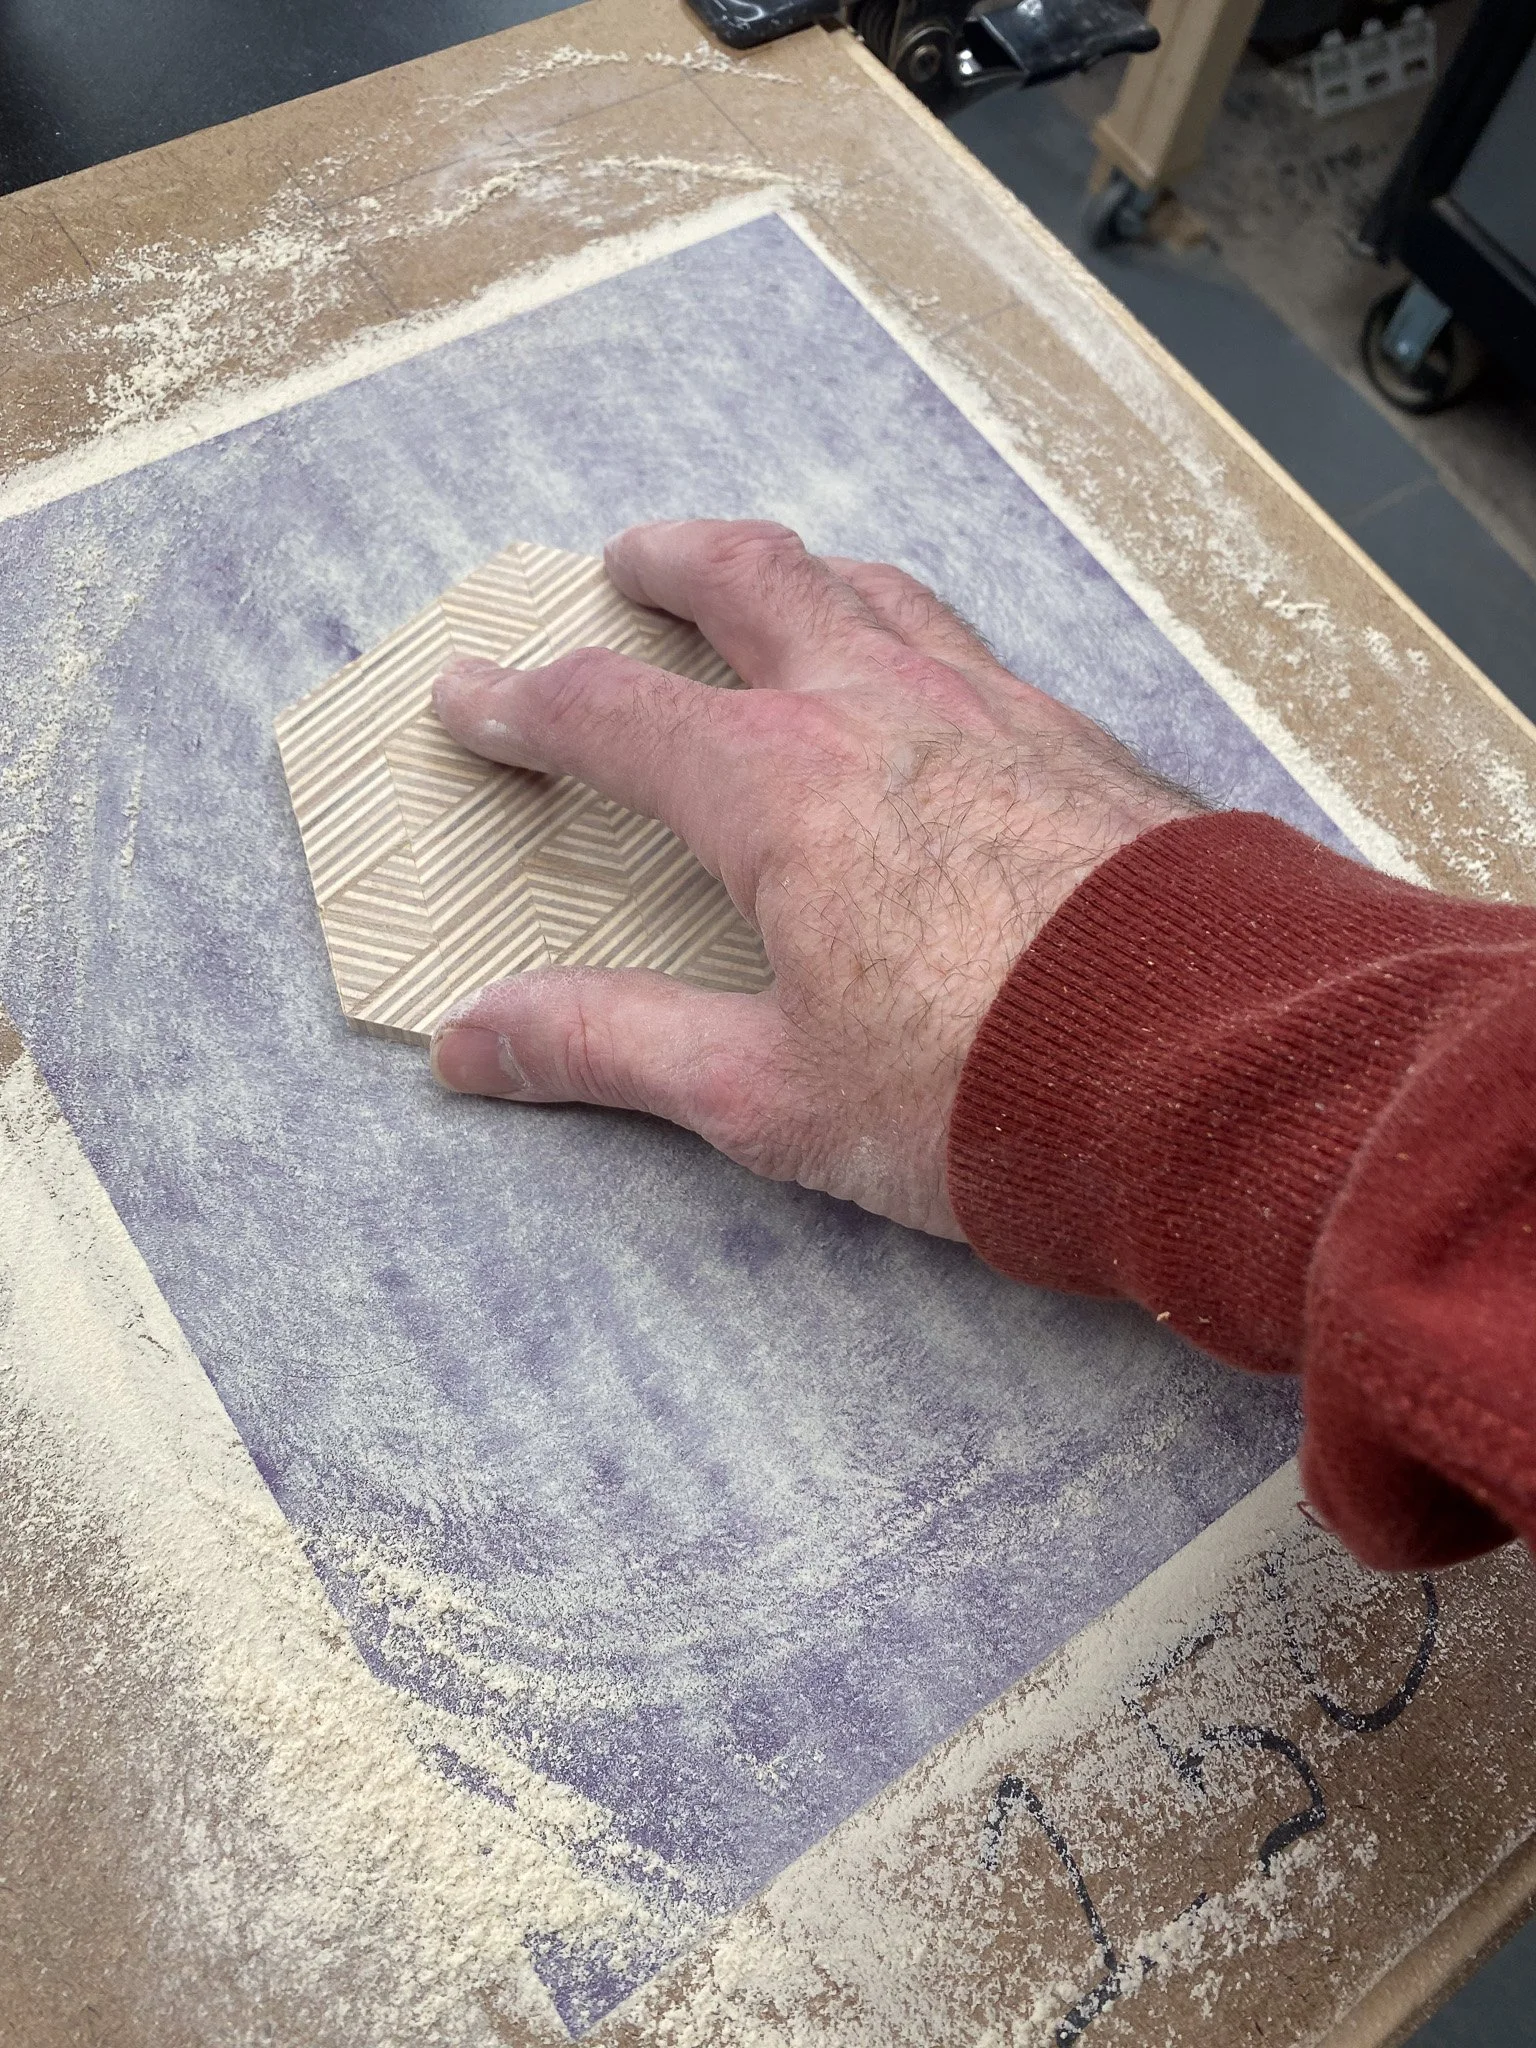
At this point, the boxes were complete and just needed a bunch more sanding to get ready for finish. Softening all the sharp edges, making everything nice and smooth and tweaking the fit of the box lids. That was quite a bit of hand sanding as I worked up through the grits. At last, the homestretch. I went with a hard wax oil finish inside and out. It is easy enough to apply - rub it all on with a scotch brite pad, and let it sit a bit, and then buff it off. Maybe easy, but very time consuming to make sure no extra finish is left, that it gets in all the nooks and crannies, and gets buffed evenly. I did three boxes at a time and eventually completed them all. Last up was taking some pictures and then I could call this project a wrap. For sure I will be revisiting patterned plywood to try more patterns, and to make more projects with it.

Thanks for reading along.